This orchid is almost completely dead. The yellow leaves are rotting and beyond saving. The roots are black and mostly damaged.
Only a single leaf remains alive. Instead of throwing it away, I separated the leaf and the base to save both. With a simple method using things you already have at home.
After 3 months, both revived, grew roots, and became new plants. I will revive a severely waterlogged orchid. Just one wrong step and the plant will die.
1. Orchid Root Rot Rescue overview
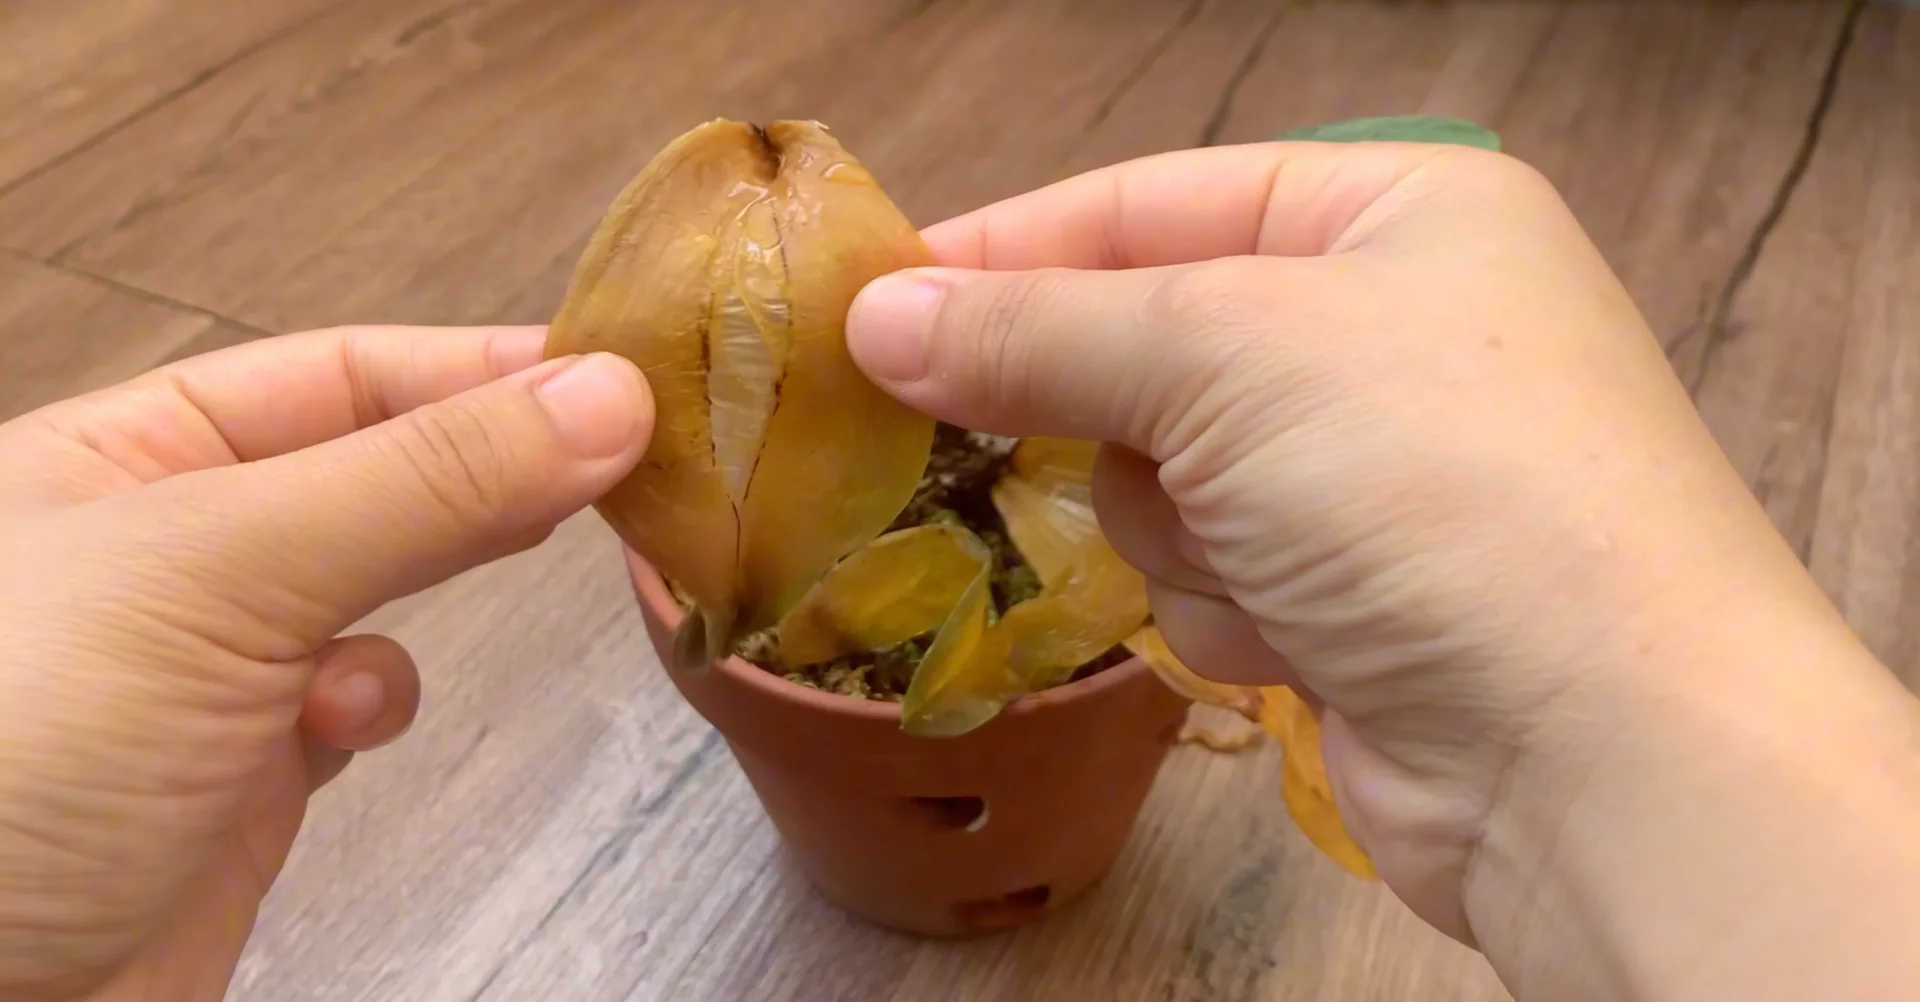
All the leaves had turned yellow and rotted, leaving only a single green leaf. I started by focusing on the base and the surviving leaf. Each part needed a different path to recovery.
2. Orchid Root Rot Rescue clean out
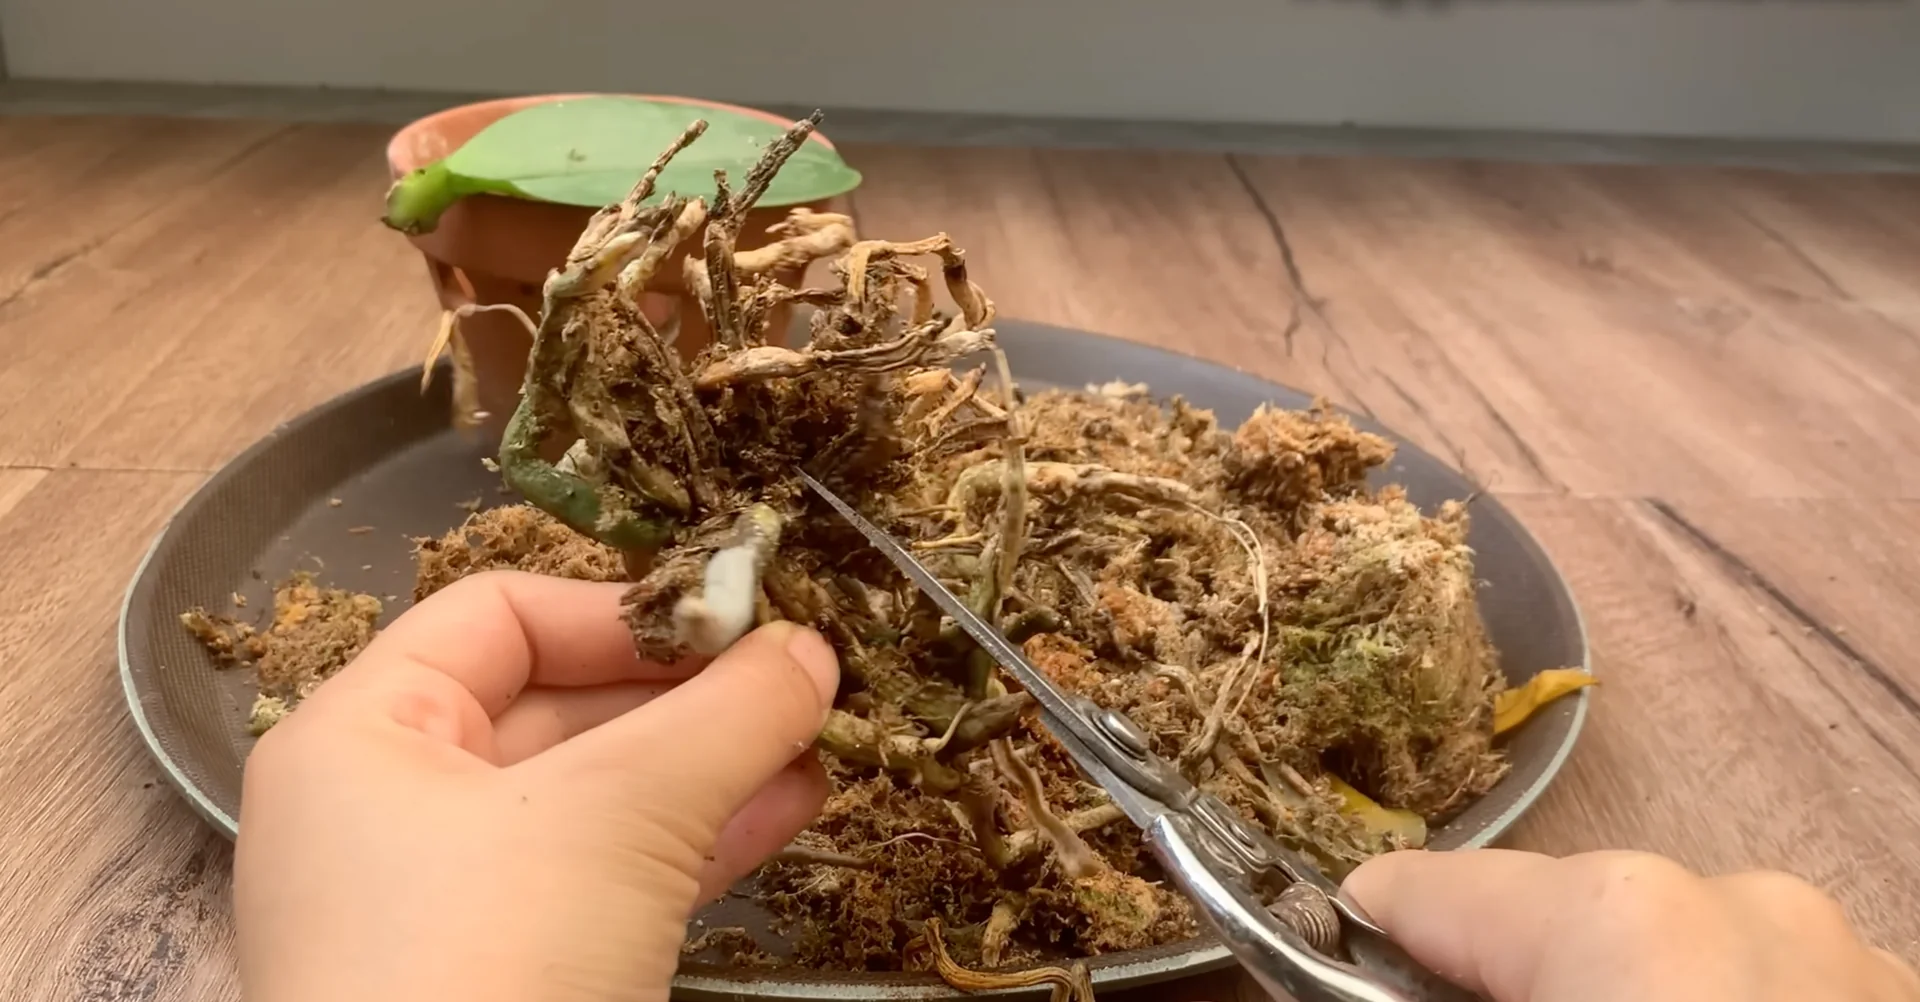
First, I removed all the old growing medium. This step is very important because the old medium retains water for too long and can harbor fungi. Clean roots need fresh air and fast drainage.
Next, I removed all the rotten, soft, and damaged roots, keeping only the healthy ones. After trimming, I washed the entire plant under water to remove any remaining bacteria and fungi. Remove every mushy root and rinse thoroughly.
For more on building strong roots that fuel blooms, see these tips for strong orchid roots. Strong roots are the foundation for recovery. Healthy roots support future spikes and flowers.
3. Orchid Root Rot Rescue disinfect
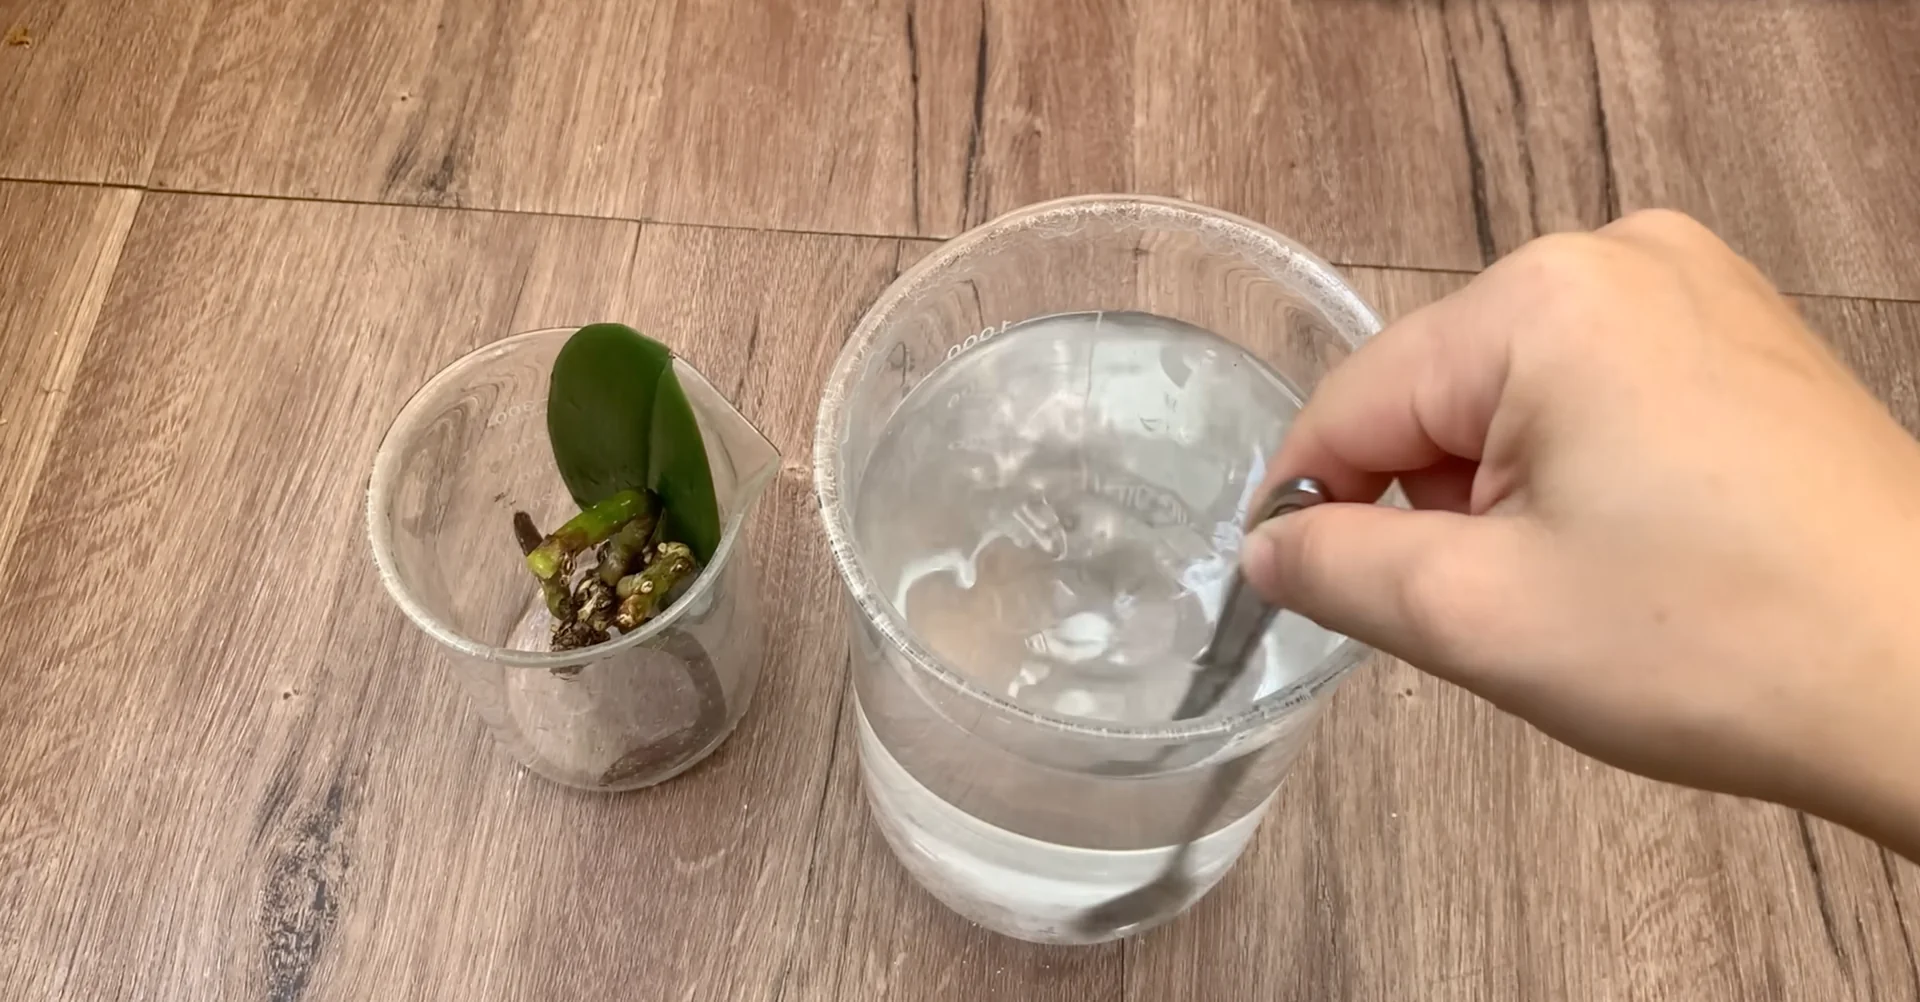
I prepared a disinfecting solution by mixing one spoon of baking soda with one liter of water. Then I soaked the entire base and the leaf in the solution. This helps clean the plant and prevents fungi from returning.
After soaking, I thoroughly dried the orchid and the leaf. Dry every cut surface completely. Moist cuts invite rot.
I sprinkled cinnamon powder on all the cut areas to disinfect, help them dry faster, and prevent fungal infection. Then I let the plant rest until the cut areas were completely dry. Patience here saves the plant.
4. Orchid Root Rot Rescue nutrient mix
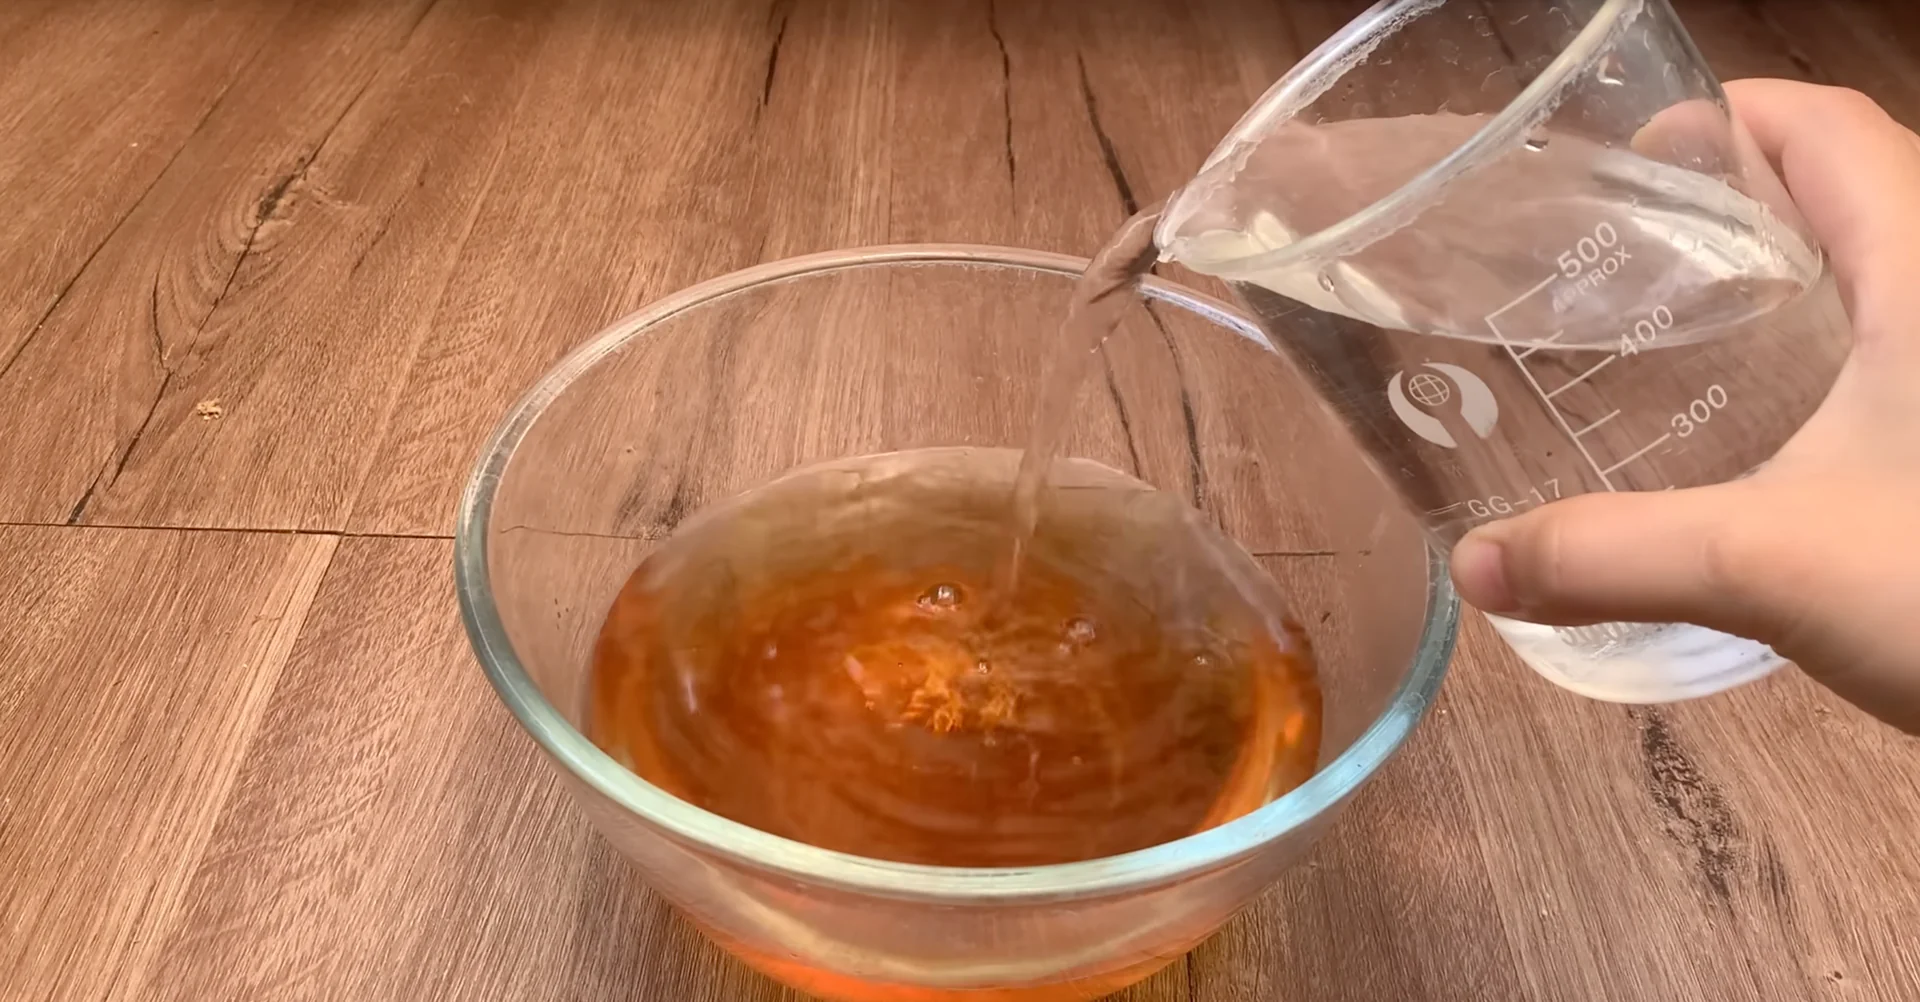
I prepared a natural nutrient solution using pure coffee powder. Take one spoon of coffee powder, mix it with half a liter of boiling water, stir well, and let it sit until it cools. After cooling, I filtered the coffee solution to remove any residue.
Filtering avoids cloudiness and reduces the risk of fungal growth. I added half a liter of clean water and three vitamin B1 tablets. Stir well to create a nutrient solution that stimulates root growth.
5. Orchid Root Rot Rescue replant base
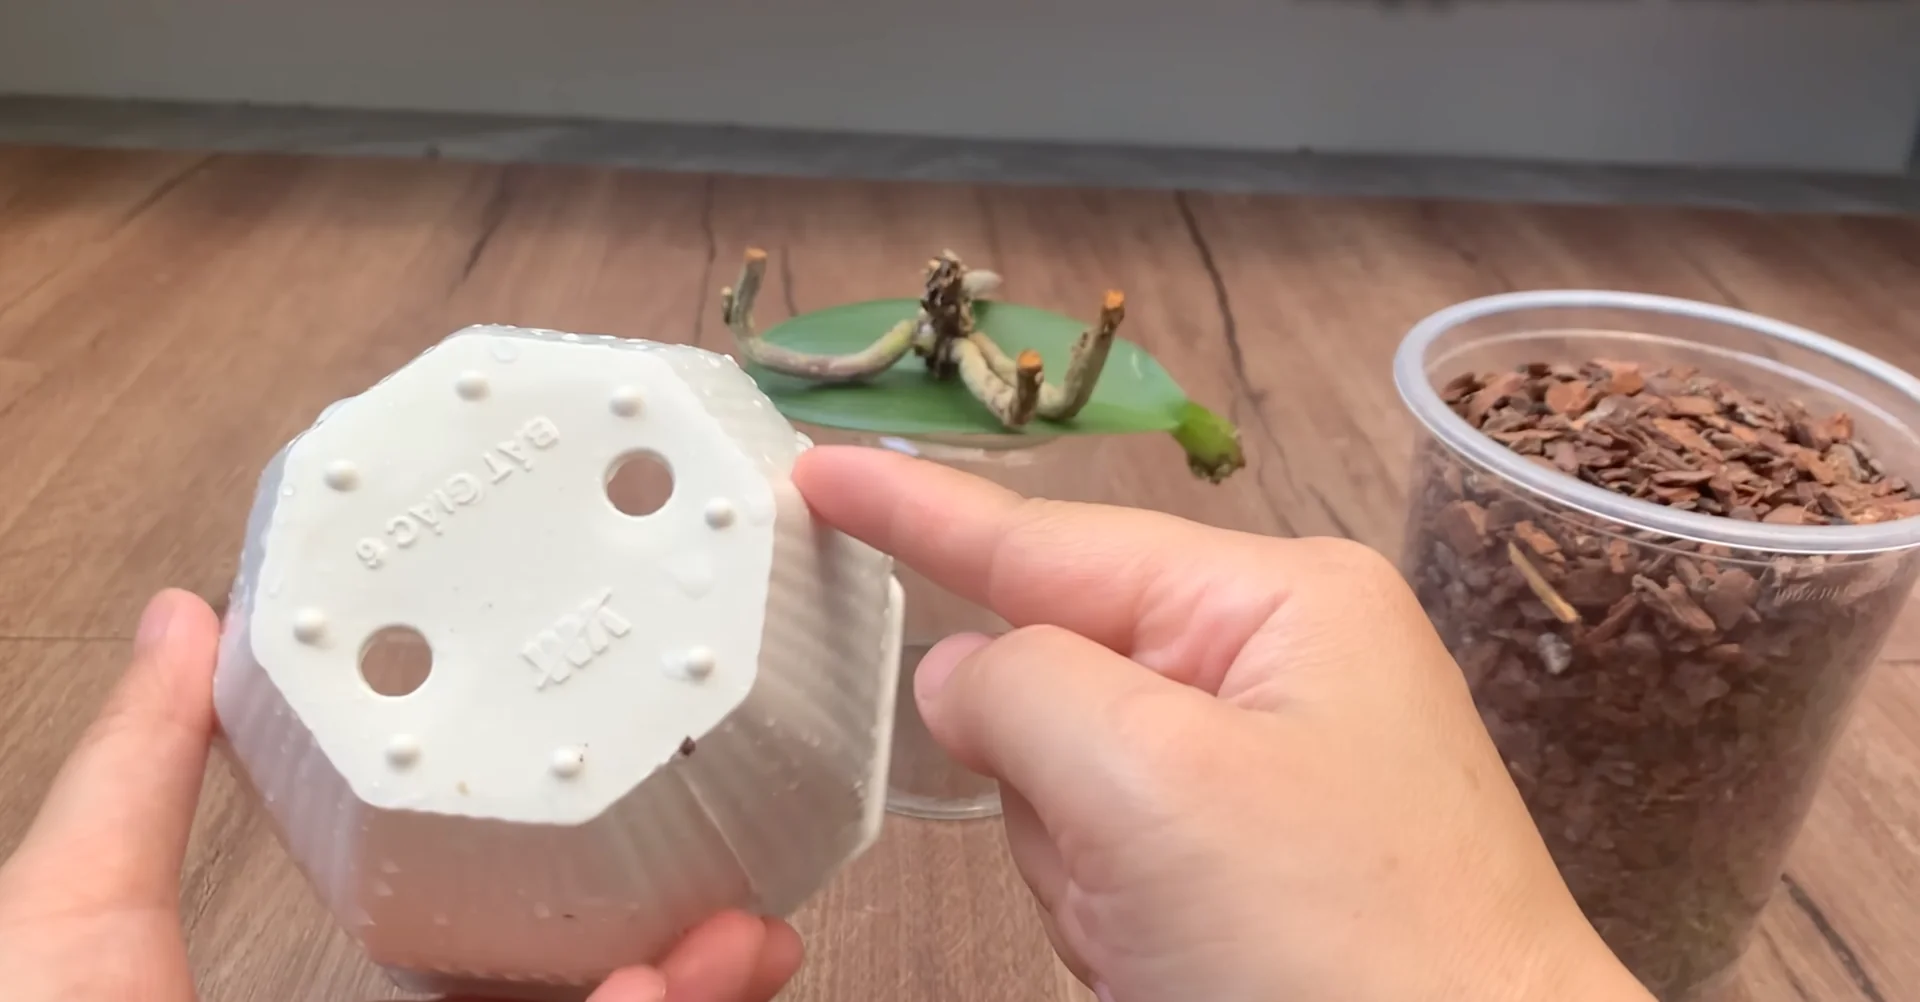
After the cut areas were dry, I replanted the base using clean bark to ensure good air flow and prevent water logging. I added a thin layer of moss to retain moisture better after watering. I used the nutrient solution to lightly water the growing medium at the base of the plant.
Do not overwater. Keep it slightly moist, not wet. Light watering encourages new roots to seek moisture.
Once recovery begins, you can encourage consistent flowering with these year round bloom tips. Healthy growth today sets up reliable blooms later. Balance moisture with strong light and airflow.
6. Orchid Root Rot Rescue leaf method
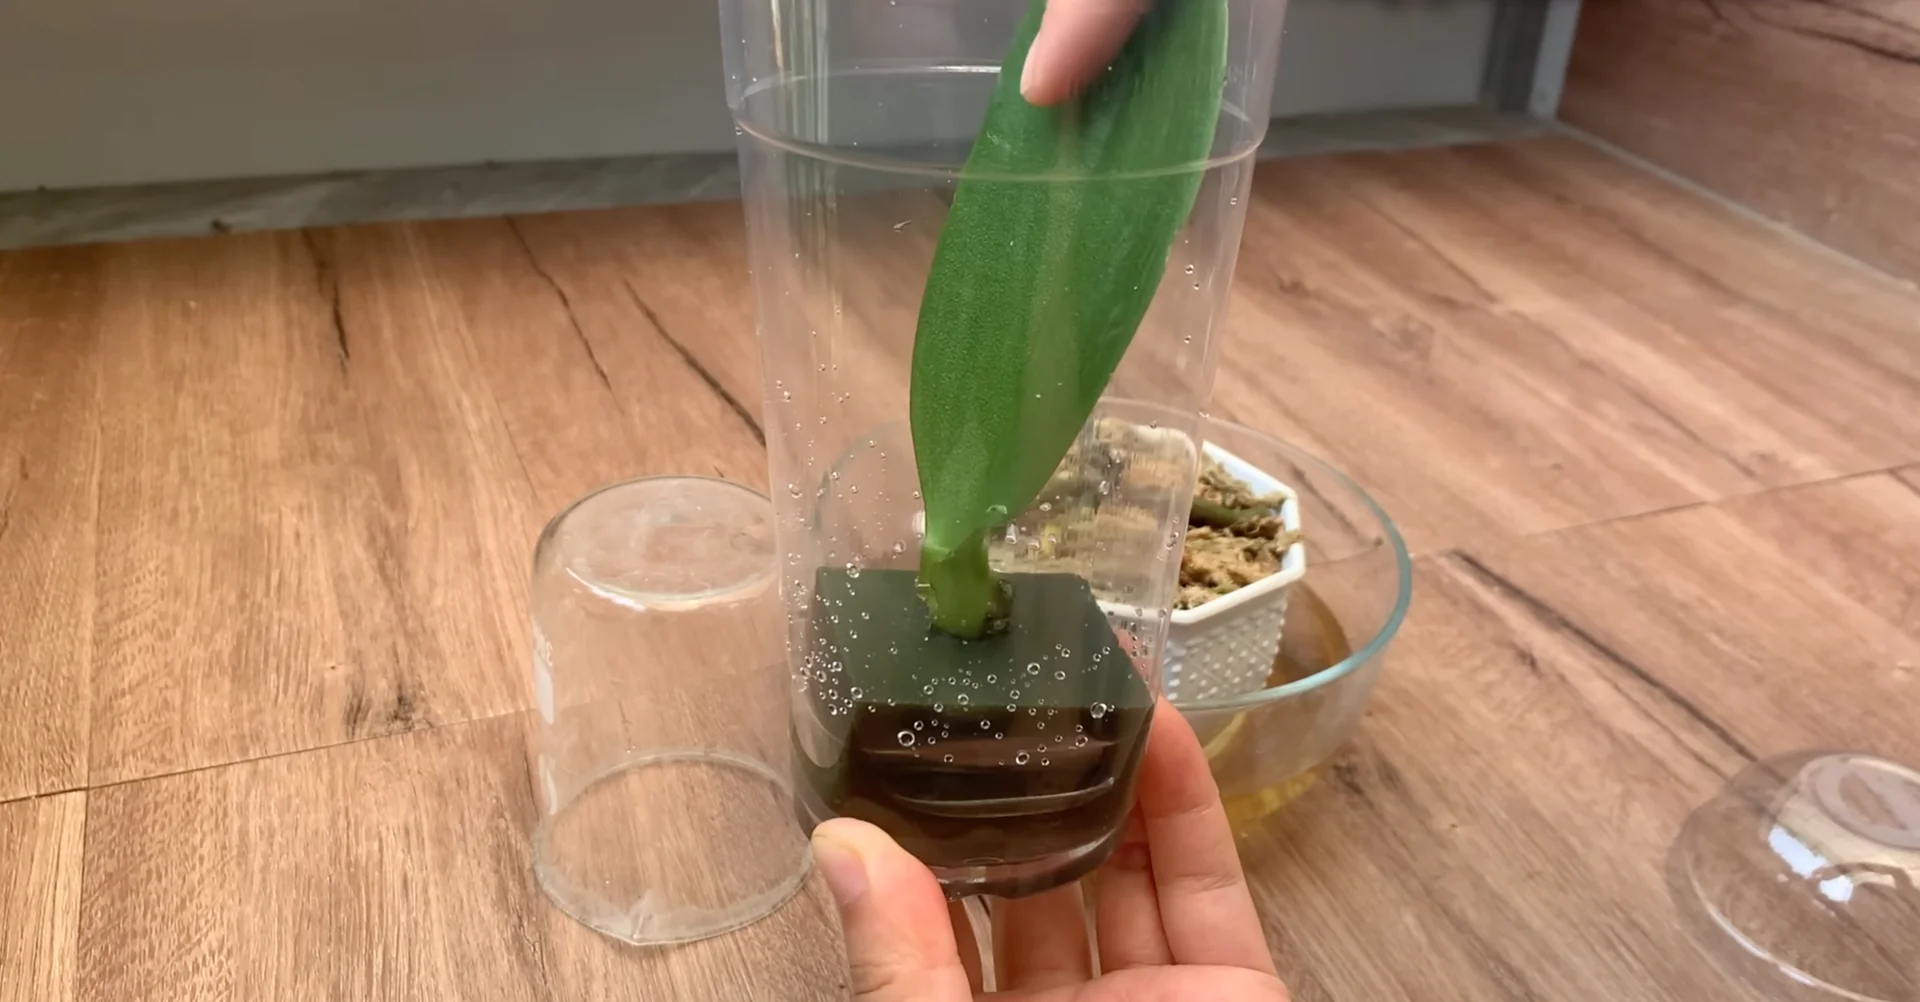
For the leaf, I gently wiped both sides with the nutrient solution to help it absorb nutrients directly. Then I planted it in a transparent cup for easier observation. Place a sponge in the cup and lightly moisten it.
Finally, place the leaf on top and cover it with a lid with air holes. Keep it in bright indirect light. Avoid direct sunlight to prevent water loss and leaf damage.
Read More: Rose Branches Root Bloom Year Round
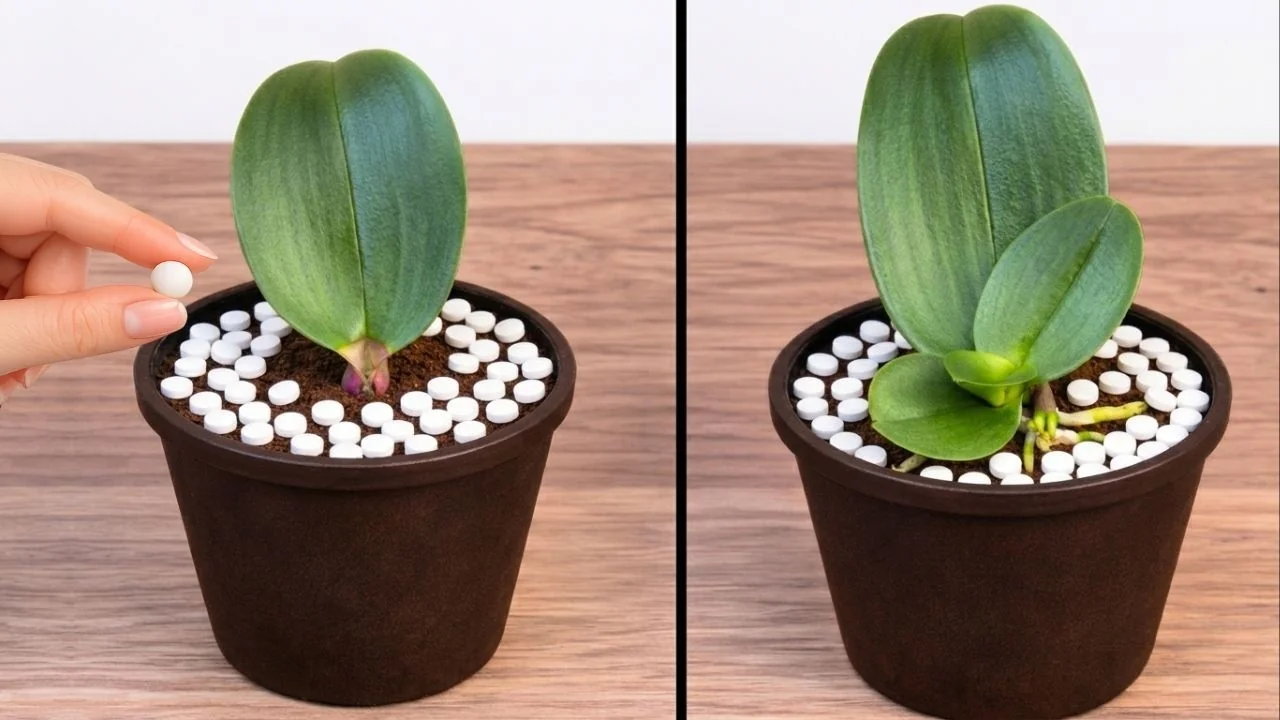
Results
Here is the result after 3 months. The base has grown many healthy new green roots and a strong new baby orchid has appeared. The leaf part is truly surprising.
A new orchid has grown strongly with long healthy roots. This shows that even an almost dead orchid can recover strongly if treated properly. Careful cleaning, disinfection, gentle moisture, and patience made the difference.
Final Thoughts
Save the base and the last healthy leaf, and treat each one with care. Clean out rot, disinfect, dry fully, and water lightly. Keep the plant in indirect light and watch for steady root growth.
Once roots are active, recovery speeds up and blooms will follow. For root health that supports future flowers, revisit these root care essentials. Build strength now and enjoy reliable blooms with these bloom boosters.