Orchid petals are cared for with love and gentleness so that every day is filled with vitality and joy. If you have an orchid pot with wilted leaves like this, don’t be quick to throw it away. I will share a simple but effective way to help the plant recover and continue to thrive.
If you see your orchid pot with wilted leaves like this, don’t be quick to throw it away, because behind that fragile appearance the plant still has a chance to revive and bloom beautifully. First, remove all the wilted leaves, old leaves, and damaged leaves so the plant can focus its energy on nourishing the healthy parts. The next step is to completely cut off the dried or rotten roots, keeping only the firm and healthy ones to give the plant a solid foundation for recovery.
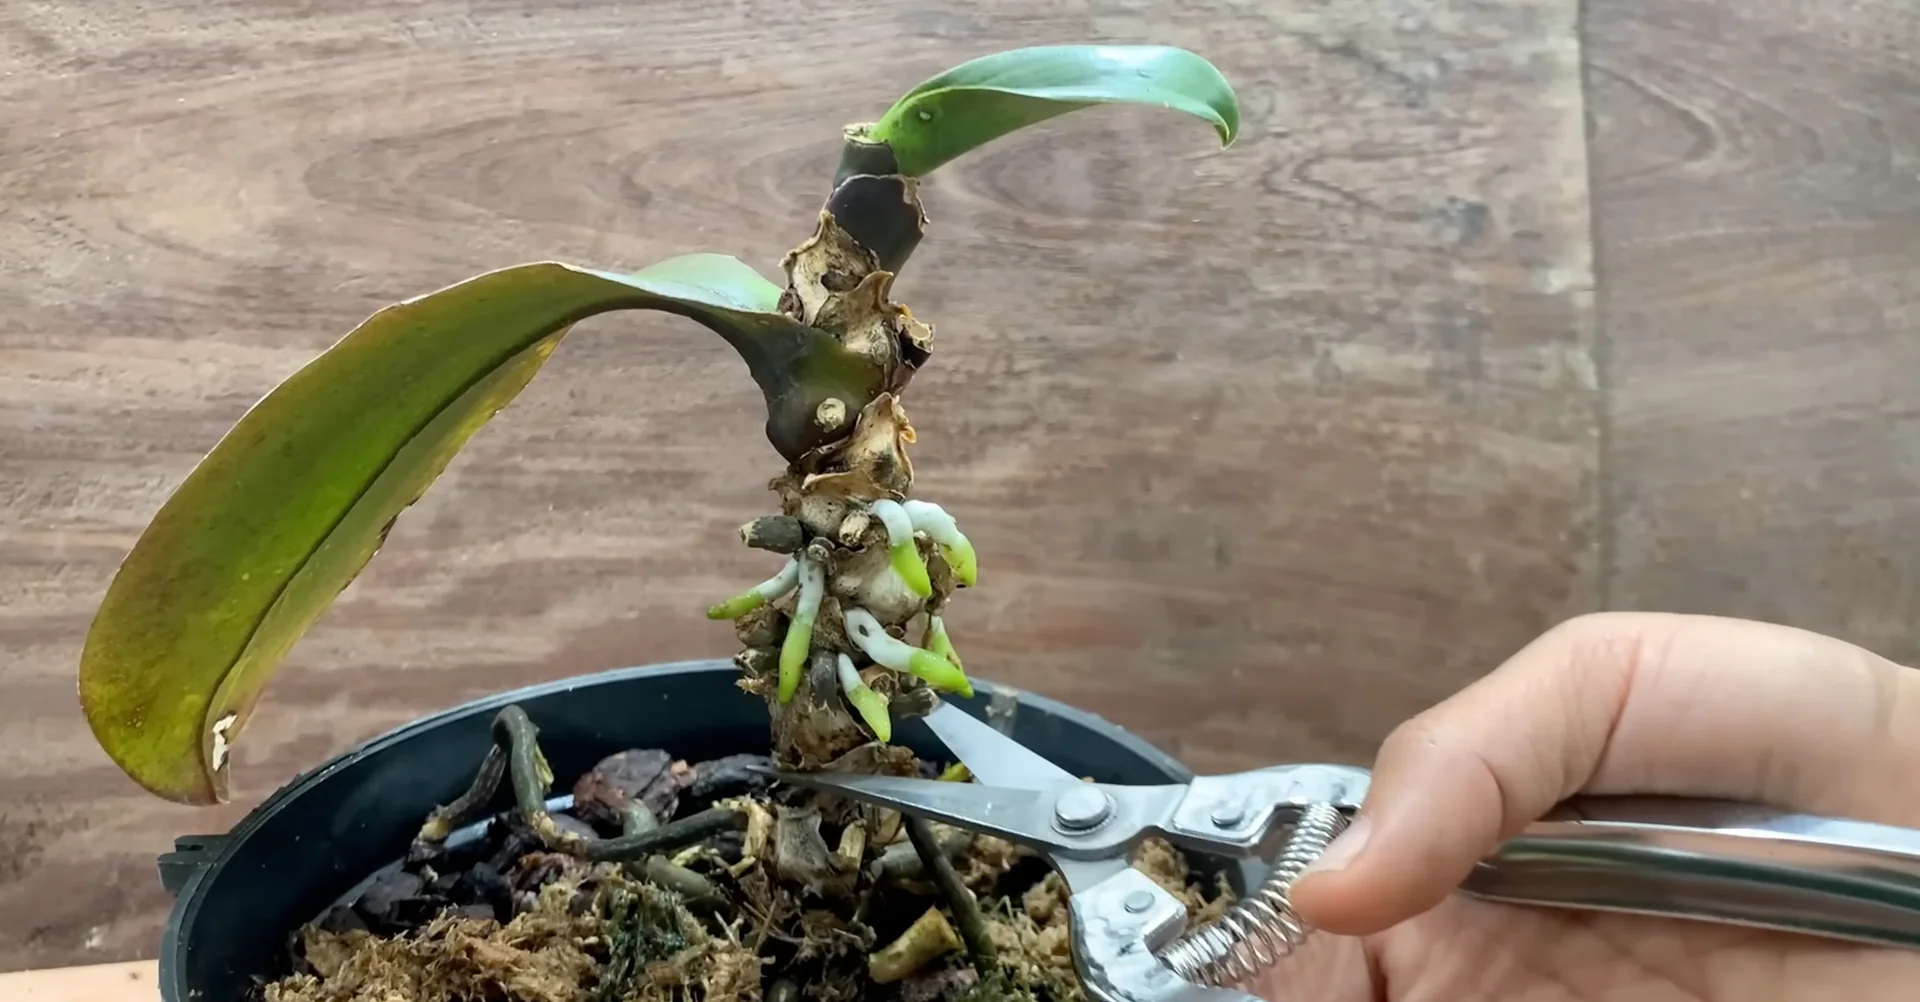
Next, cut off the old flower spike. By removing the old spike, the plant will no longer waste energy on the useless part but instead focus on nourishing itself to recover faster. After careful inspection, I noticed that the top of the plant still has the potential to grow new leaves, which is a sign that the plant is still alive and can recover.
Place the orchid pot in a well ventilated spot for one day and temporarily avoid watering so the cuts have time to dry and the plant can stabilize again.
1. Garlic Treatment for Orchids
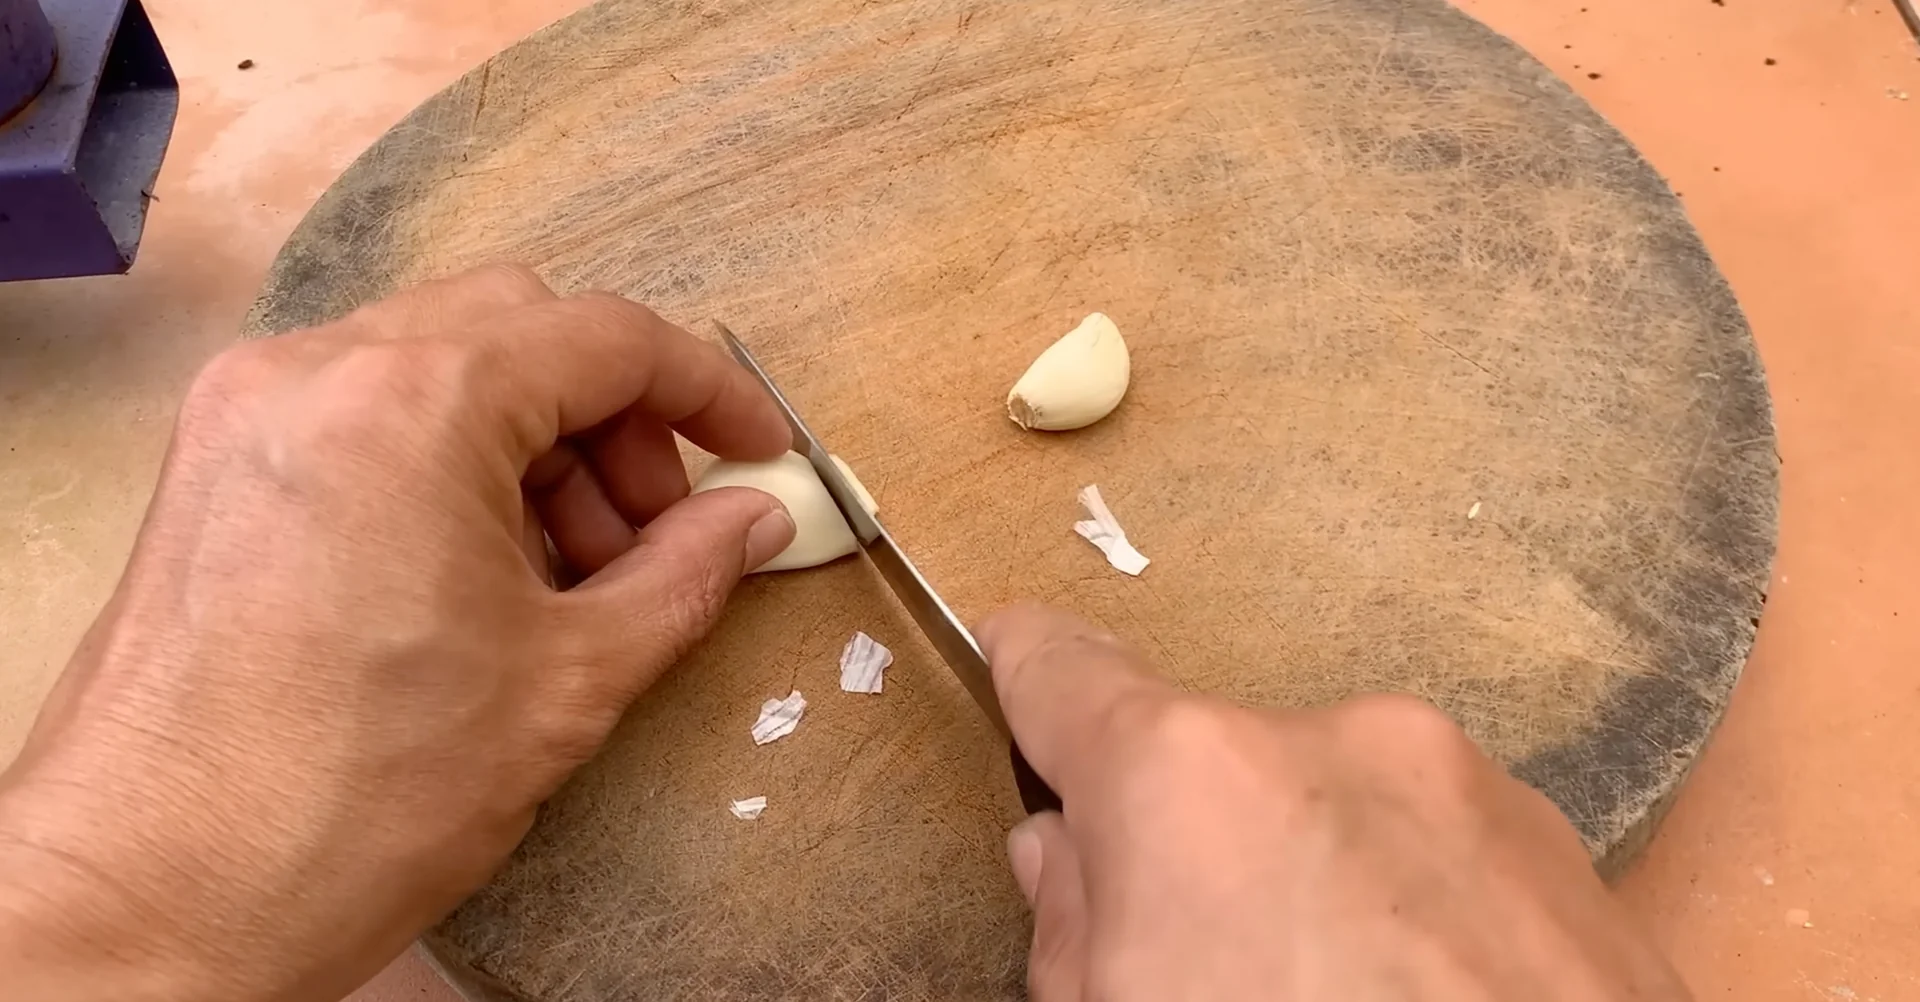
After that, take 2 cloves of garlic. Garlic has antibacterial and disinfecting properties and is especially useful in supporting the recovery of weak orchids. Because garlic contains many natural compounds that help prevent bacteria and fungal diseases, it becomes a great ally to protect and restore the orchid.
Slice the garlic into very thin pieces so that the nutrients can easily dissolve and work more effectively. Next, take about 20 grams of aloe vera leaves and cut them into thin slices. Aloe vera will help provide moisture and nutrients, supporting the orchid to recover and grow quickly.
Then put all the ingredients into a very clean jar. Add 1 liter of room temperature water to the jar, allowing the ingredients to blend and form a nourishing solution for the orchid. Tightly close the jar and let it sit for 1 day, allowing the nutrients from the garlic and aloe vera to fully blend.
After 1 day, stir the solution well and then strain out the solids, keeping only the clear liquid to use for caring for the orchid.
2. Apply the Garlic Treatment for Orchids
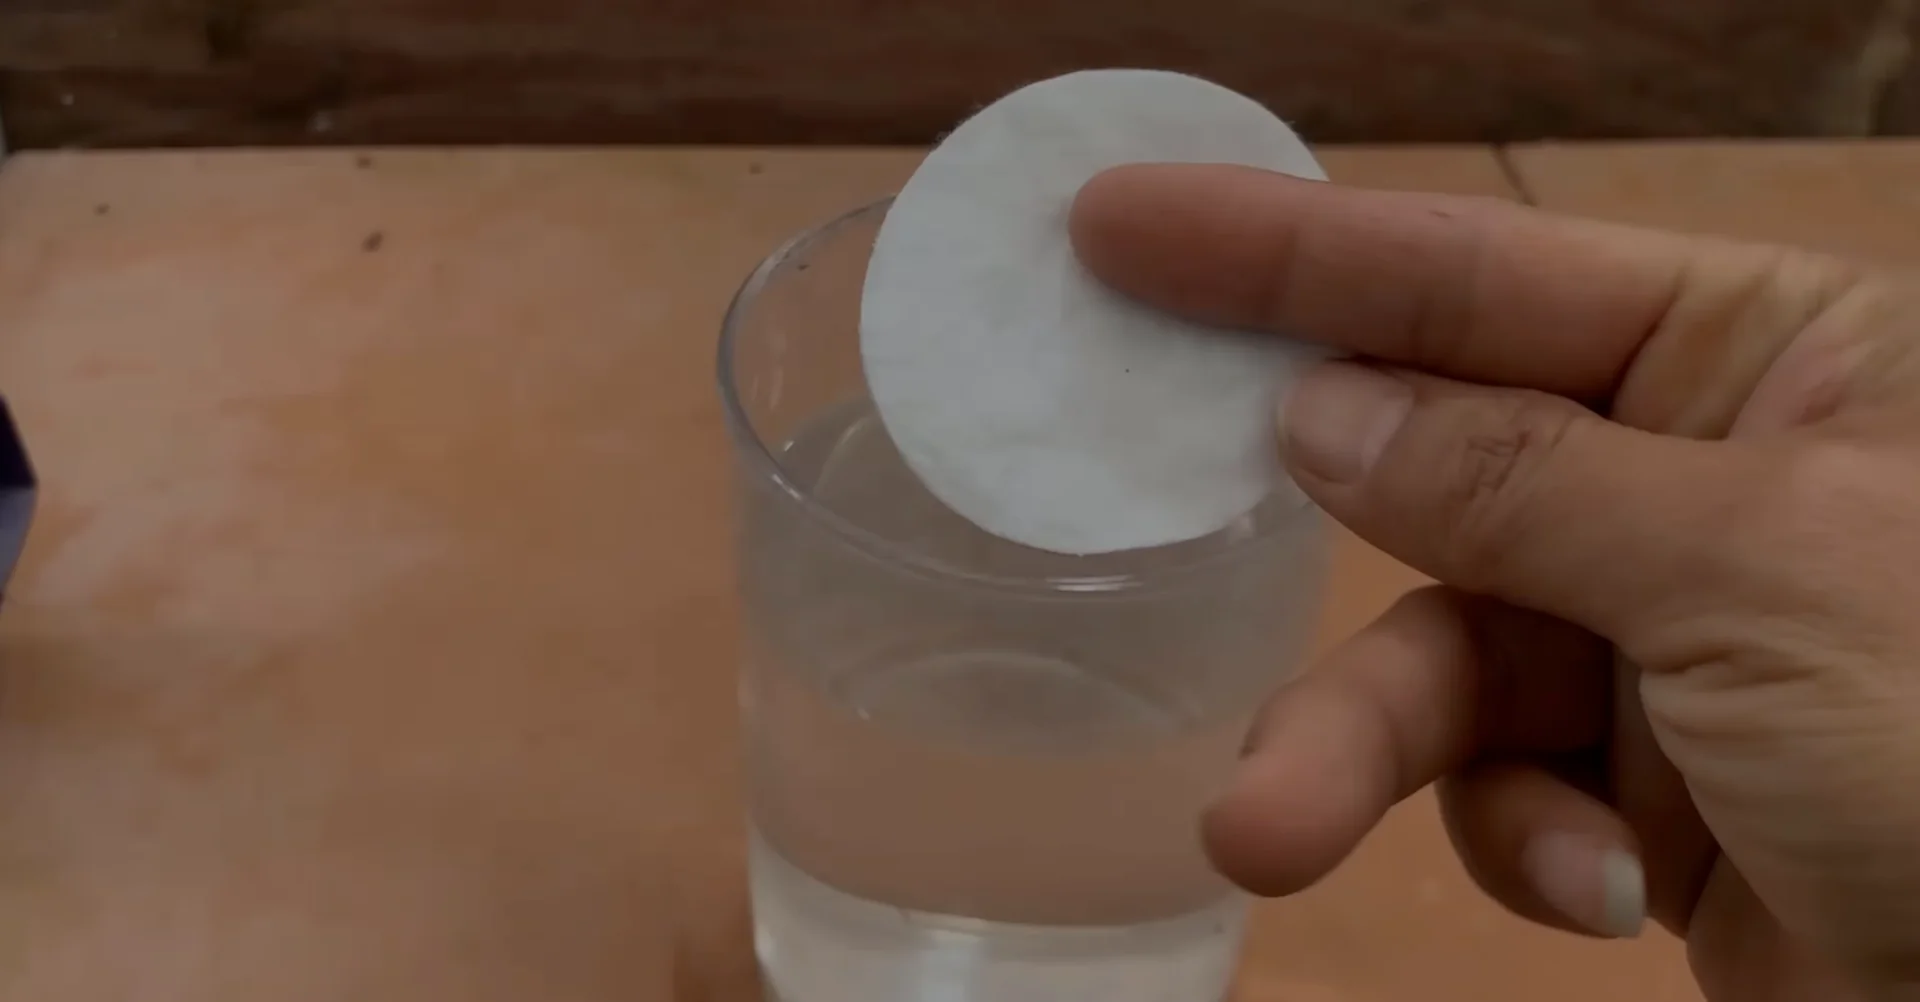
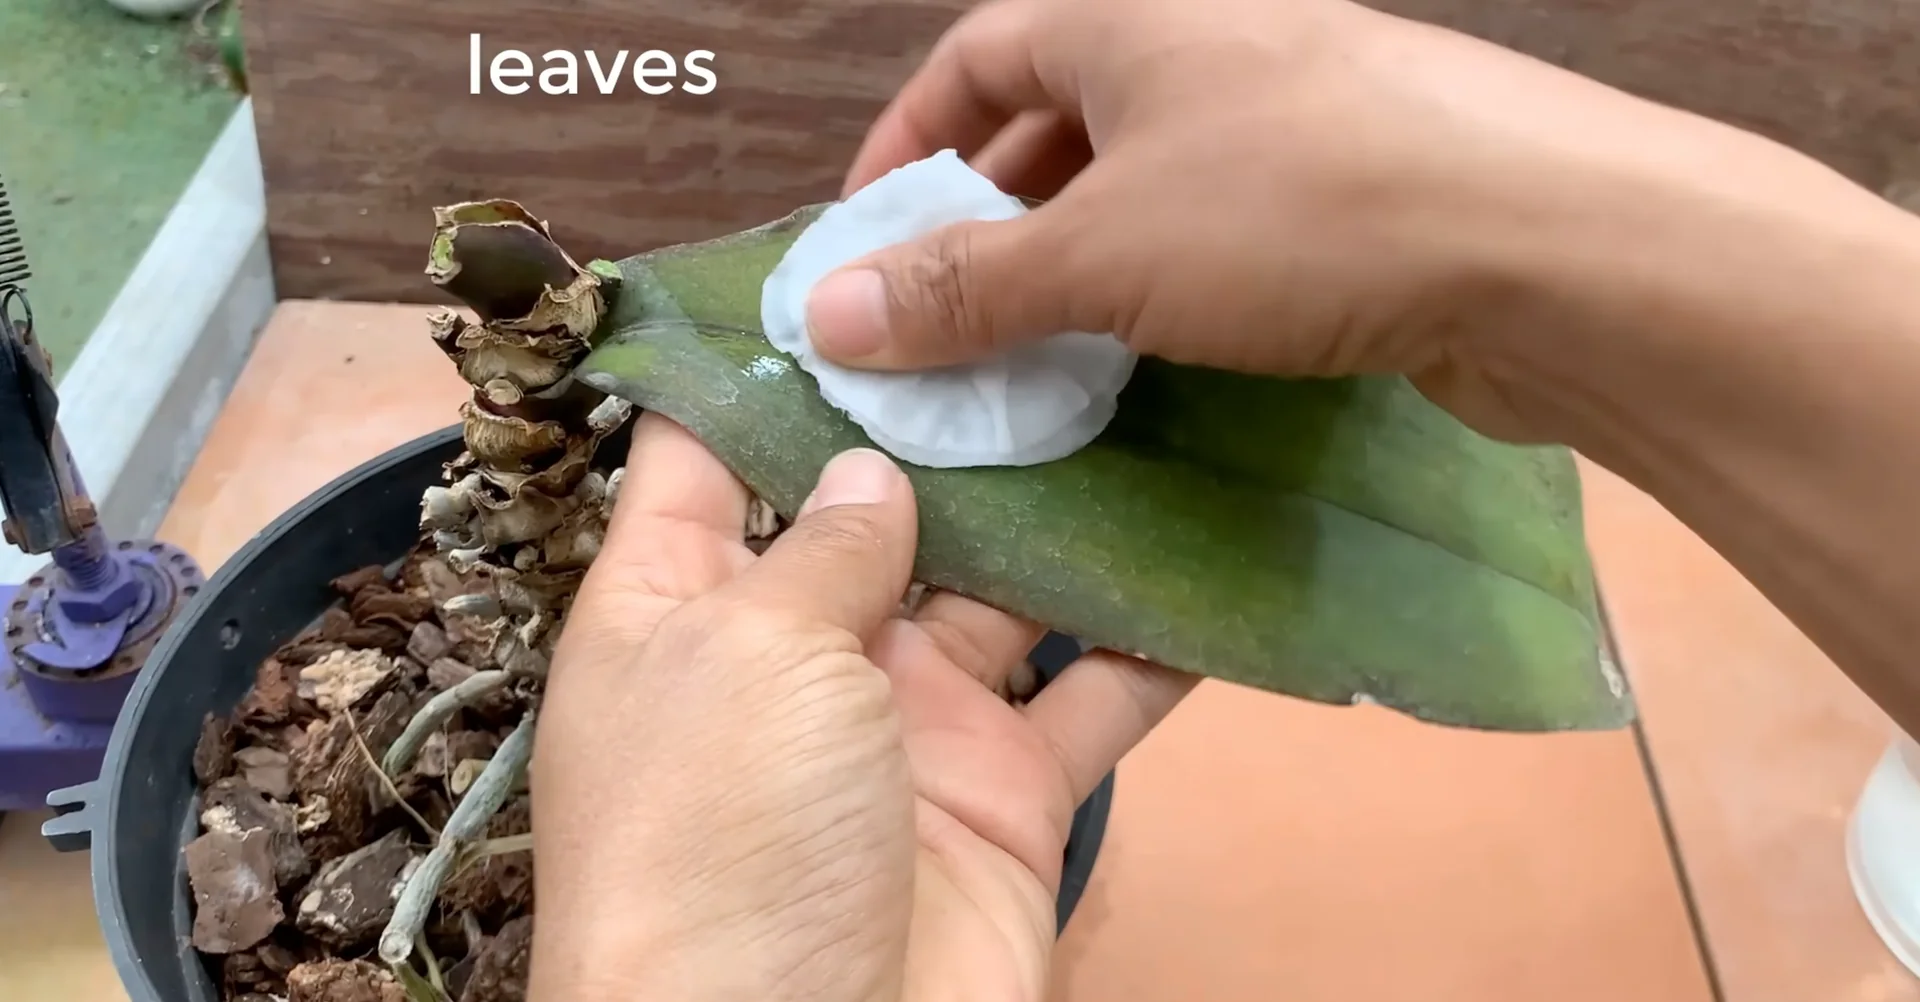
Step 1: Use a soft cloth to soak up this solution and gently wipe both the top and bottom of the orchid leaves, helping the nutrients penetrate deeply and support recovery. Wiping the leaves with the garlic and aloe vera mixture helps remove dirt and bacteria on the leaf surface, reducing the risk of disease and creating a clean environment for the leaves to photosynthesize more effectively. This mixture also provides moisture and nutrients directly to the leaves, helping them become healthy and glossy and enhancing their ability to absorb light, thereby supporting the orchid’s recovery and growth.
Step 2: Pour the garlic and aloe vera mixture into a spray bottle, ready for direct spraying onto the orchid leaves and roots. Evenly spray this mixture onto the orchid stem, leaves, and roots, helping to provide nutrients and protect the plant from bacteria while promoting the recovery process. This provides nutrients directly while also acting as an antibacterial treatment, supporting the plant to recover faster and become healthier.
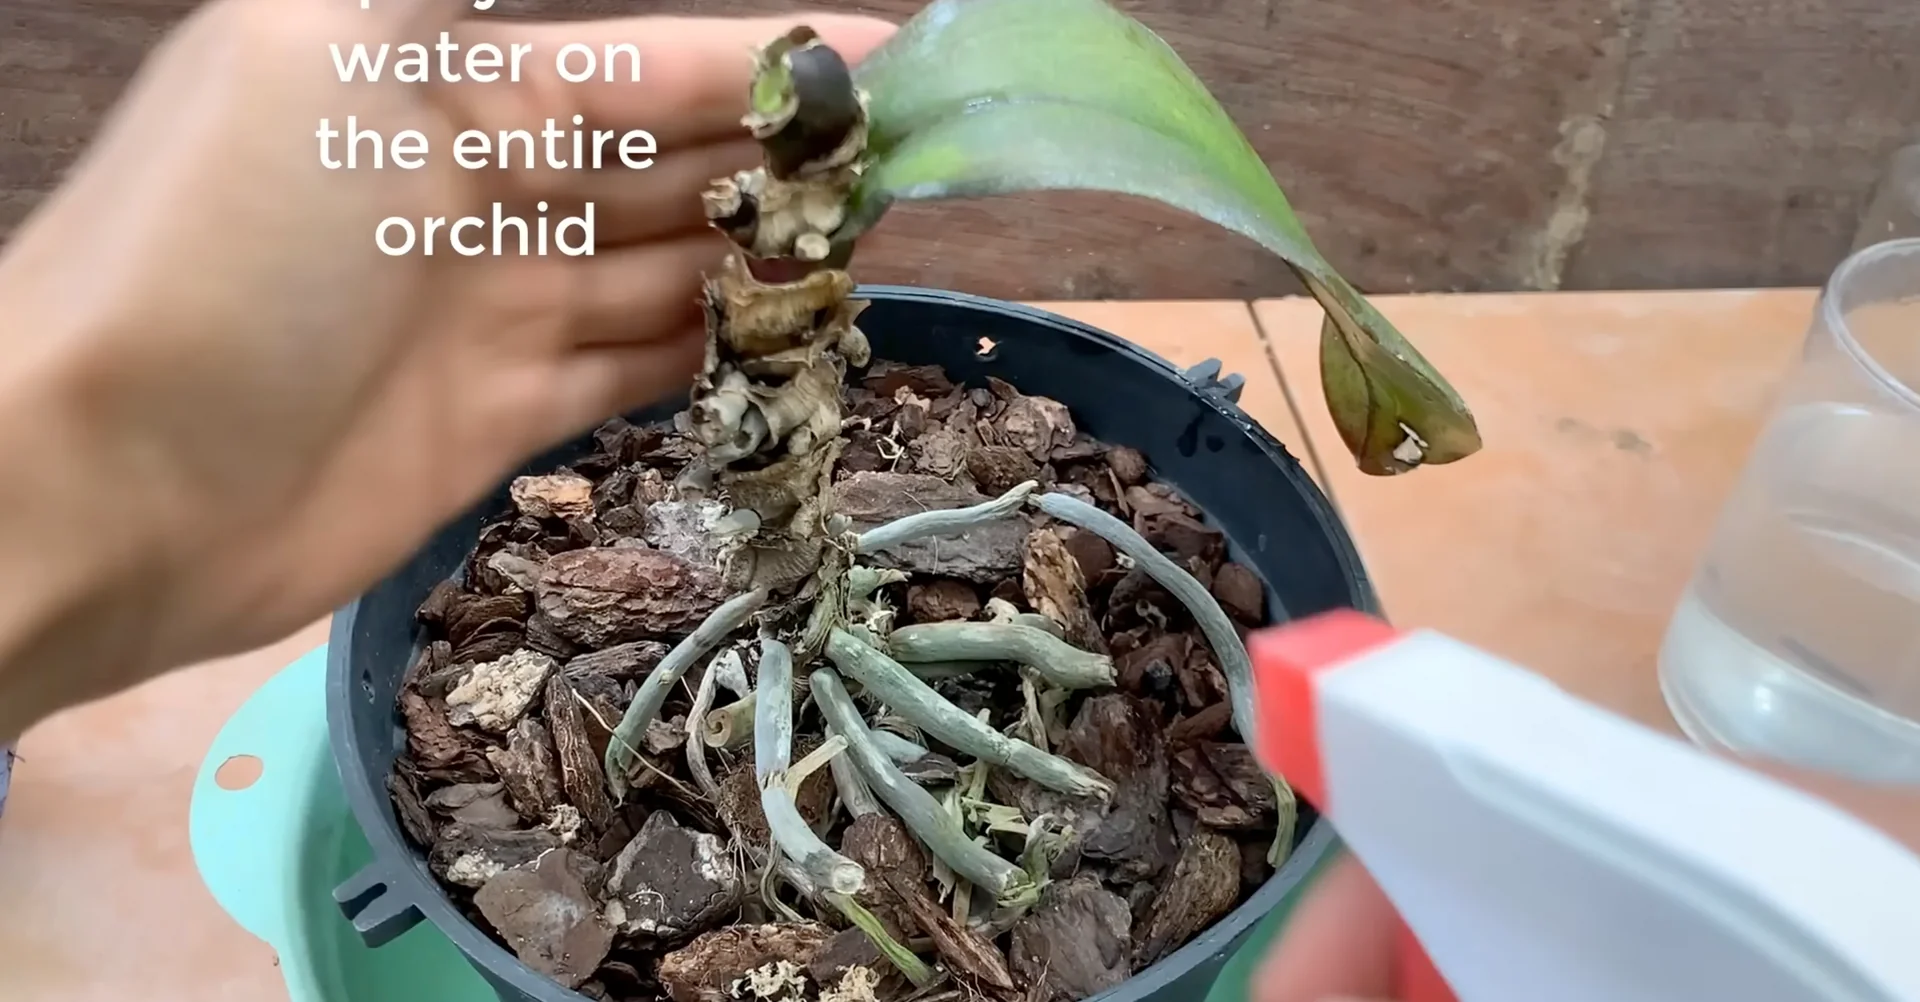
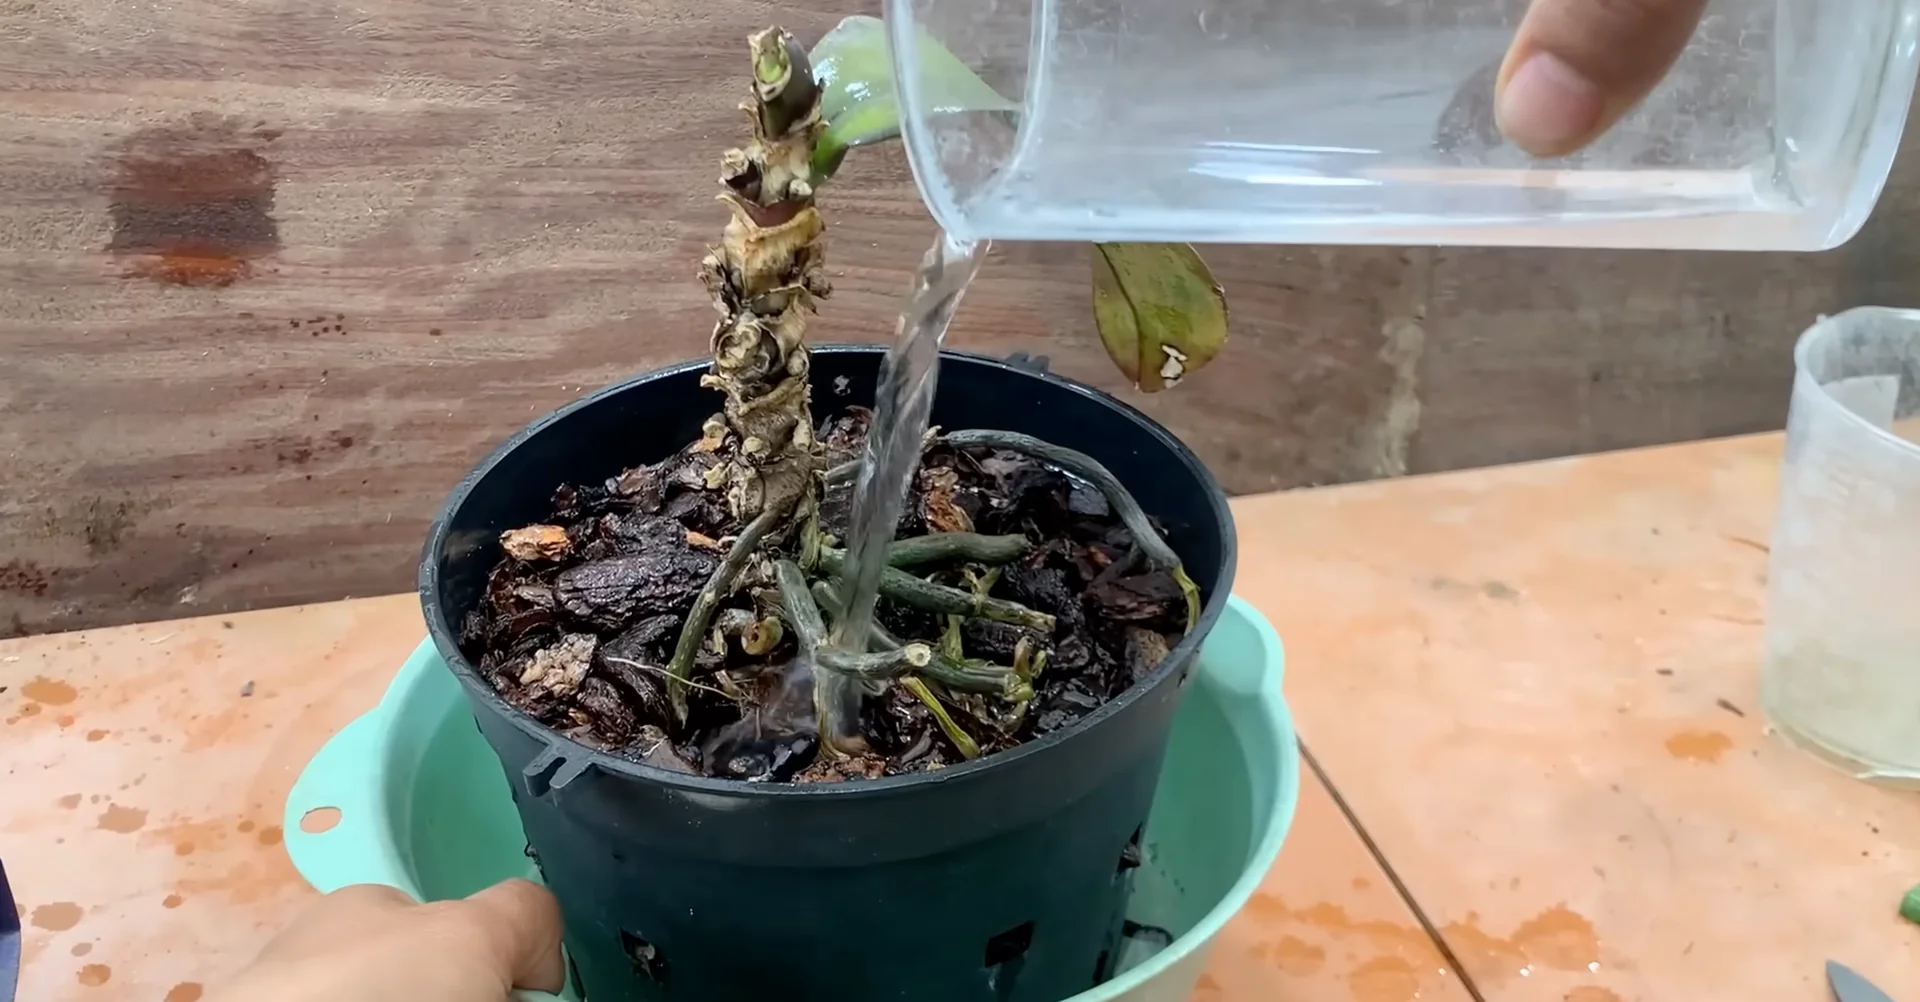
Step 3: Evenly water the roots and growing medium with this mixture, helping to provide nutrients, maintain moisture, and stimulate strong orchid root growth. After watering, you can soak the orchid pot in this mixture for about 5 to 10 minutes or longer depending on the water retention of the growing medium so the roots can absorb maximum nutrients.
3. Root boost setup
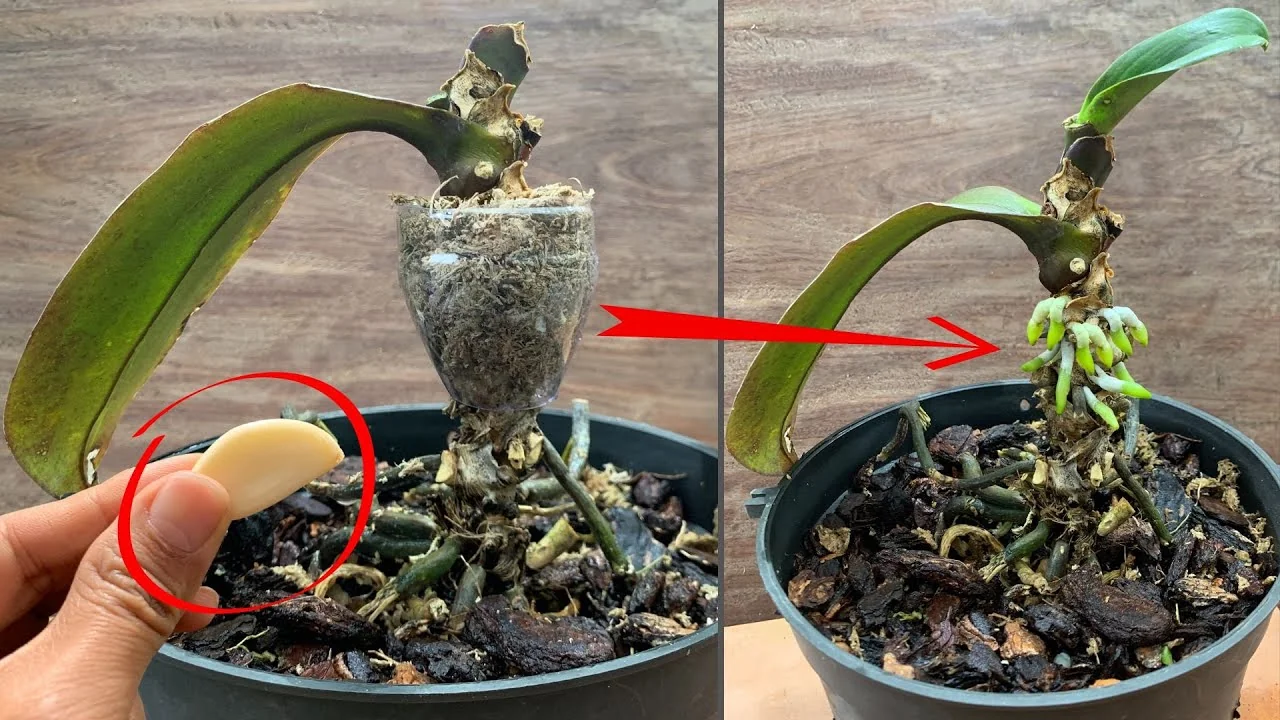
I recycle a plastic bottle into a simple tool, helping to concentrate nutrients and stimulate the orchid roots to grow faster. Put sterilized dry moss inside the tool, creating a moist and clean environment for the orchid roots to grow faster. After that, water regularly and maintain moisture, helping the orchid roots grow evenly and the plant recover faster.
I usually water every 3 to 5 days. At the same time, misting the leaves with water keeps the orchid leaves fresh and supports a faster recovery process. Place the orchid pot in a spot with gentle sunlight, helping the plant photosynthesize effectively and recover energy faster.
4. Results after one month
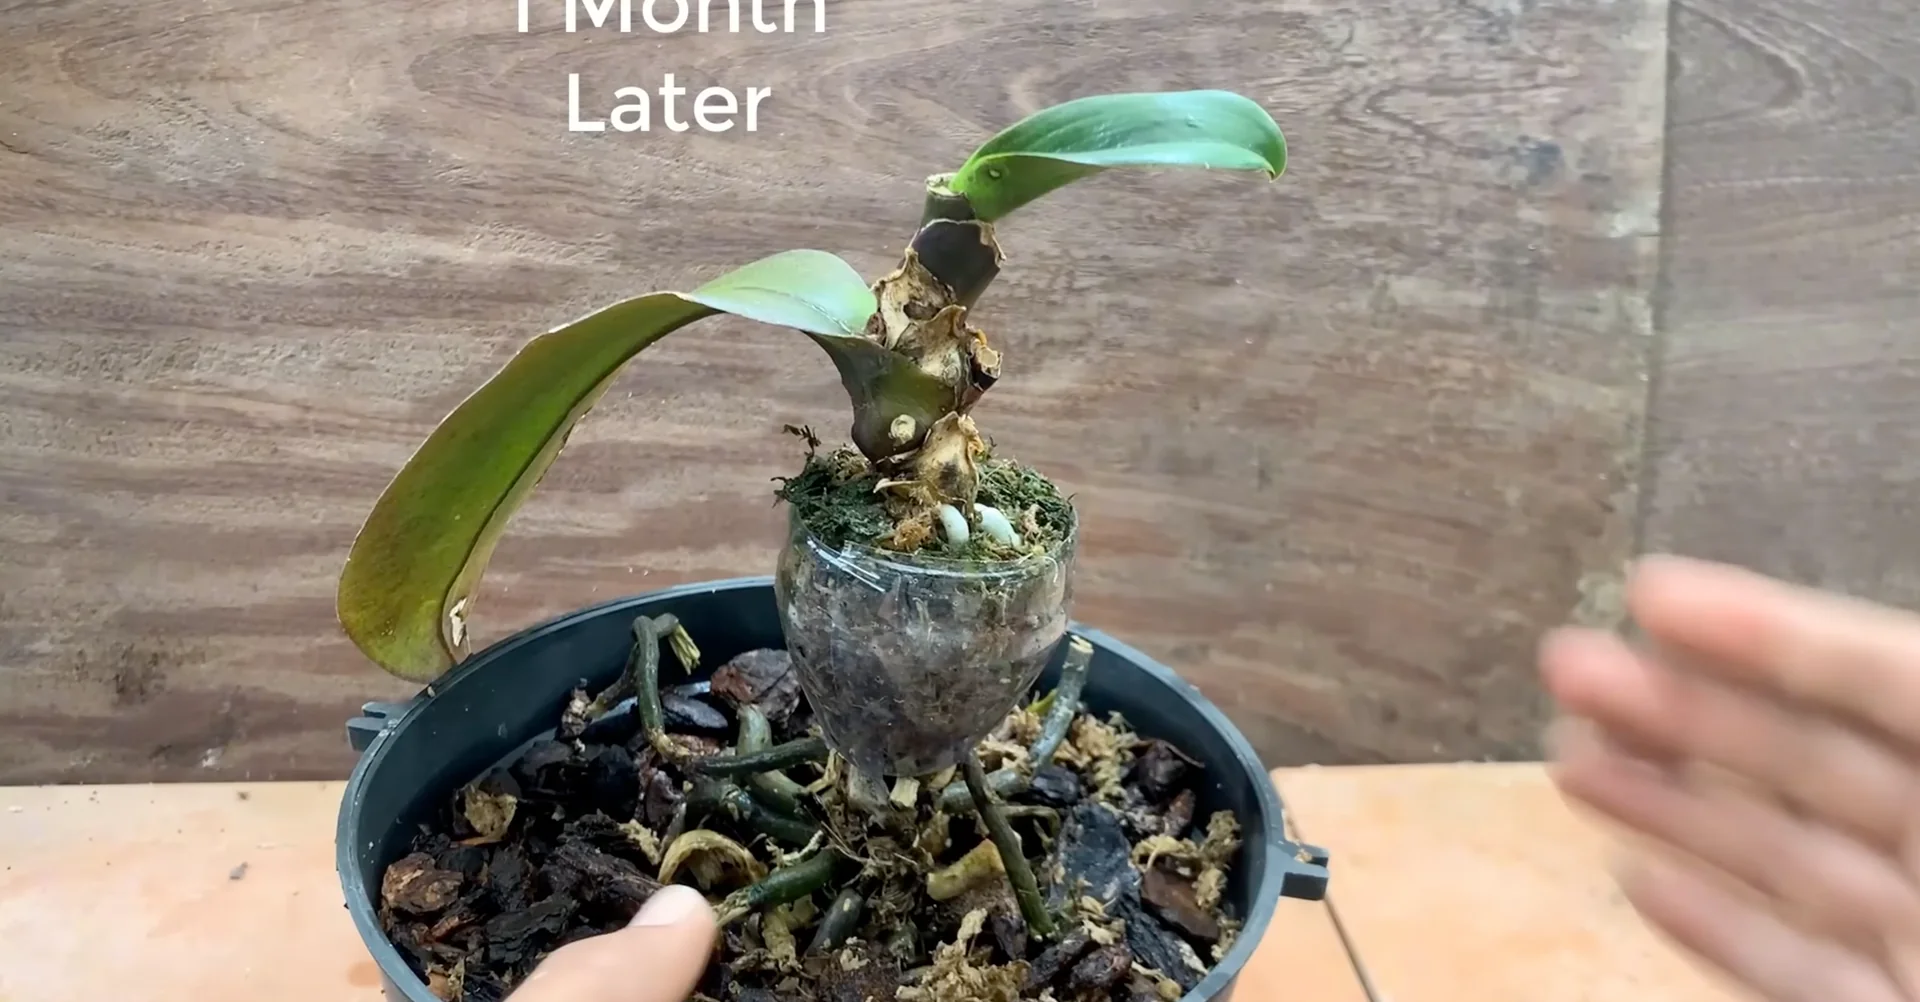
Here are the results after one month of care. The orchid leaves have become sturdy and healthier, and a new leaf has grown at the top. Peel off the outer layer to check the inside and see how the orchid is growing.
You can see new roots sprouting from the orchid stem. They are growing very strong and full of vitality in this way. This method has stimulated excellent root growth, helping the orchid become healthy and ready for the next blooms.
These new roots will help the orchid absorb nutrients and water more efficiently, allowing it to grow healthy and bloom beautifully in the future. Thanks to the roots absorbing more nutrients, the new leaves at the top grow strong, while the older leaves also become greener and sturdier than before.
5. Repot and propagate after the Garlic Treatment for Orchids
I cut across the orchid stem just below where the roots grow along the stem to plant it in a new pot and help the plant grow more successfully. After that, I apply a little toothpaste to the cut, helping it heal quickly and prevent infection. Then I plant the orchid section just cut from the mother stem into a new pot, giving the plant space to grow and recover better.
The orchid growing medium is made up of large pine bark and some moss, all sterilized to provide a clean environment supporting healthy orchid growth. Carefully place the orchid into the pot, ensuring the roots are evenly spread on the growing medium so the plant grows firmly. After planting, place the orchid pot in a spot with gentle sunlight, ideally morning sun from the east, helping the plant photosynthesize and recover faster.
Here is the orchid pot that was once rotting, but after applying this method the plant has fully recovered and is growing healthily. This is the lower part of the stem after cutting across the mother stem. Since it no longer has the growth tip, a new orchid has sprouted from the horizontal part of the mother stem.
This is the upper part of the mother plant. It has grown many new leaves and is very healthy, full of vitality.
Final thoughts
By caring for each plant individually step by step, over time you will have a garden full of vibrant orchid blooms. The patience you show today will bring abundant joy tomorrow. Start with each small orchid pot, and through years of persistent care you will transform your garden into a paradise full of vibrant orchid blooms and vitality.