When your orchid has just finished its blooming cycle or even has never bloomed, do not worry. Each orchid pot has its own growth rhythm. With a little patience along with the right care steps, you can help your orchid become healthy and bloom brilliantly in the future.
First, cut off all the wilted flower stems, leaves, and roots. This helps eliminate potential diseases. It also stimulates the orchid to grow new healthy leaves, roots, and flower buds.
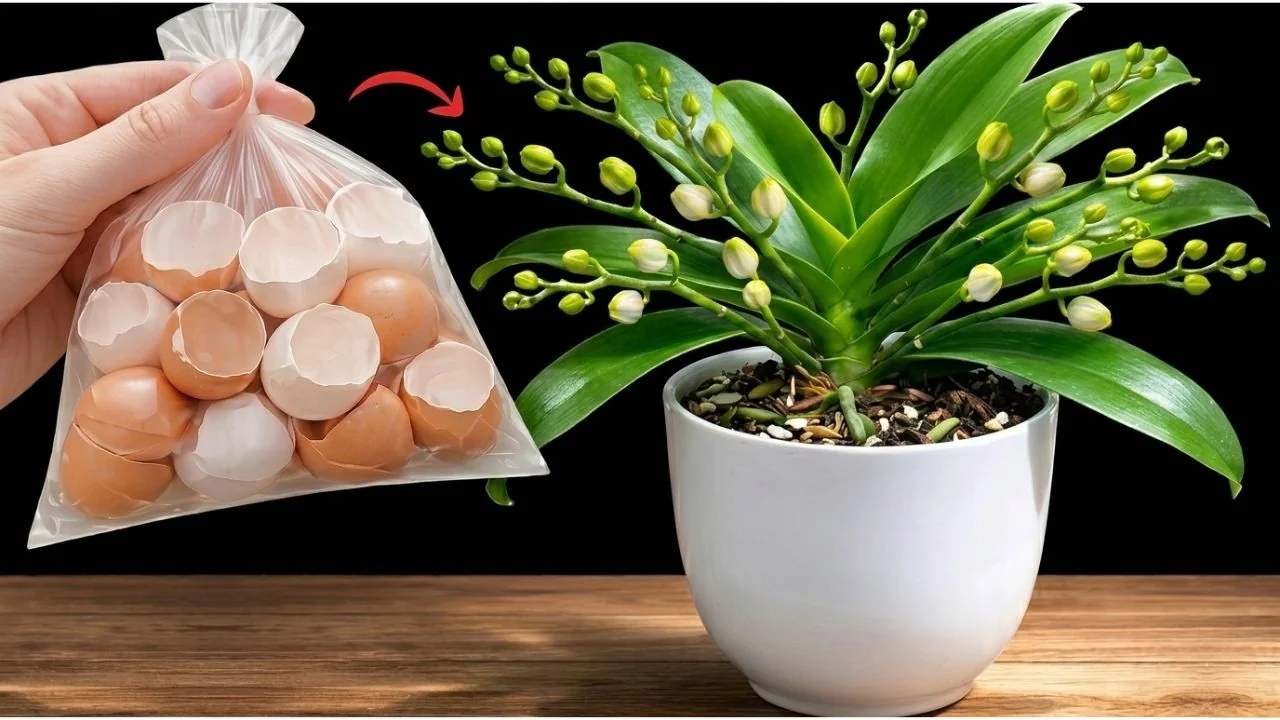
1. Eggshell Vinegar Orchid Fertilizer
I use egg shells as a natural fertilizer to stimulate the orchid to bloom. Eggshells are rich in calcium and minerals, helping the orchid stay healthy and develop new flower buds quickly and steadily. For more help on building strong root systems, see tips for strong roots and bigger blooms.
Mixing the solution
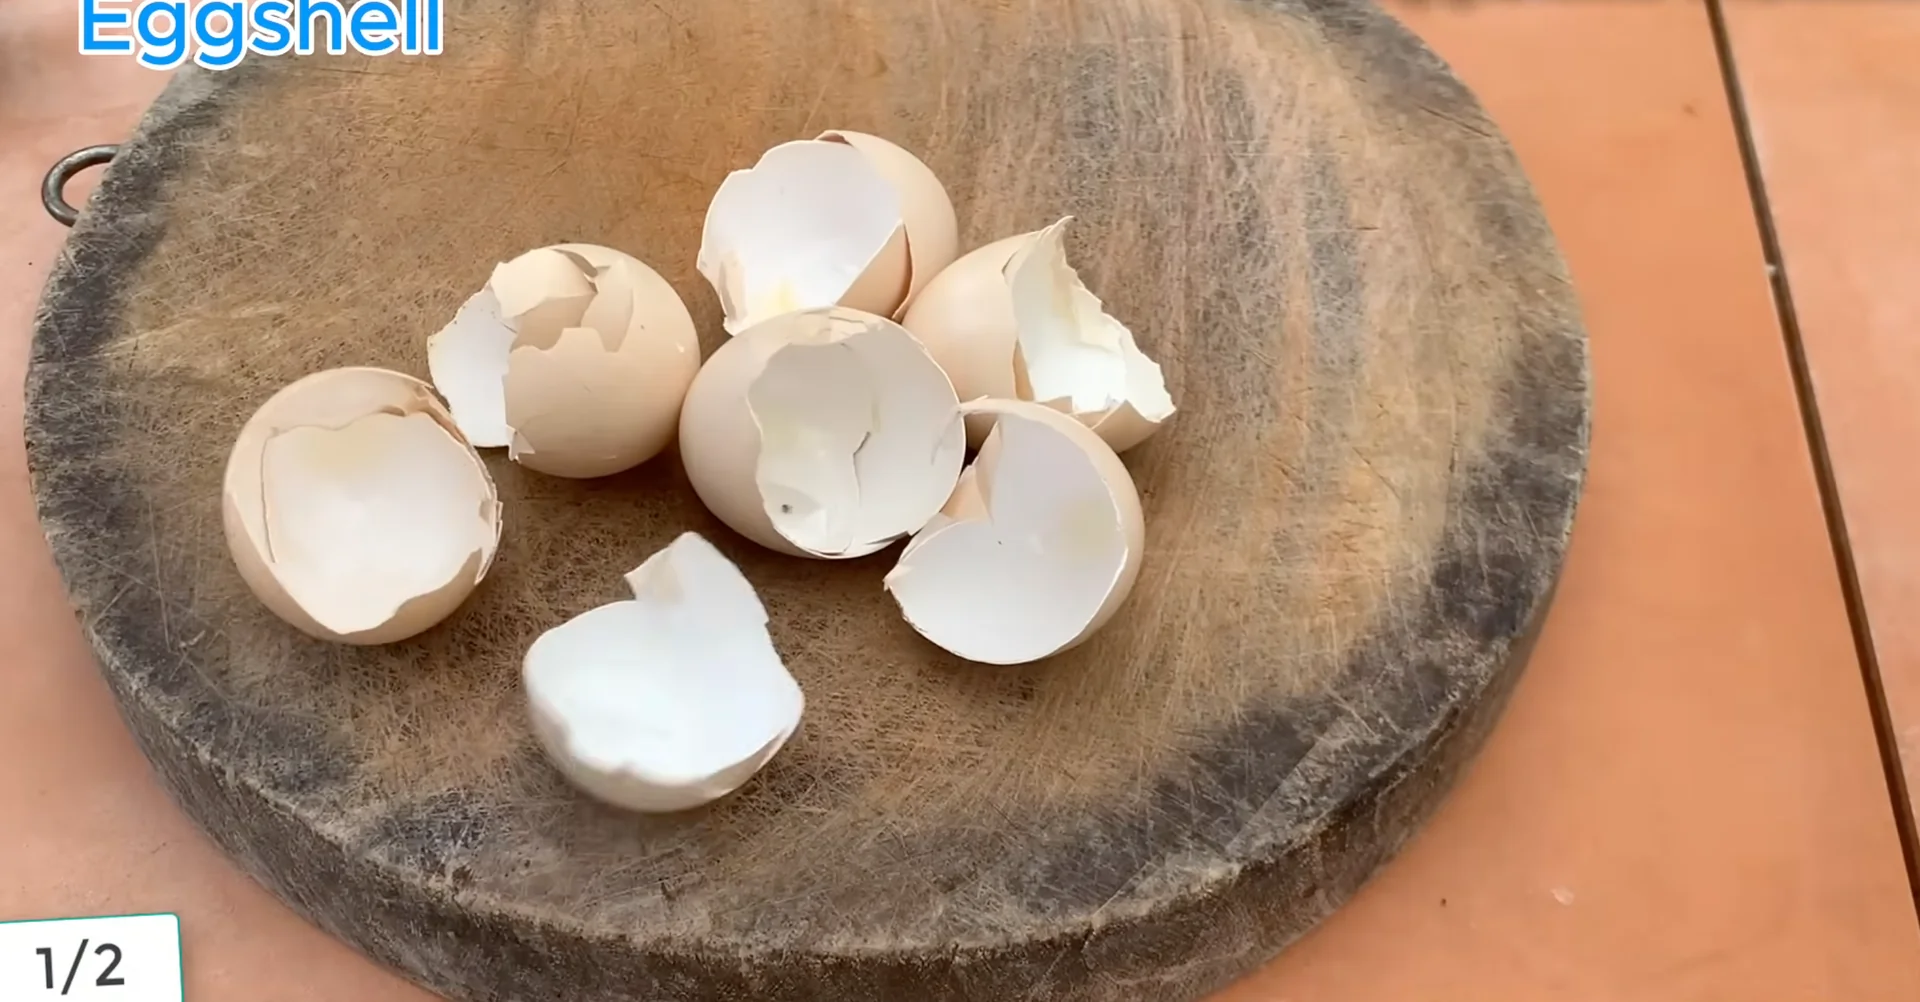
Crush about five egg shells. Grinding them very finely helps the minerals dissolve easily into the water and soil, providing nutrients effectively for the orchid’s roots and leaves.
After crushing, put the eggshells into a clean jar to prepare for soaking. This step helps the eggshells blend with other nutrients during the soaking process, creating a nutrient rich natural fertilizer for the orchid.
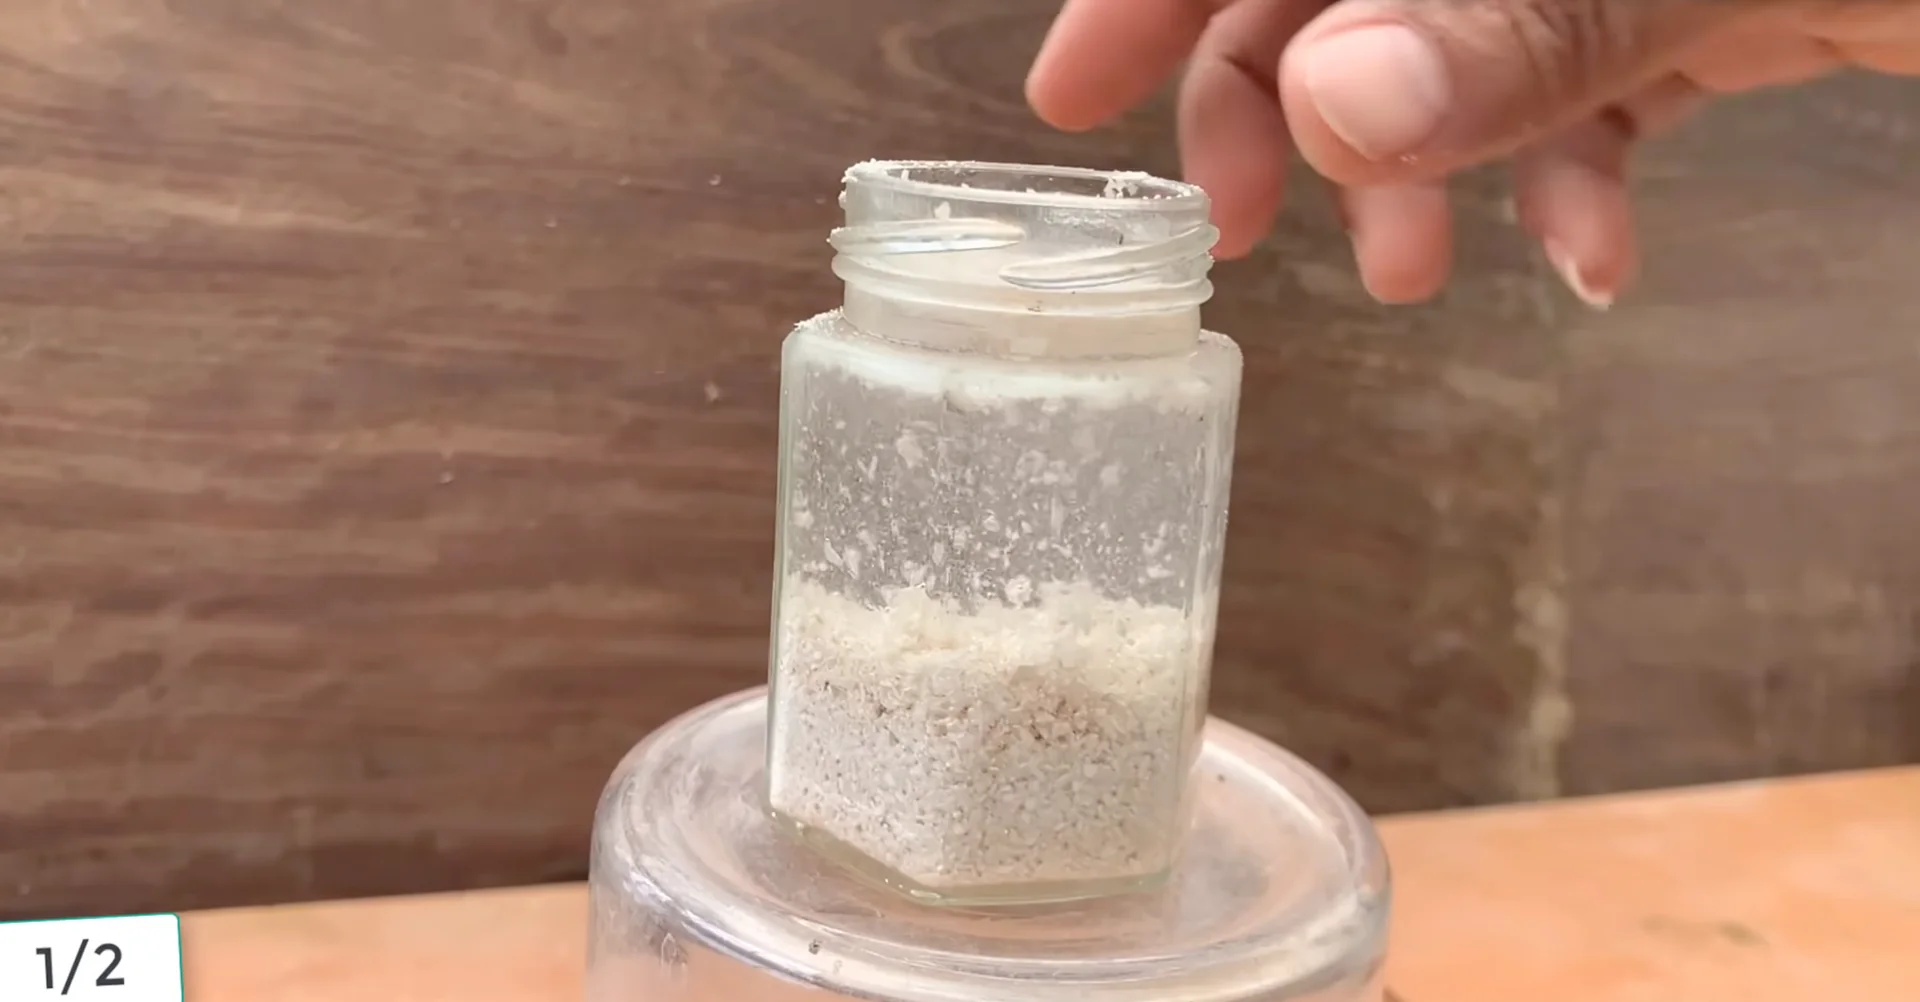
Add about 50 ml of vinegar into the jar. Vinegar helps the eggshells ferment slightly and dissolve the organic calcium, turning it into a fertilizer that is easily absorbed by the orchid’s roots and leaves. You can see immediately after pouring the vinegar in, a lively reaction occurs between the vinegar and the eggshells.
This process produces quickly soluble organic calcium, ready to provide nutrients effectively to the orchid’s roots and leaves. Then let the mixture sit for 1 day. This allows the calcium and minerals from the eggshells to fully dissolve, creating a nutrient rich solution ready to nourish the orchid’s roots, leaves, and flower buds.
After 1 day, strain out the remaining residue. This step makes the solution clear and smooth, ready to be diluted and used directly for your orchid pot. After straining, dilute the solution with about 3 L of water.
How to apply
Step one roots and medium
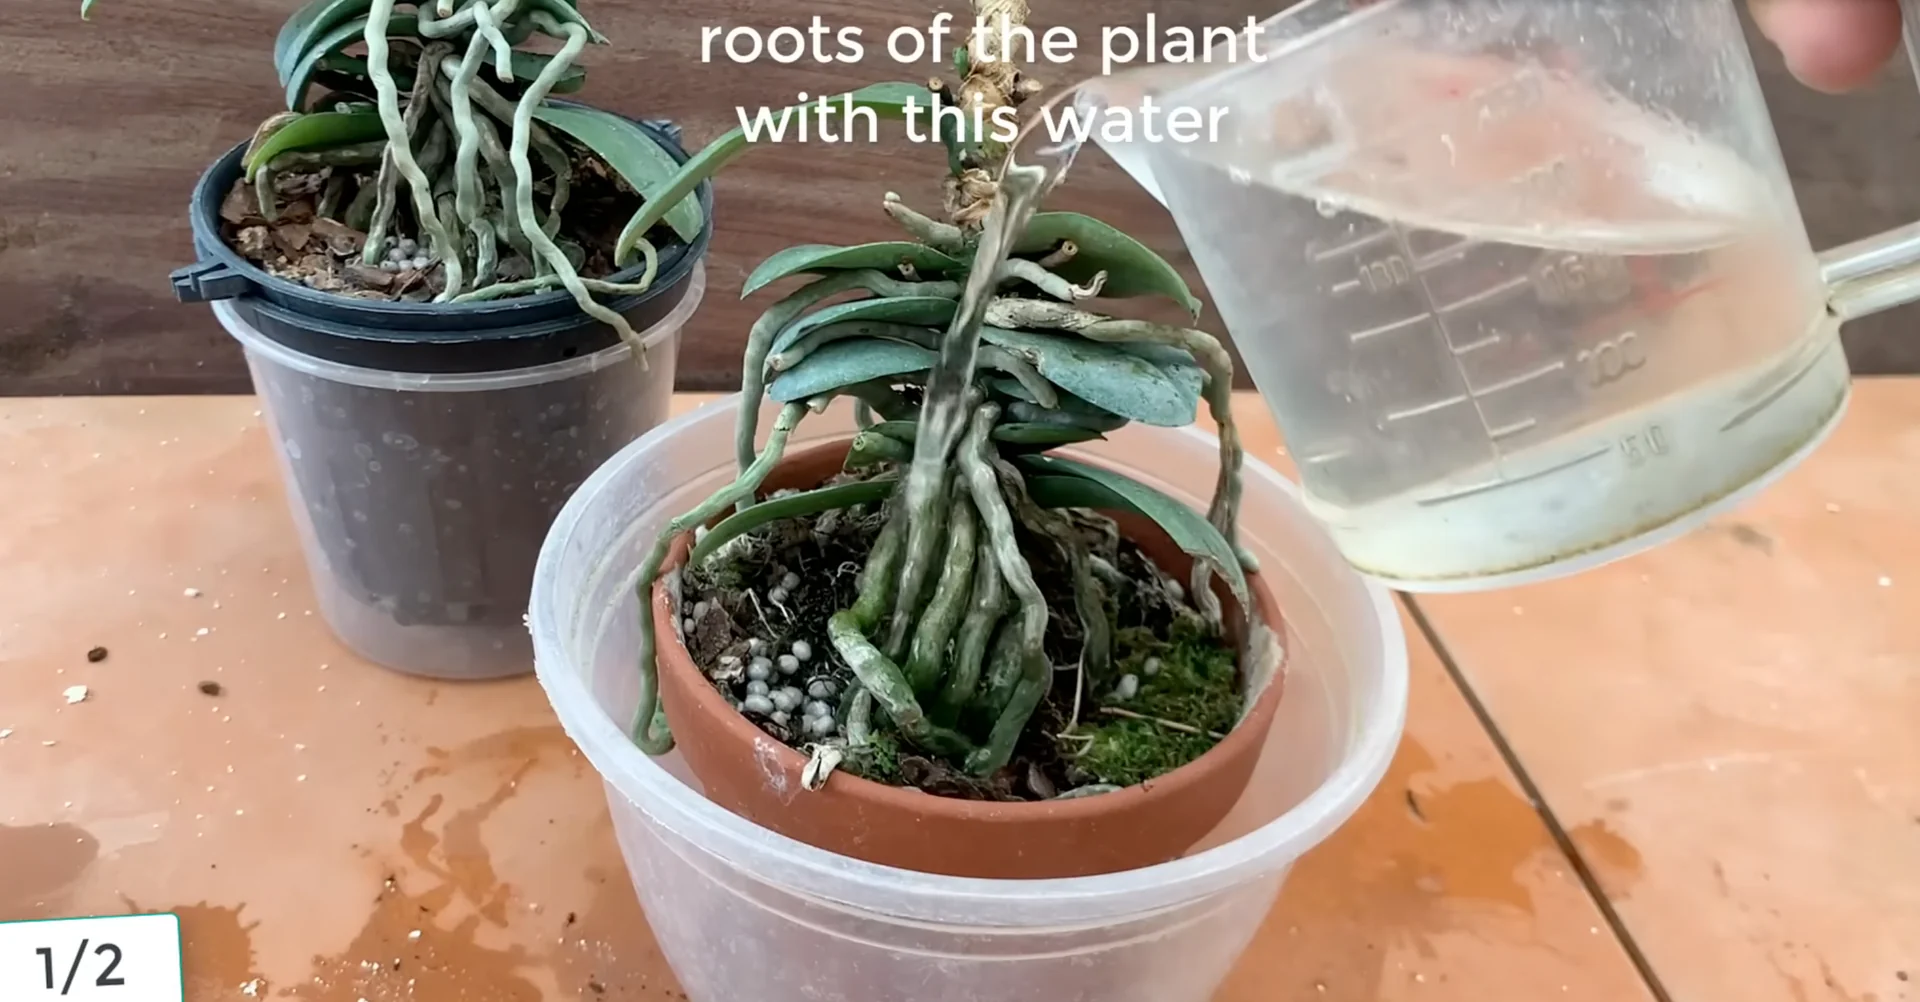
Water this fertilizer mixture directly onto the orchid’s roots and growing medium about once every 2 weeks. Regular watering provides continuous nutrients, helping the orchid stay healthy, stimulating root growth, and preparing for new flower buds. For an easy schedule, check out a simple one cup weekly method that revives blooms.
Eggshells contain a lot of calcium, helping the orchid stay healthy and increasing its resistance to pests and diseases. Eggshells are also rich in potassium, an important nutrient that helps stimulate flower development, bringing more vibrant and consistent blooms. In addition, the nitrogen and phosphorus in eggshells help the leaves and roots grow strongly.
When the roots are healthy and the leaves are green, the orchid can absorb nutrients more effectively. It will be ready to nurture new flower buds in a healthy and sustainable way.
Step two foliar spray
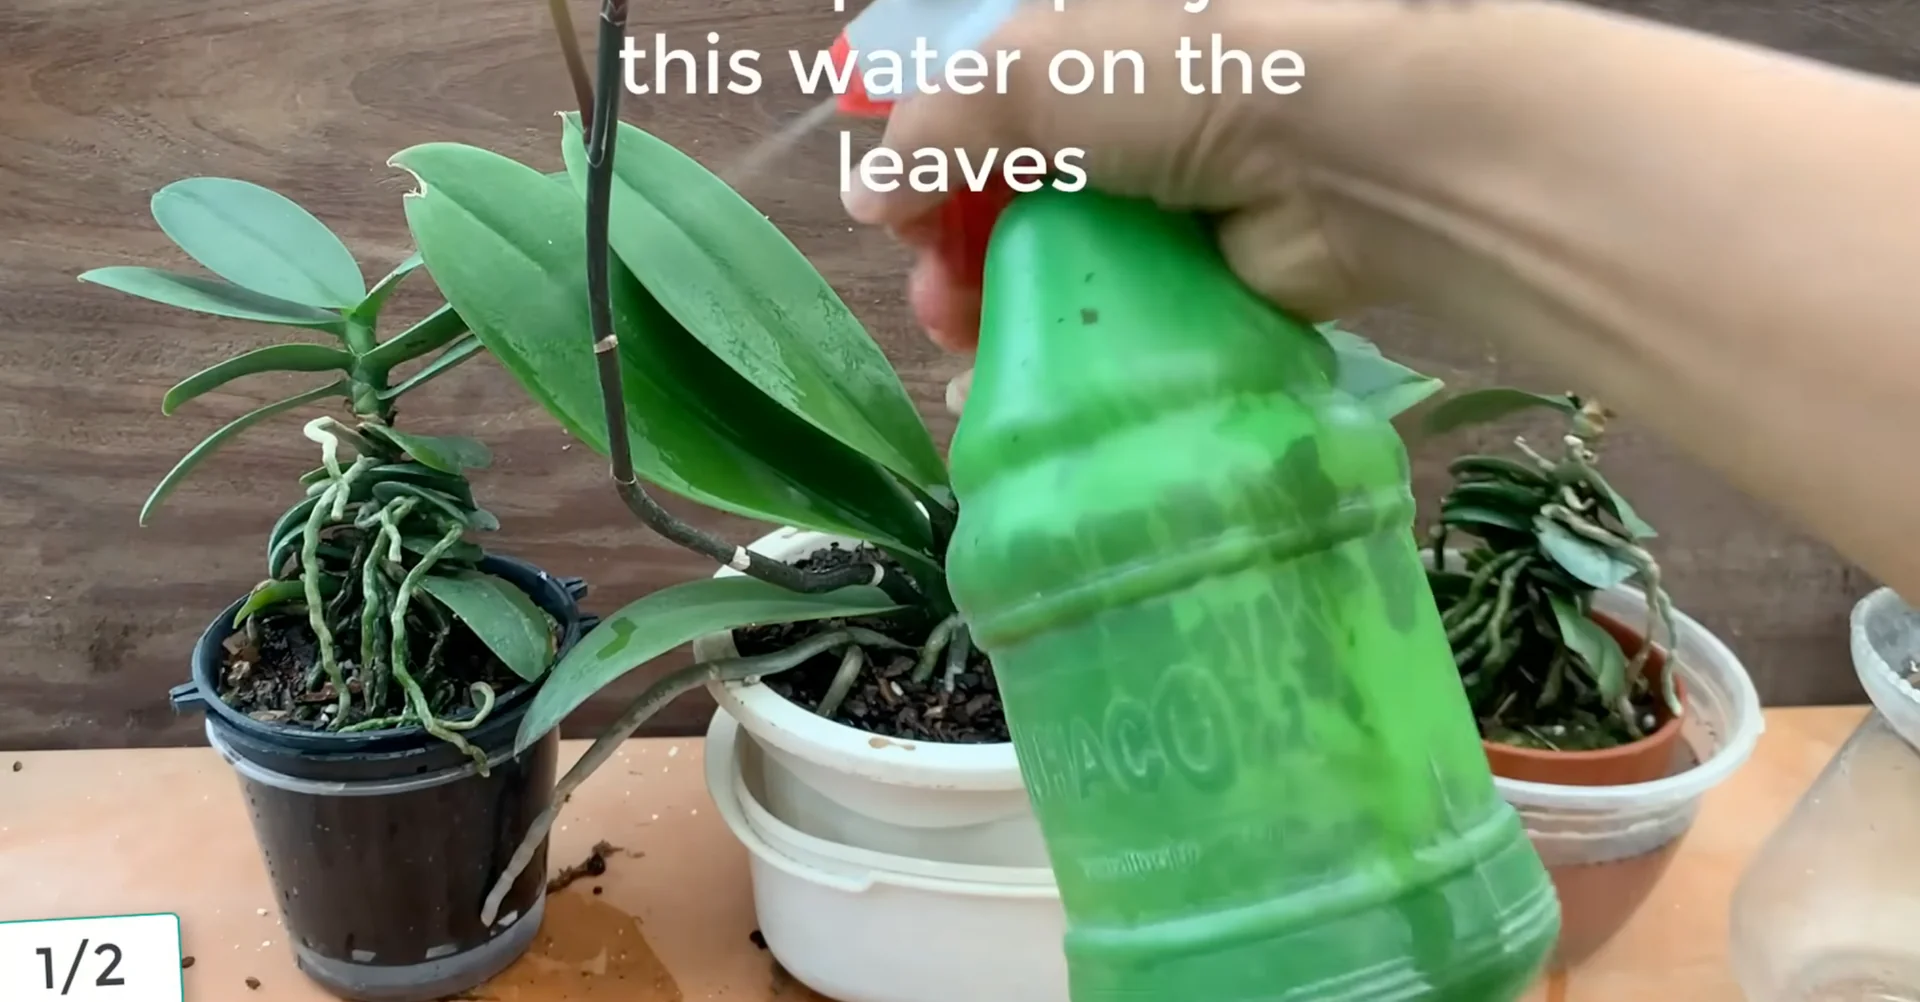
Spray the solution directly onto the orchid’s leaves about once every 2 weeks. Regular spraying helps the leaves absorb more nutrients, maintain a lush green color, and increase the vitality of the entire plant, while also supporting more efficient photosynthesis.
The vinegar in the solution helps remove dirt, insects, and fungal diseases on the orchid’s leaves and flowers. The calcium from the eggshells helps the leaves become stronger, increases resistance to pests, and maintains the plant’s long term vitality.
Light and placement
After watering, place the orchid pot in a spot with gentle sunlight. Gentle light helps the orchid photosynthesize effectively, increases nutrient absorption, and stimulates bud development, preparing for the vibrant flowers about to bloom.
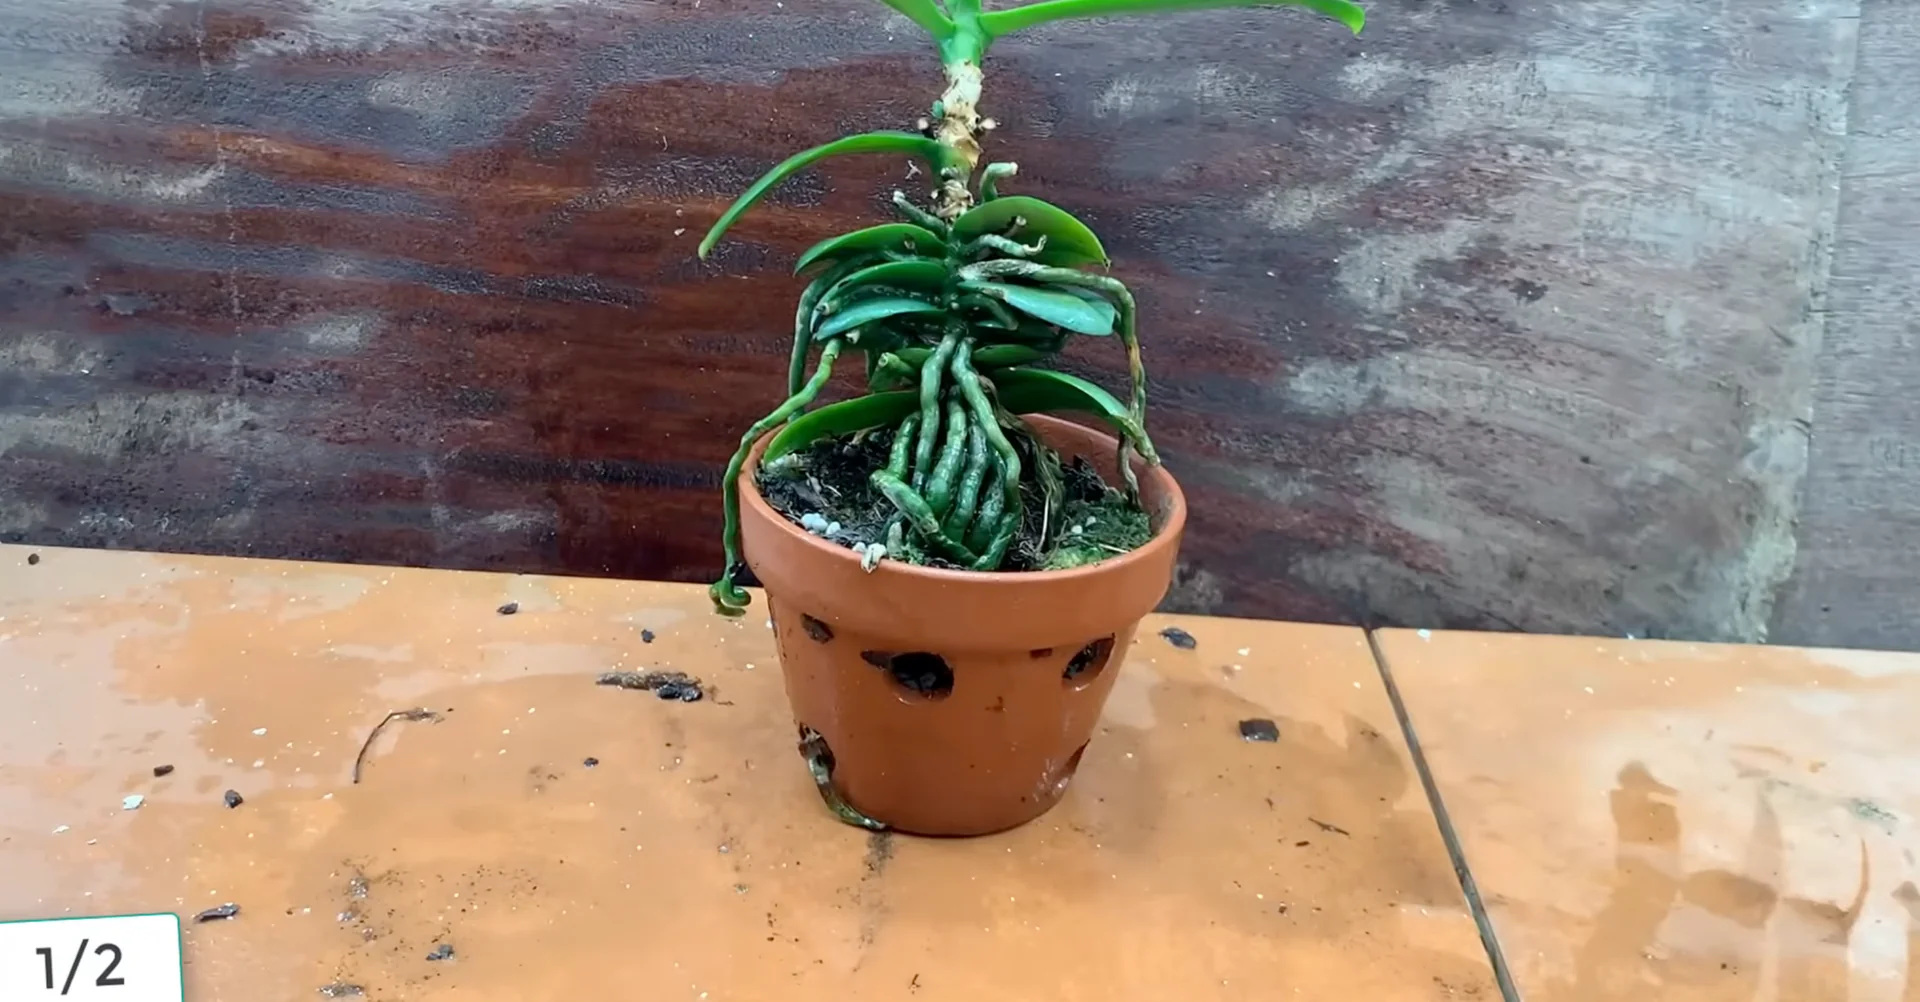
Results after 2 months
Here is the result after 2 months of care and recovery. The orchid continues to produce many new buds, promising vibrant flowers soon to bloom.
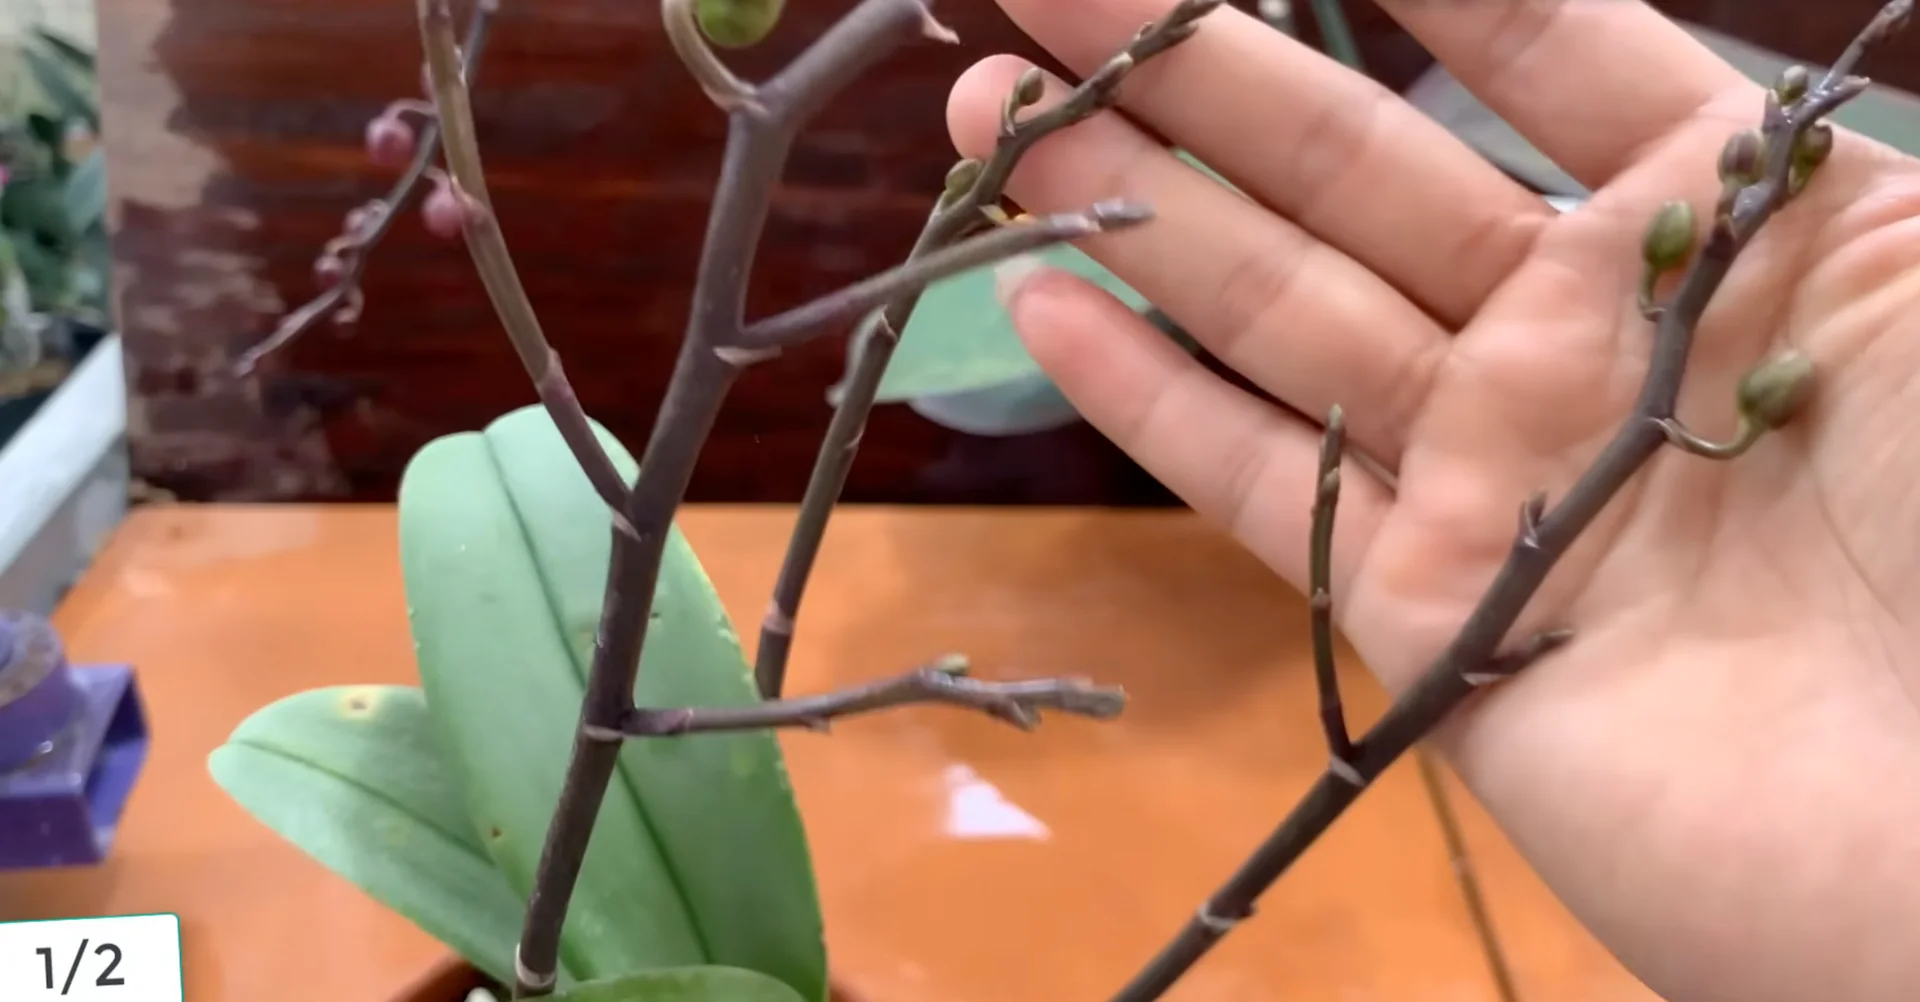
Each orchid can carry up to six to seven flower stems at the same time. With the right care and patience, orchids can grow strongly, bloom many flowers simultaneously, and bring vibrant beauty to the entire garden.
When the orchid receives sufficient nutrients, the flowers bloom larger, more uniform, and more vibrant than ever. They display stunning beauty and reflect the plant’s strong vitality, thanks to meticulous and patient care.
For strategies to keep flowers coming, see keep orchids blooming year round.
2. Reviving a rotting orchid
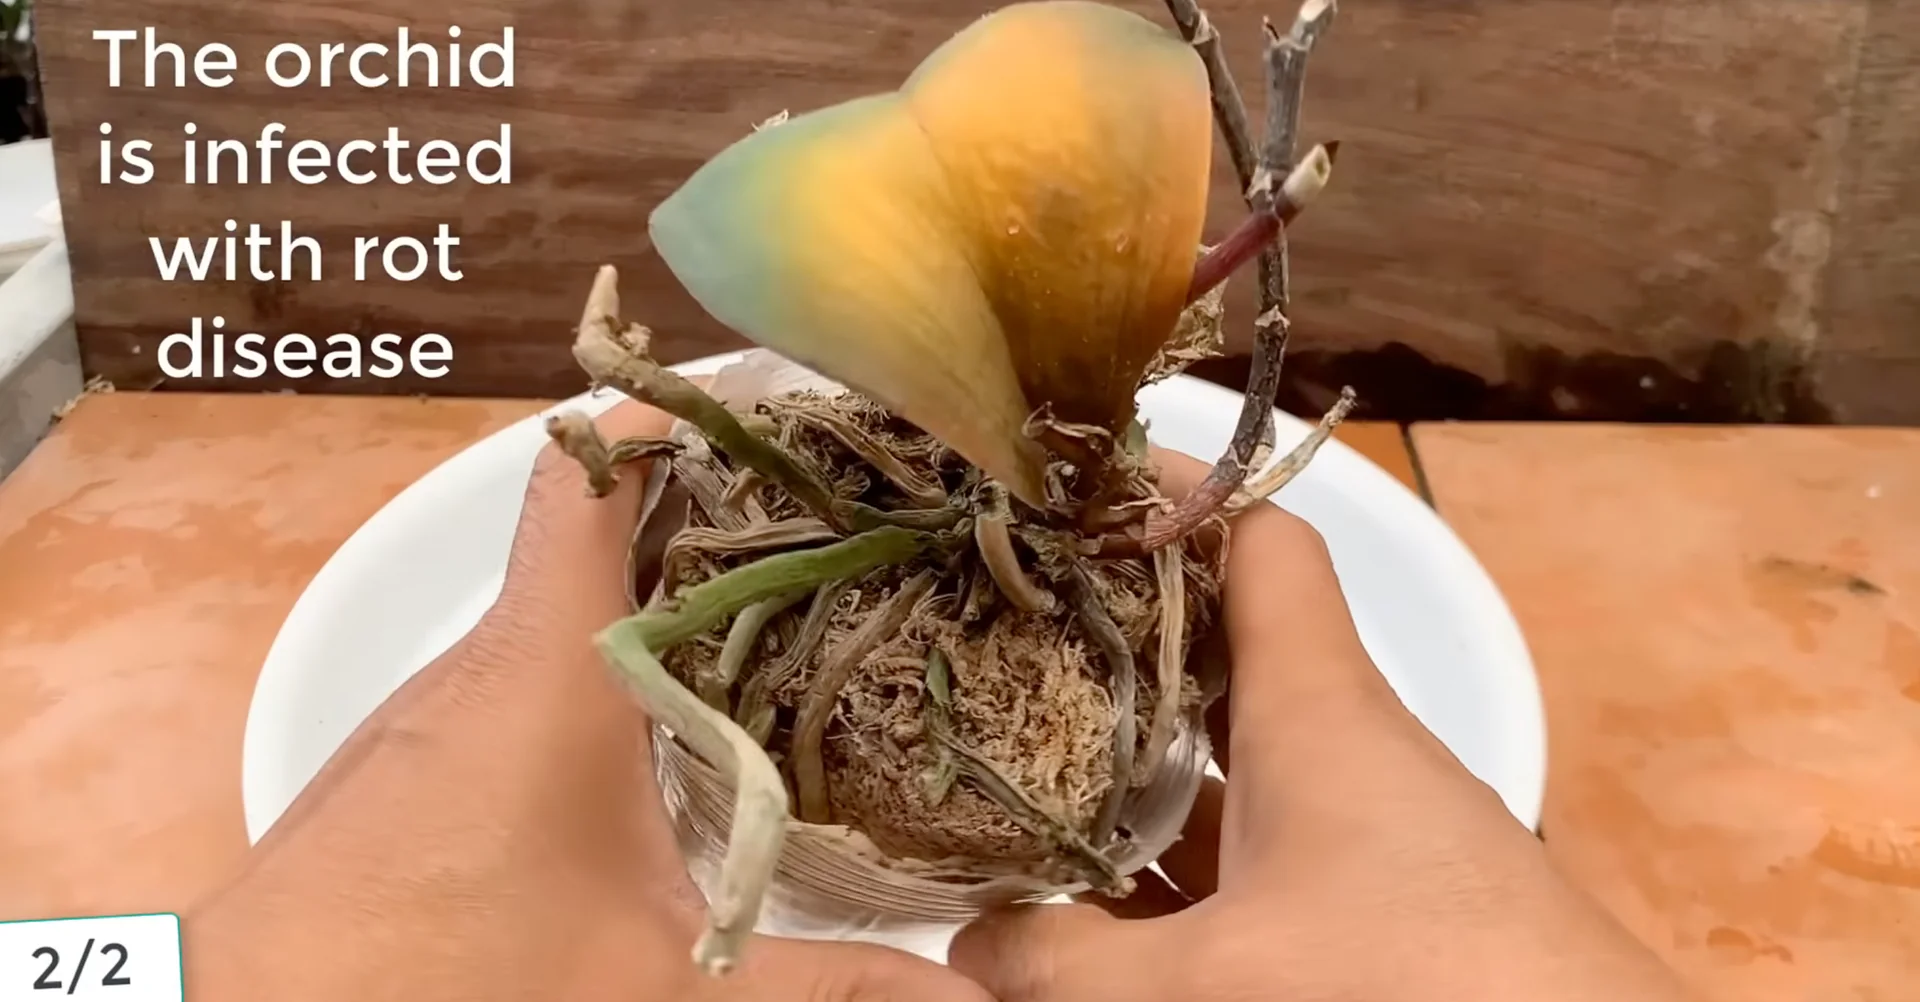
If you have an orchid that is rotting and has lost all its leaves, do not rush to throw it away. With proper care, the plant can still recover, grow new roots, and continue to bloom beautifully.
Identify and clean
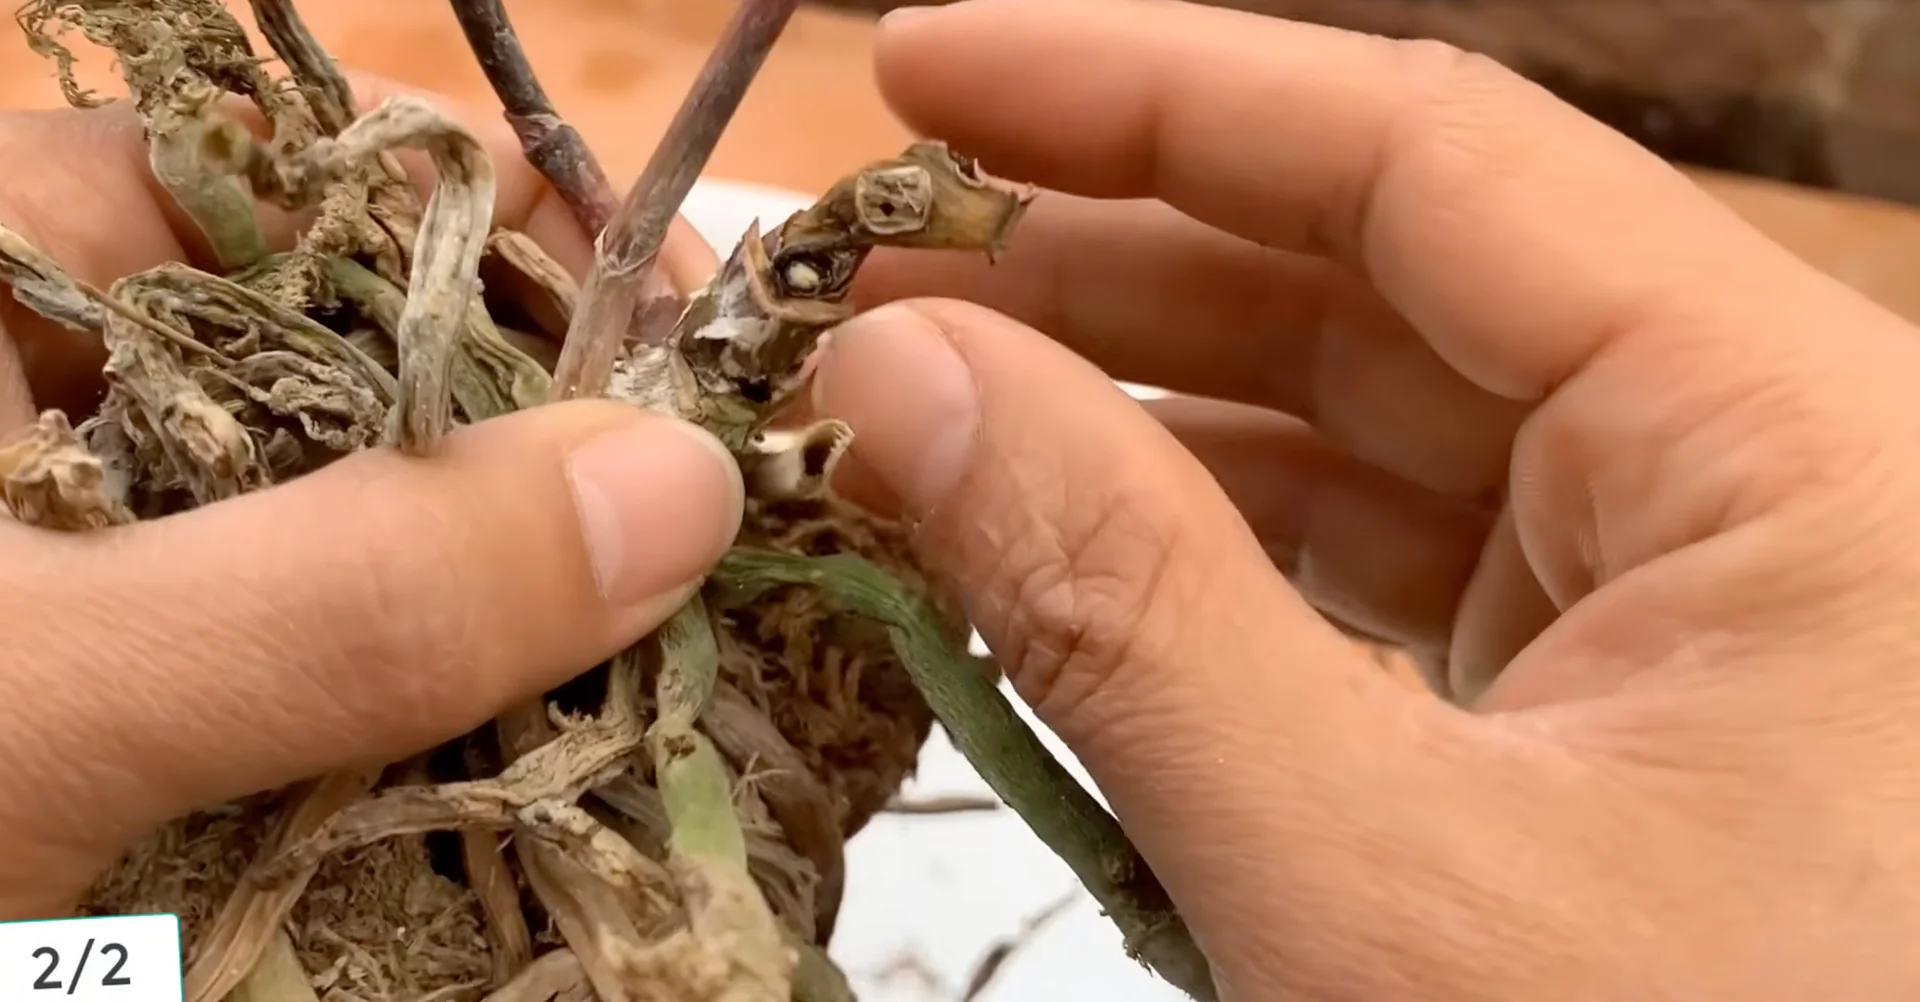
This orchid is infected by bacteria causing its stem and roots to gradually rot. First, cut off and clean the rotting parts on the orchid’s stem and roots. This removes harmful bacteria, prevents the disease from spreading, and prepares the plant to begin a healthy recovery process.
Disinfect and rest
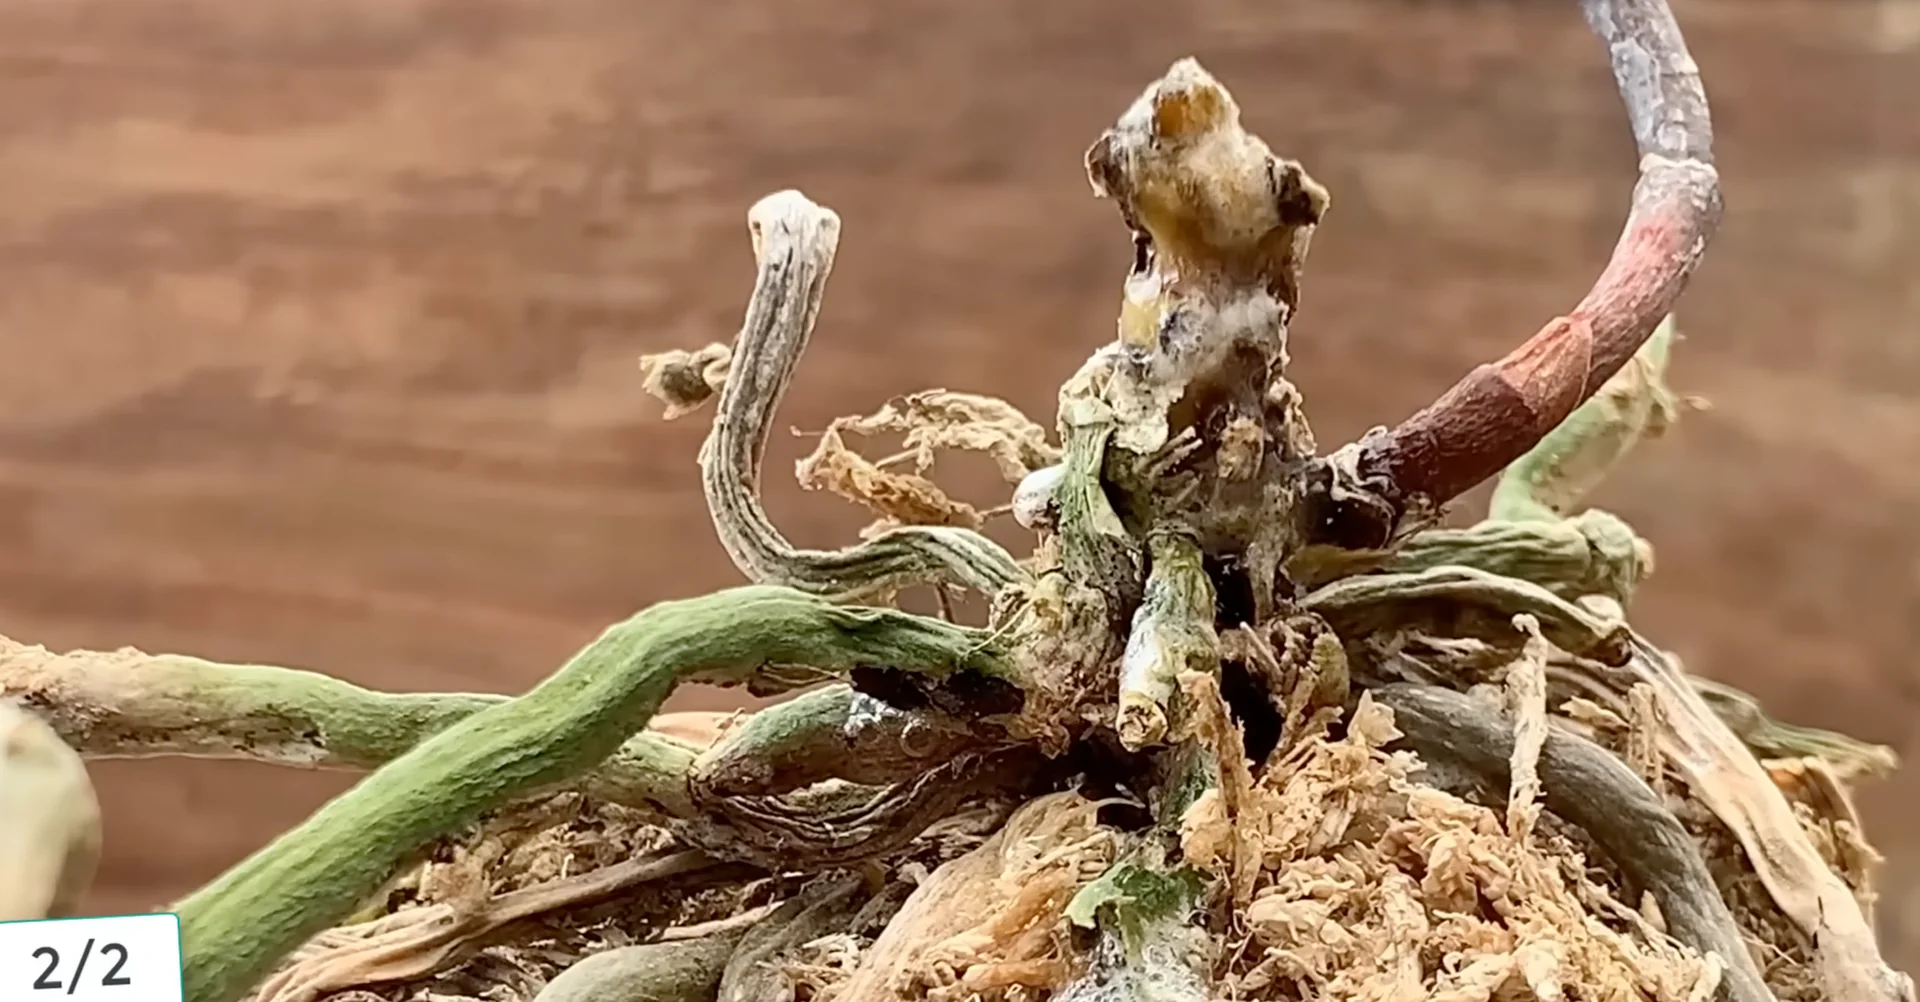
Completely cut off the damaged roots. Apply pure hydrogen peroxide to disinfect the recently cut stem and roots of the orchid, helping eliminate any remaining bacteria and creating conditions for the plant to recover quickly.
Apply pure hydrogen peroxide directly onto the rotting areas and on the freshly cut wounds. This disinfects effectively and prevents the disease from spreading, creating conditions for the plant to recover healthily. Then leave the plant undisturbed for 1 day without watering to allow the cuts to heal completely.
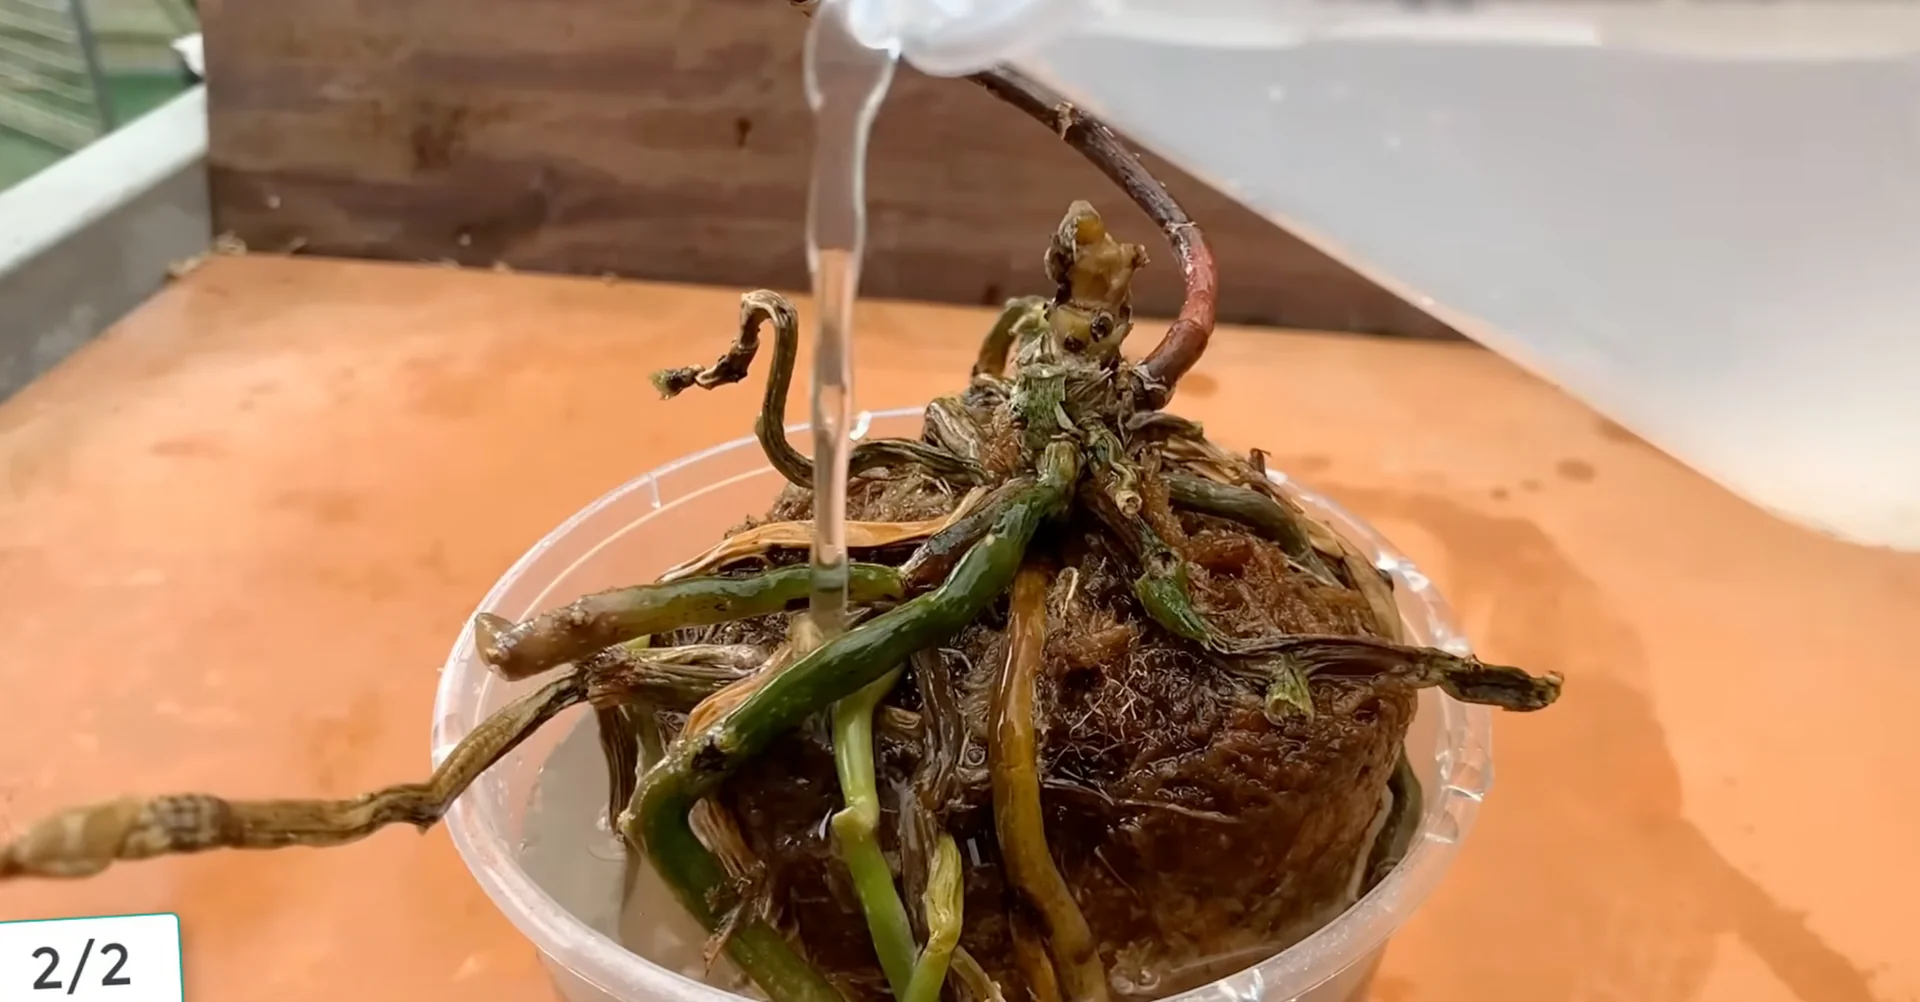
Baking soda soak
Prepare 3 L of water in a clean container to mix the growing medium treatment solution. Add one spoon of baking soda and stir well until completely dissolved.
Baking soda helps balance the pH in the growing medium while also preventing bacteria and fungal growth, creating an ideal environment for the orchid’s roots to recover. Soak the entire orchid in this solution for about 10 to 20 minutes.
Moisture and light
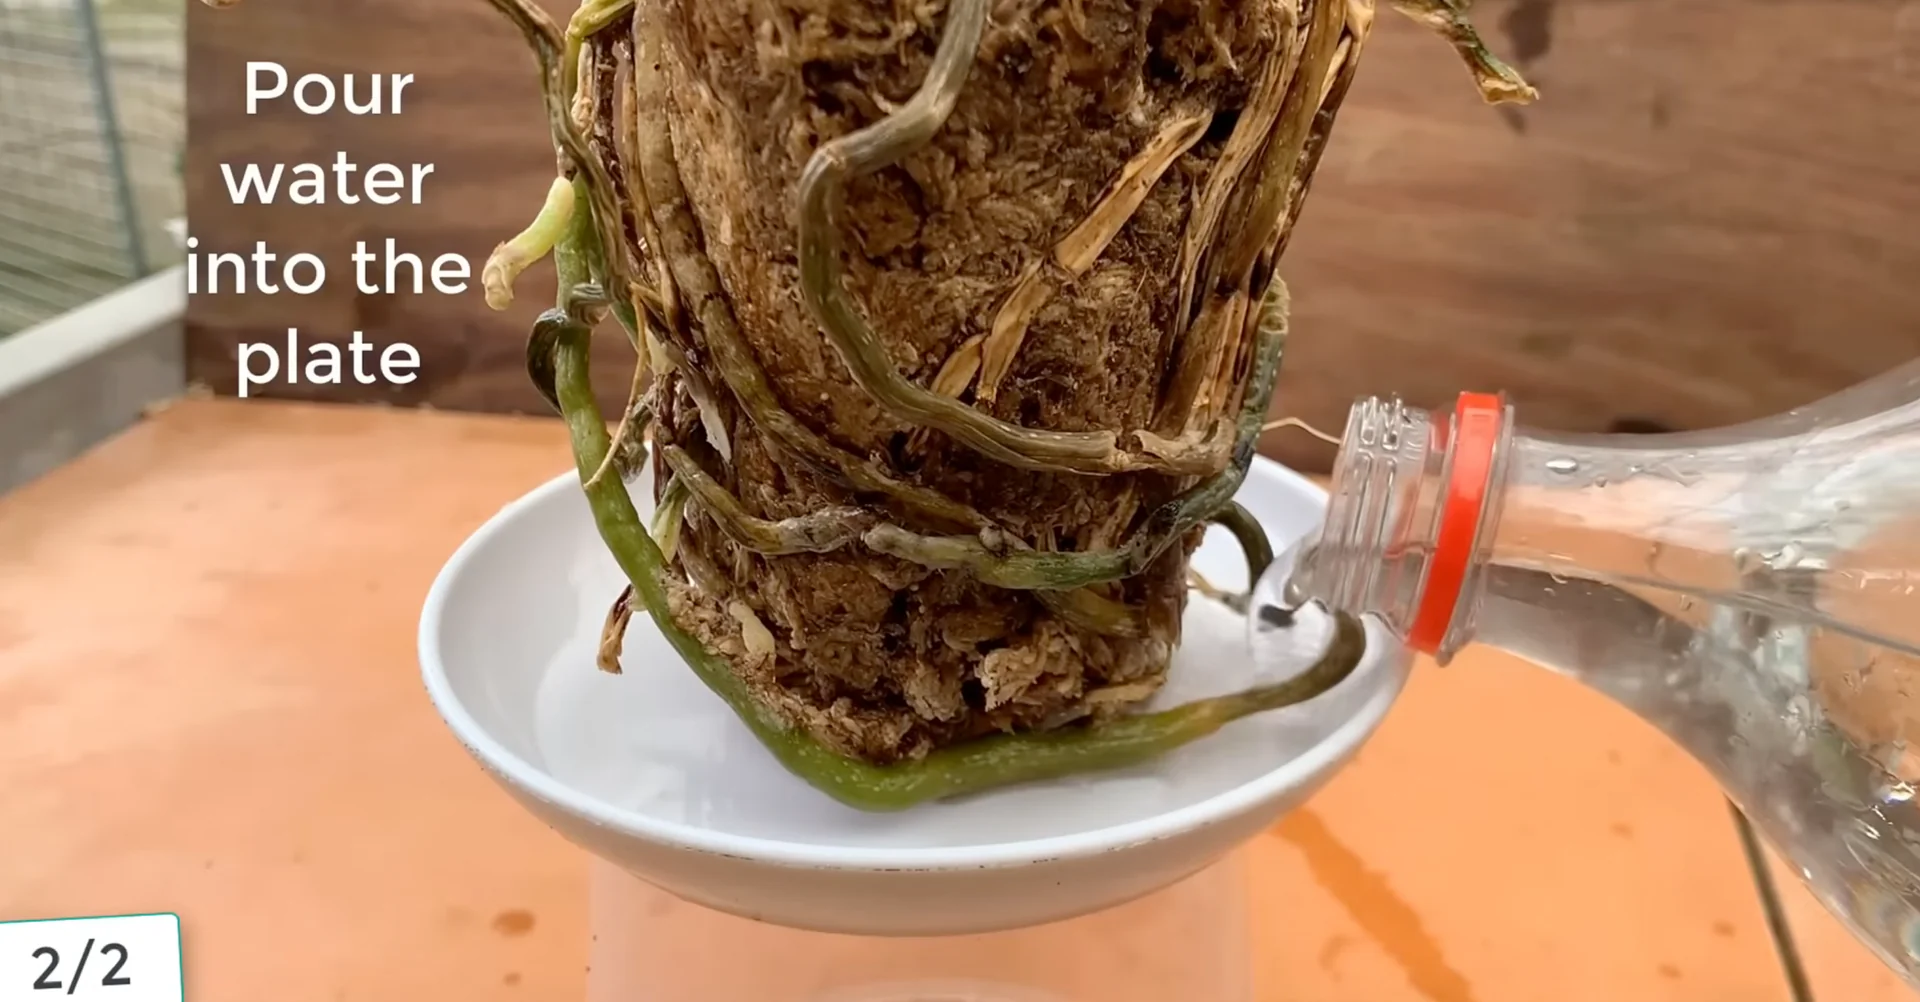
Gently take the orchid out and place it on a plate. Pour water into the plate so the growing medium can absorb it naturally, helping maintain the proper moisture and creating an ideal environment for the orchid’s roots to recover and grow strongly.
Place the orchid pot in a spot with gentle sunlight, good ventilation, and not too much wind. This location helps the plant photosynthesize adequately, maintain moisture, and reduce stress, allowing the roots and new flower buds to grow healthier.
Regularly mist with water whenever the surface of the growing medium is dry. This helps maintain stable moisture, supports even root growth, and provides the best conditions for the plant to recover quickly.
Rice water nutrients
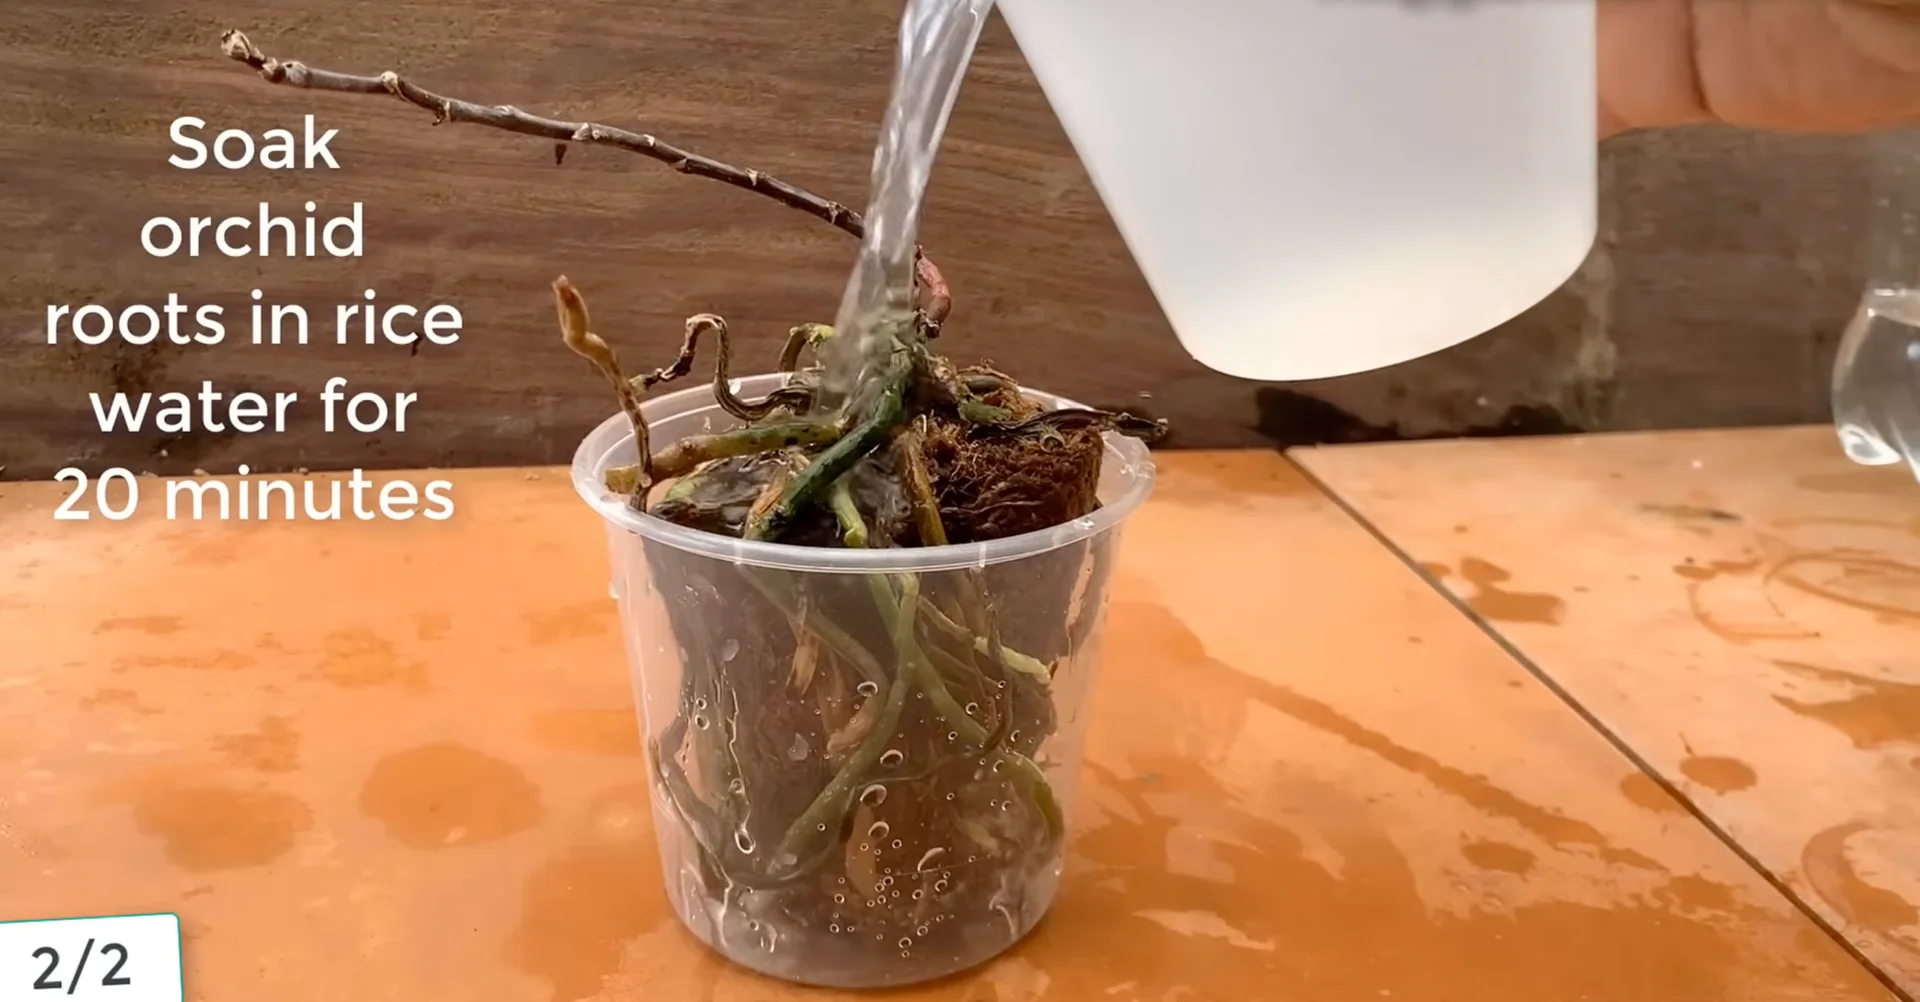
Prepare fertilizer for the orchid. Take 2 tsp of rice into a cup to mix, then add about 1 L of water into the cup.
Rice water helps dissolve the nutrients from the rice, creating a solution rich in vitamins and minerals, naturally nourishing the orchid’s roots, leaves, and flower buds. After mixing, pour the rice water over the roots and growing medium and soak for about 20 minutes.
Do this about once every one to two weeks. Regular repetition provides continuous nutrients, helping the orchid recover more quickly.
After soaking for about 20 minutes, gently take the orchid out and place it in a spot with gentle sunlight. Gentle light helps the roots and leaves photosynthesize effectively while also supporting nutrient absorption from the solution, creating conditions for healthy bud development.
Recovery timeline
The result after 1 month of recovery is truly amazing. From an almost dead rotting orchid, it can recover and grow a healthy new plant from the side of the stem.
Keep watering the orchid with rice water every 1 to 2 weeks. Maintaining this regularly provides continuous nutrients, helping the roots, leaves, and buds grow strongly, resulting in fresh and healthy flowers.
After watering, let the plant soak for about 20 minutes. This helps the nutrients from the solution penetrate deeply into the roots and growing medium, nourishing the orchid and stimulating even bud development.
After the next month, the orchid grows bigger with roots, leaves, and buds developing noticeably, promising vibrant flowers in the near future. Every green leaf, every healthy root, and every new bud is the result of meticulous and patient care.
After the next 5 months, the orchid can fully recover, grow strong, and bloom brilliantly, demonstrating vigorous vitality when properly cared for. Keep caring for your orchid with patience and love.
Final thoughts
Cut back spent parts, feed with the eggshell vinegar solution, water or spray every two weeks, and give gentle light. If rot strikes, clean, disinfect, rebalance the medium, and nourish with rice water on a steady schedule. With patience and careful steps, your orchid will reward you with vigorous growth and vibrant blooms.