A natural and nutrient-rich method for propagating roses by cuttings is perfect for those who prefer safety and gentleness but still want high effectiveness. It helps the cuttings quickly develop roots, sprout strong shoots, and adapt well after planting. For extra growth support after rooting, see how a single cup can boost blooms in One Cup Transform Rose Plant Growth Blooms.
This guide shows how to root rose cuttings using aloe vera, garlic, and oatmeal. Each ingredient supports moisture, protection, and nutrition during the most delicate stage. Follow the steps closely for strong, healthy roots.
1. Rose Propagation by Cuttings: Prepare the Cutting
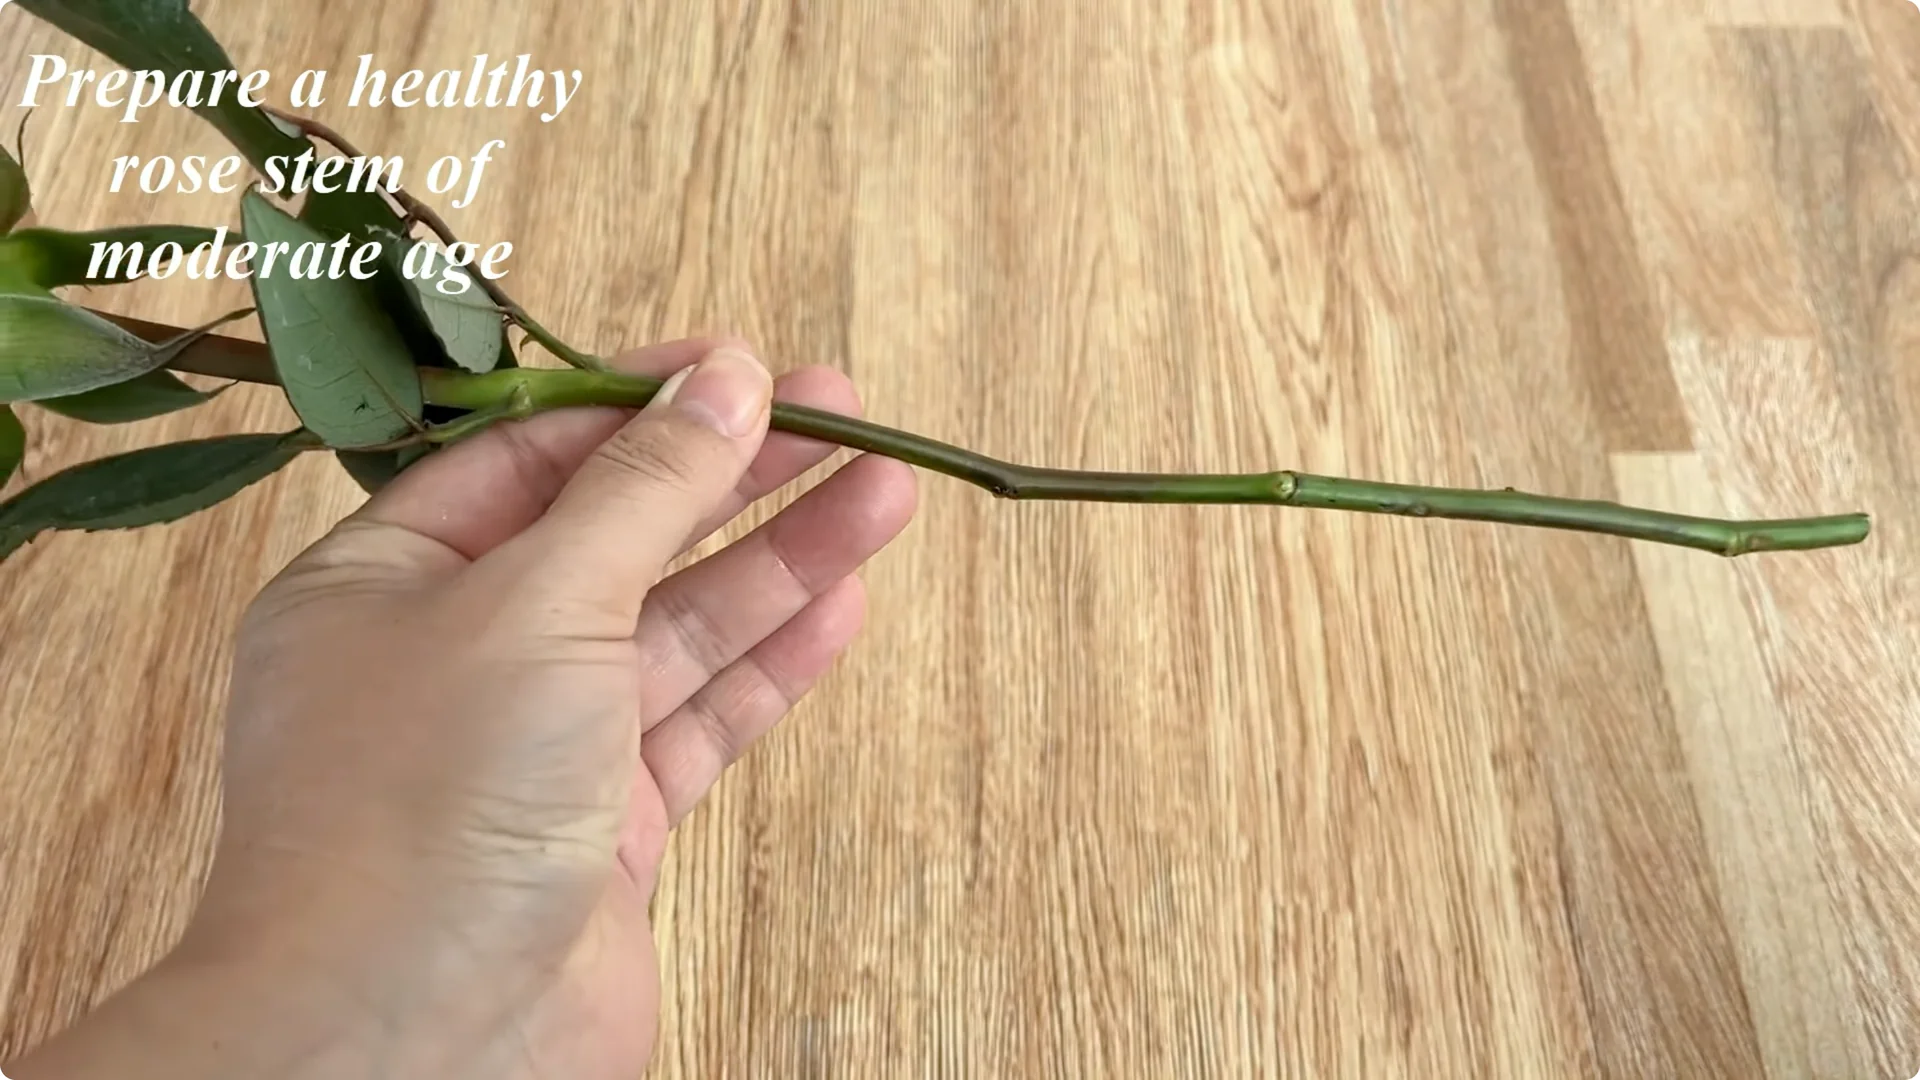
Choose a healthy rose cutting of the right age, free from pests and diseases. Cuttings that are too young lose water easily, while those that are too old root slowly, so the right age is crucial. Remove all leaves, thorns, and old, withered petals to reduce water loss and lower the risk of fungal infection.
Trim the cutting to about 20 cm in length. At the base, gently shave away a thin layer of bark to expose the inner tissue. This stimulates callus formation and supports new root development.
2. Rose Propagation by Cuttings: Aloe Vera Pre-Soak
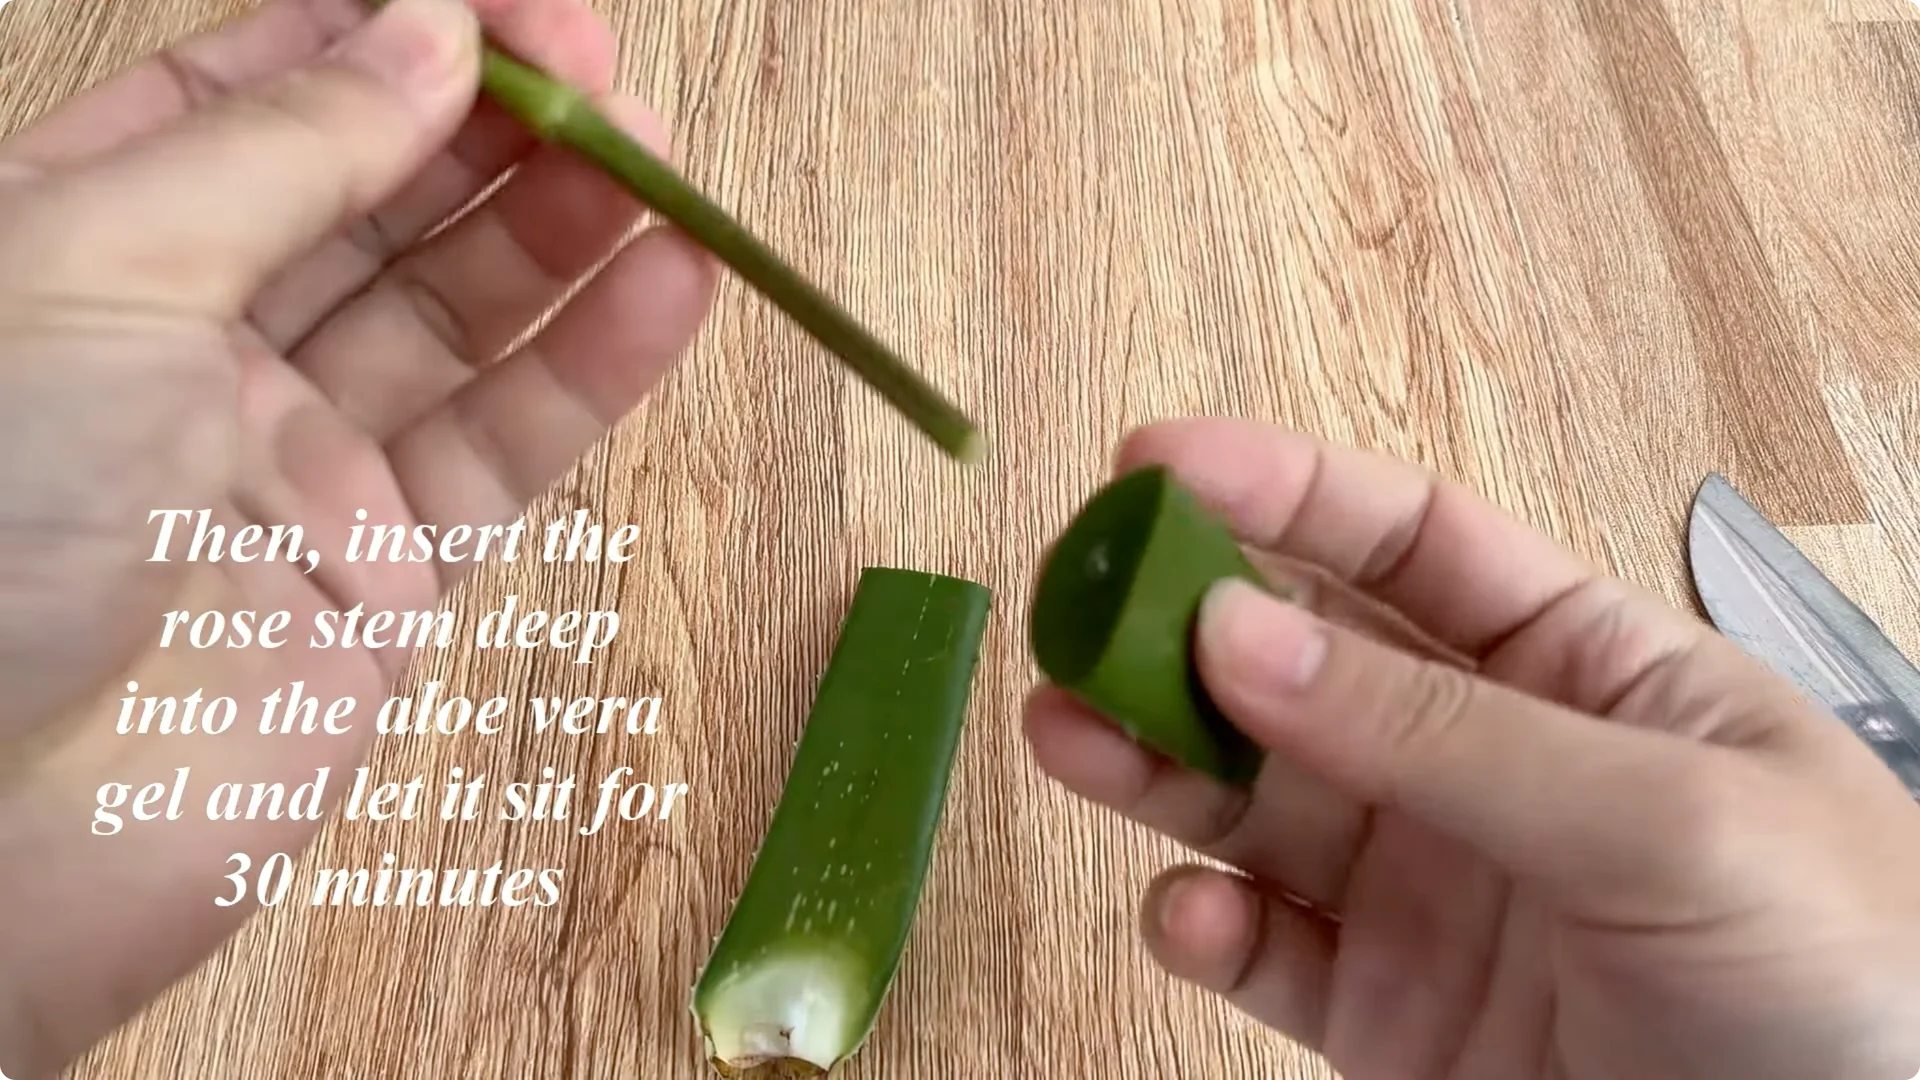
Take a fresh aloe vera leaf and wash it thoroughly to remove dirt and yellow sap. Cut a section about 5-6 cm long, then insert the base of the rose stem deep into the aloe flesh for about 30 minutes. Aloe vera contains enzymes, vitamins, and natural mucilage that moisturize, soothe the cut, and stimulate root tissue regeneration.
During this time, the stem is incubated in a cool, humid environment. This reduces shock and increases the chance of survival when transplanted. For another easy rooting approach, see Simple Trick Grows Rose Stems Roots.
3. Rose Propagation by Cuttings: Make the Rooting Solution
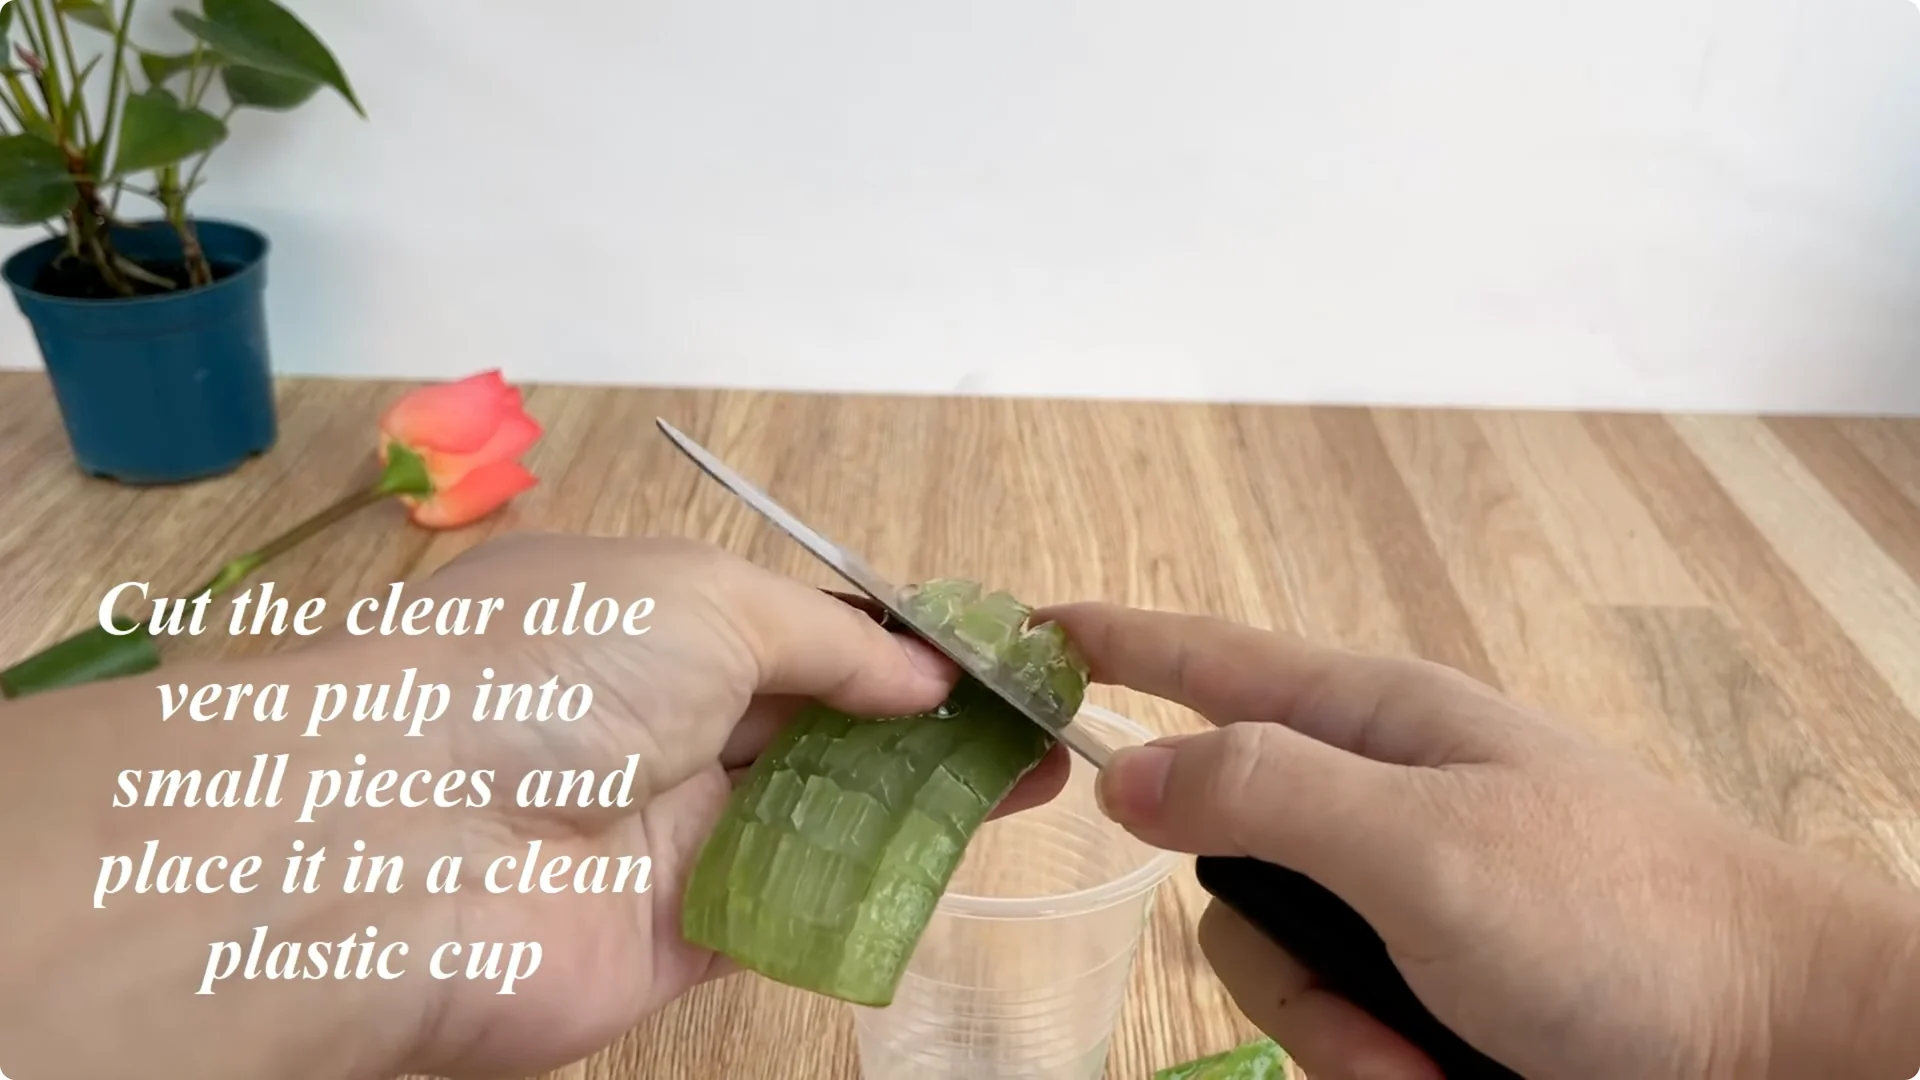
Prepare the aloe
Completely remove the green outer layer from the remaining aloe, keeping only the transparent inner flesh. Cut this aloe flesh into small pieces and put it in a clean plastic cup.
Add garlic
Peel and chop 2 cloves of garlic and add them to the cup with the aloe. Garlic is a powerful antibacterial and antifungal agent, protecting the rooting point from rot and disease during rooting.
Add oatmeal and warm water
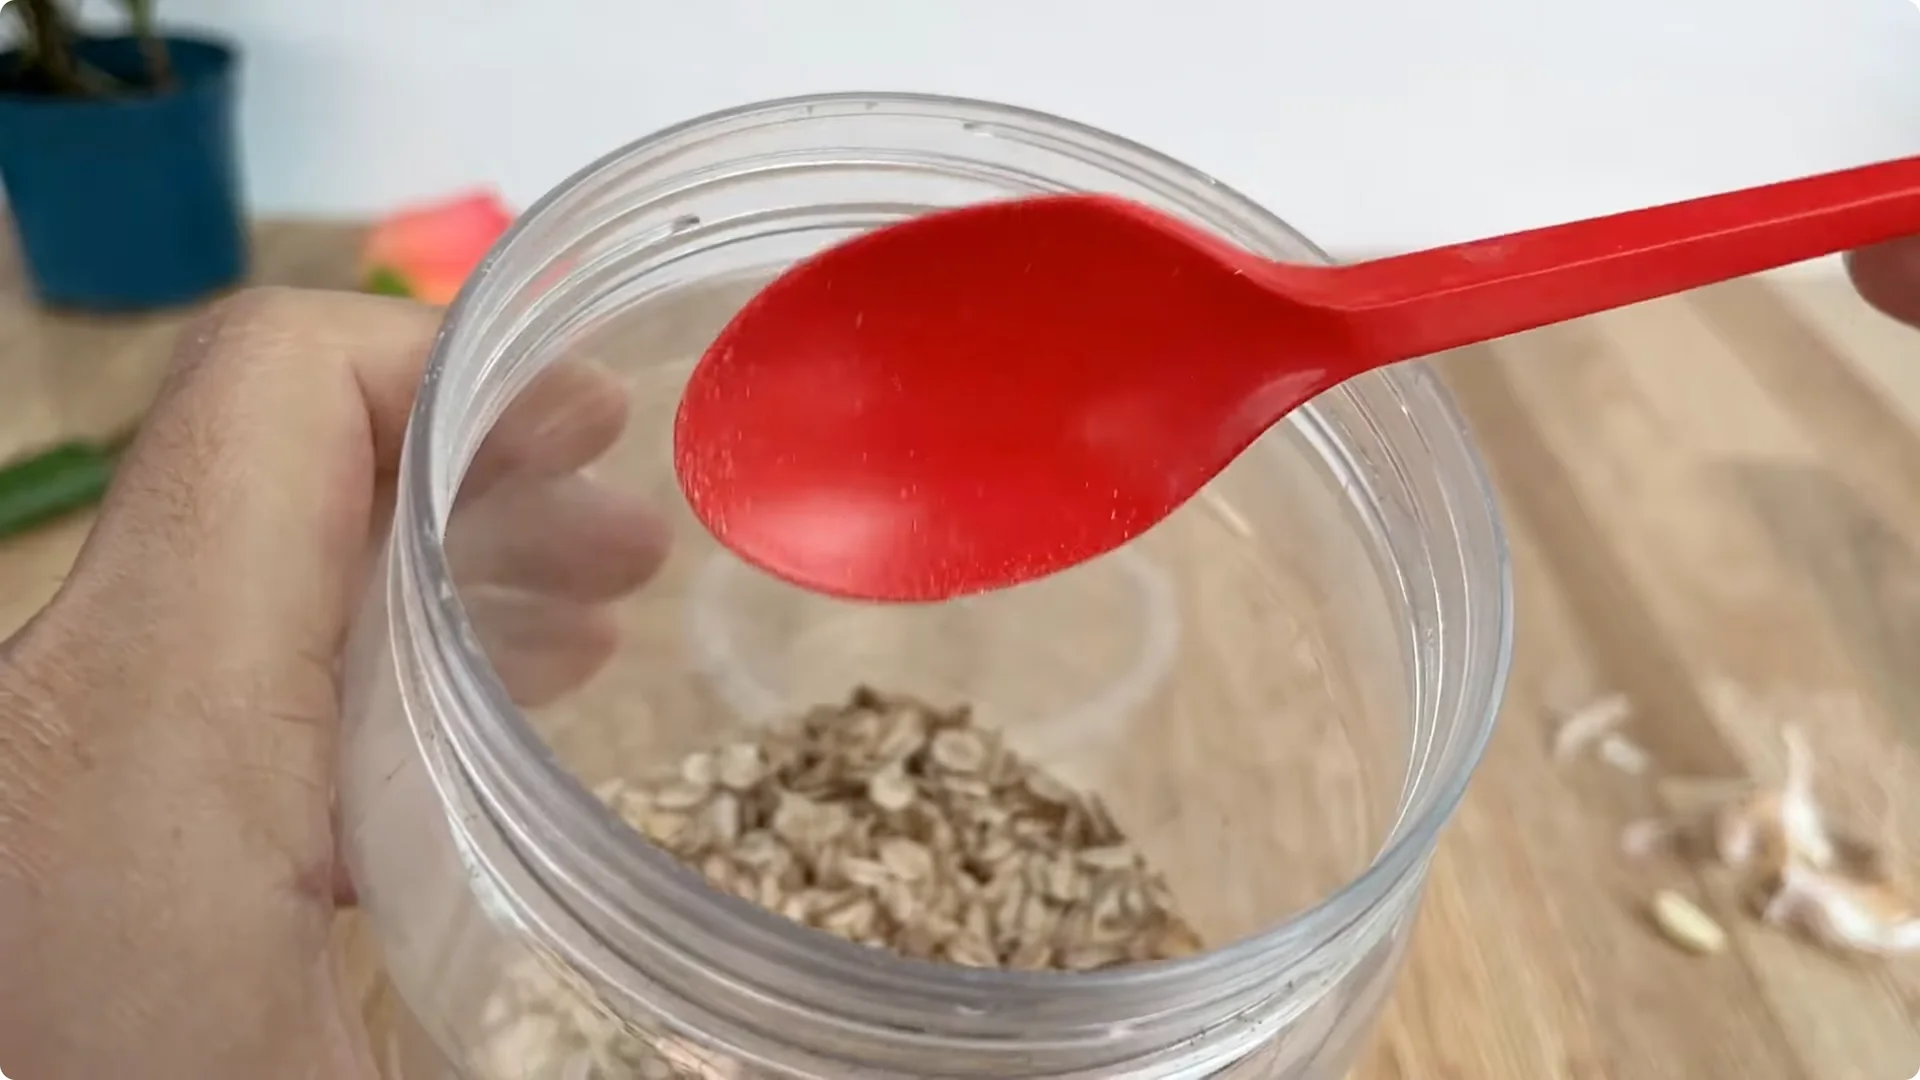
Add 3 tablespoons of oatmeal to the cup. Oatmeal is rich in minerals, B vitamins, and easily biodegradable organic compounds that release nutrients to help young roots develop evenly and healthily. Add 500 ml of warm water, stir well, and let it sit for about 30 minutes so the nutrients dissolve completely.
Filter and dilute
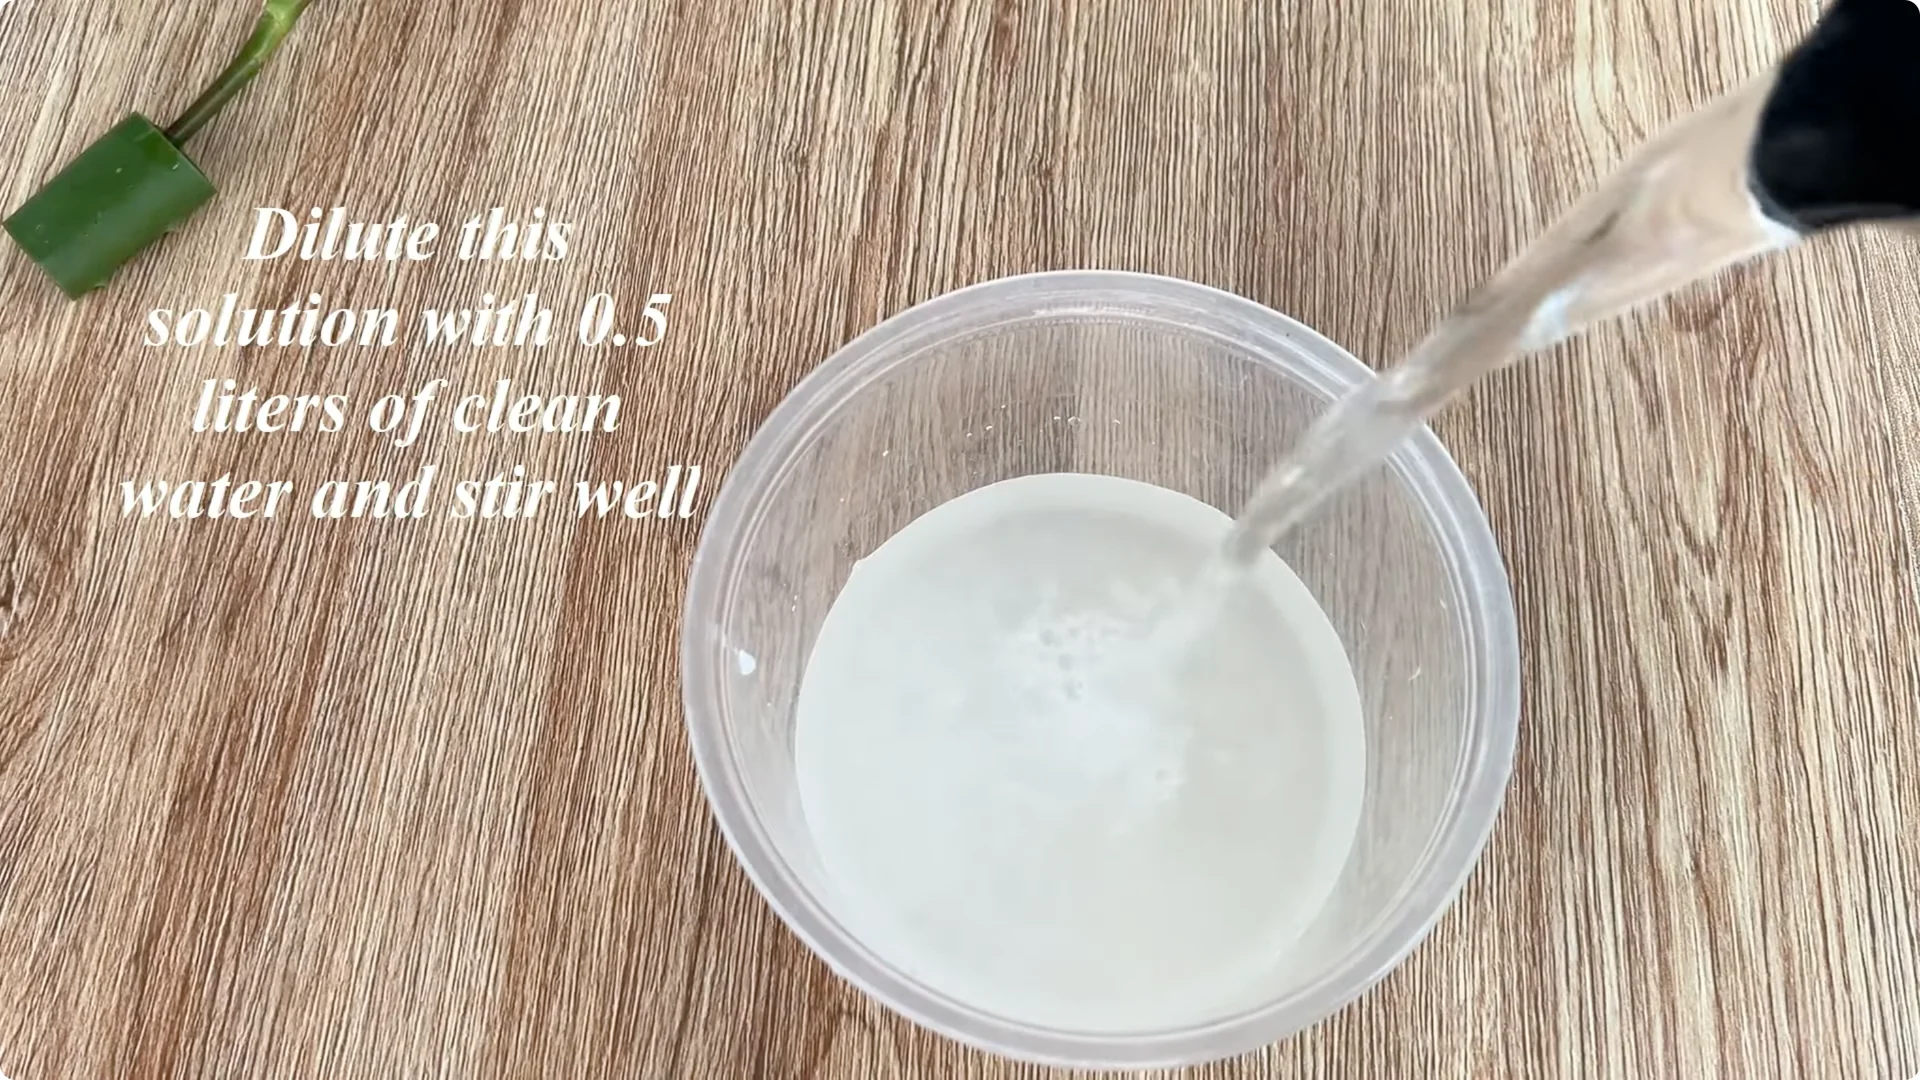
Filter out all residue, keeping only the aloe-garlic-oatmeal solution. Dilute this solution with 0.5 liters of clean water and stir to achieve a mild concentration that is safe for cuttings during the rooting stage.
4. Rose Propagation by Cuttings: Set Up the Rooting Cup
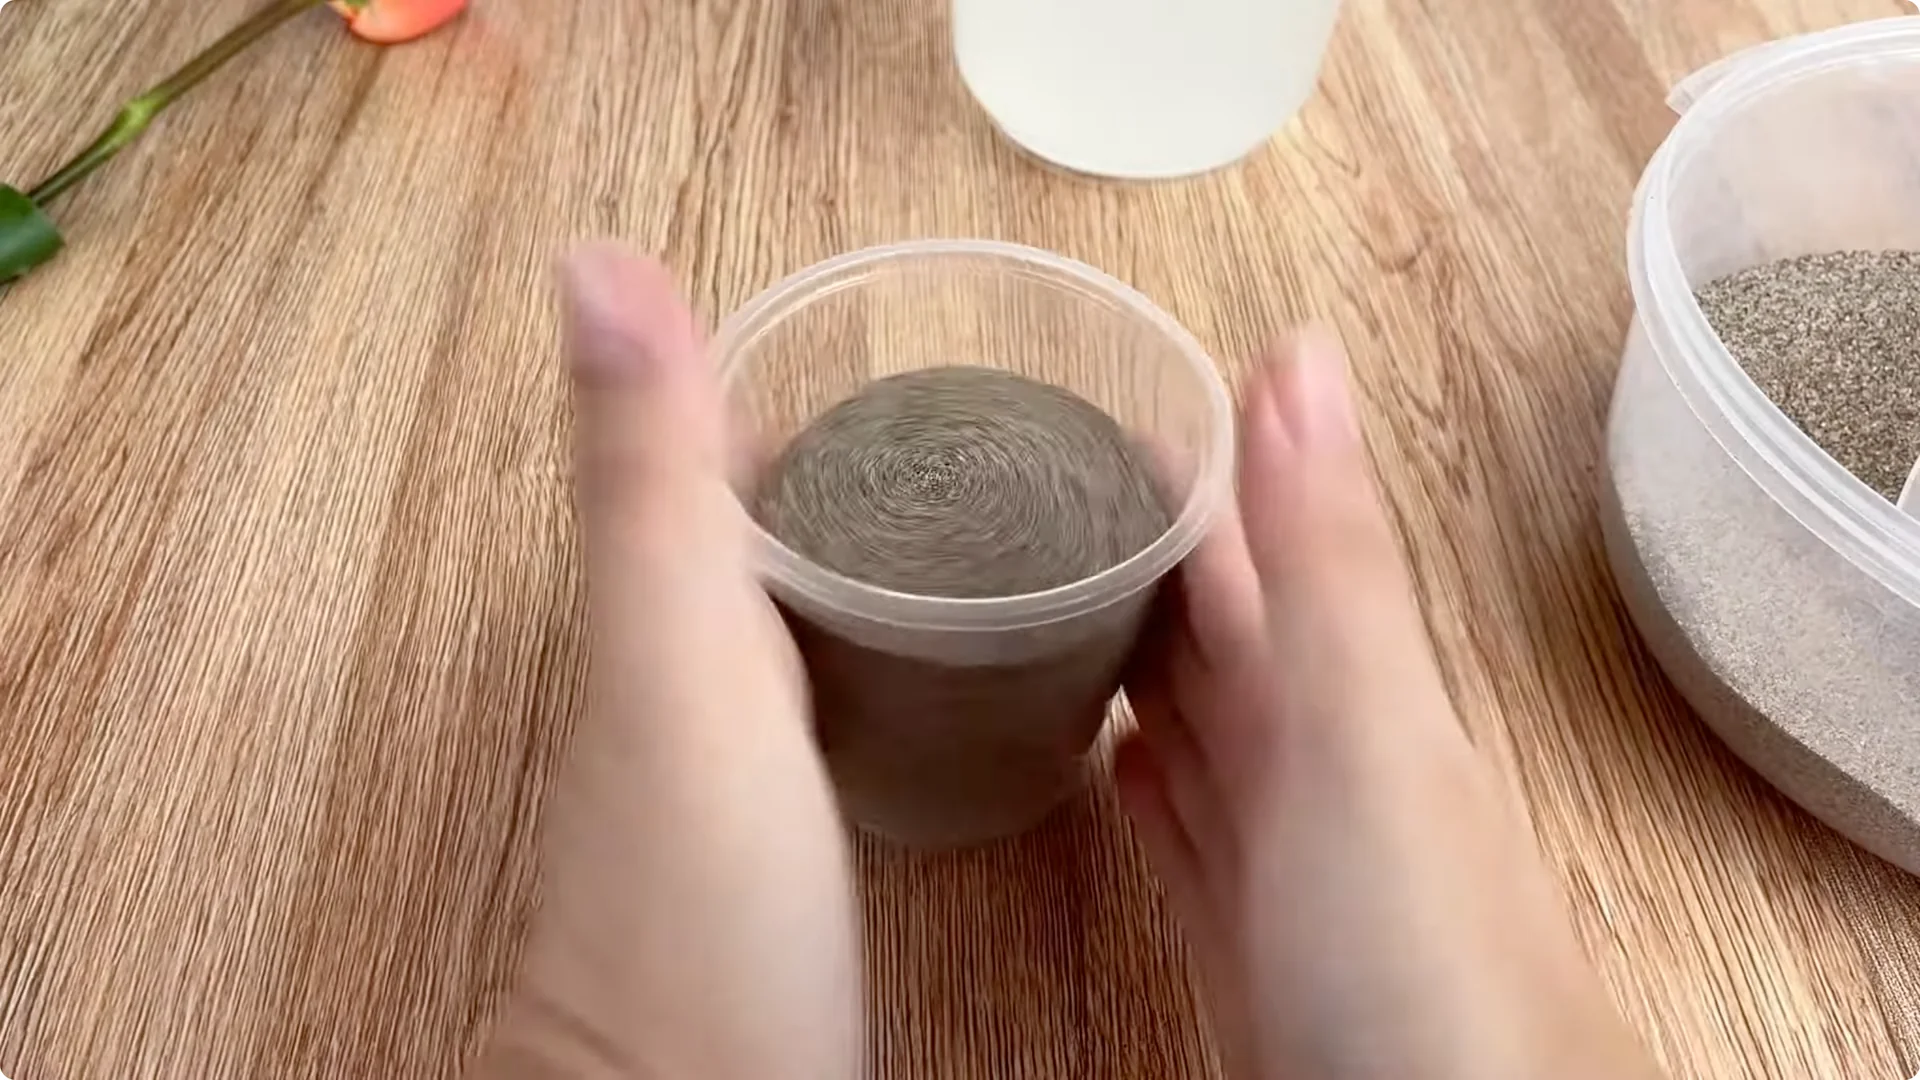
Prepare a clean plastic cup and fill it with treated river sand. River sand drains well, prevents waterlogging, and lets young roots breathe easily. Pour the solution into the sand to moisten the entire substrate.
Gently remove the rose stem from the aloe section and insert it into the center of the cup of sand. Ensure the base of the stem is fully submerged and securely fixed. Cover the cup and stem with a clear plastic bag or cup to create a stable, humid mini greenhouse.
Place the cup in a cool, airy location. Avoid strong winds and harsh sunlight to prevent water loss and thermal shock in the first few days. Keep the substrate evenly moist, not waterlogged.
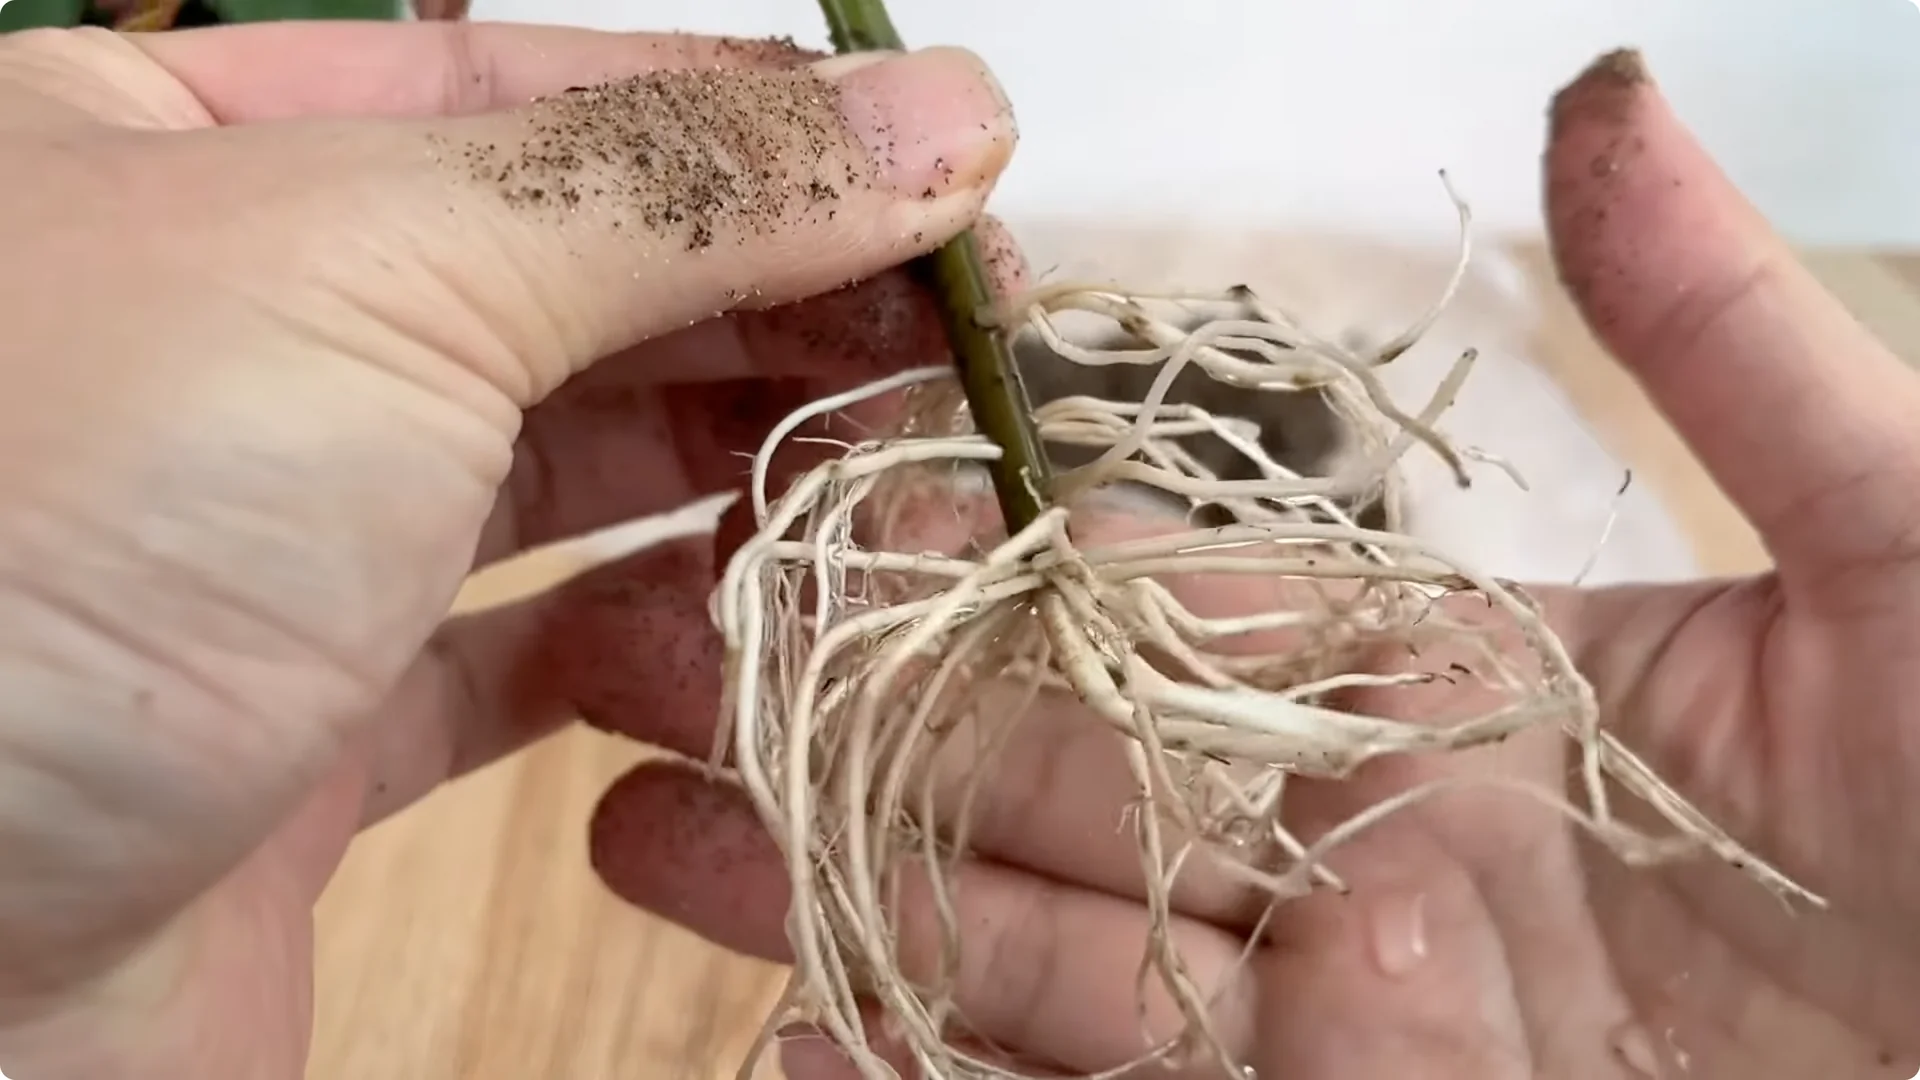
5. Rose Propagation by Cuttings: Early Care and Signs of Success
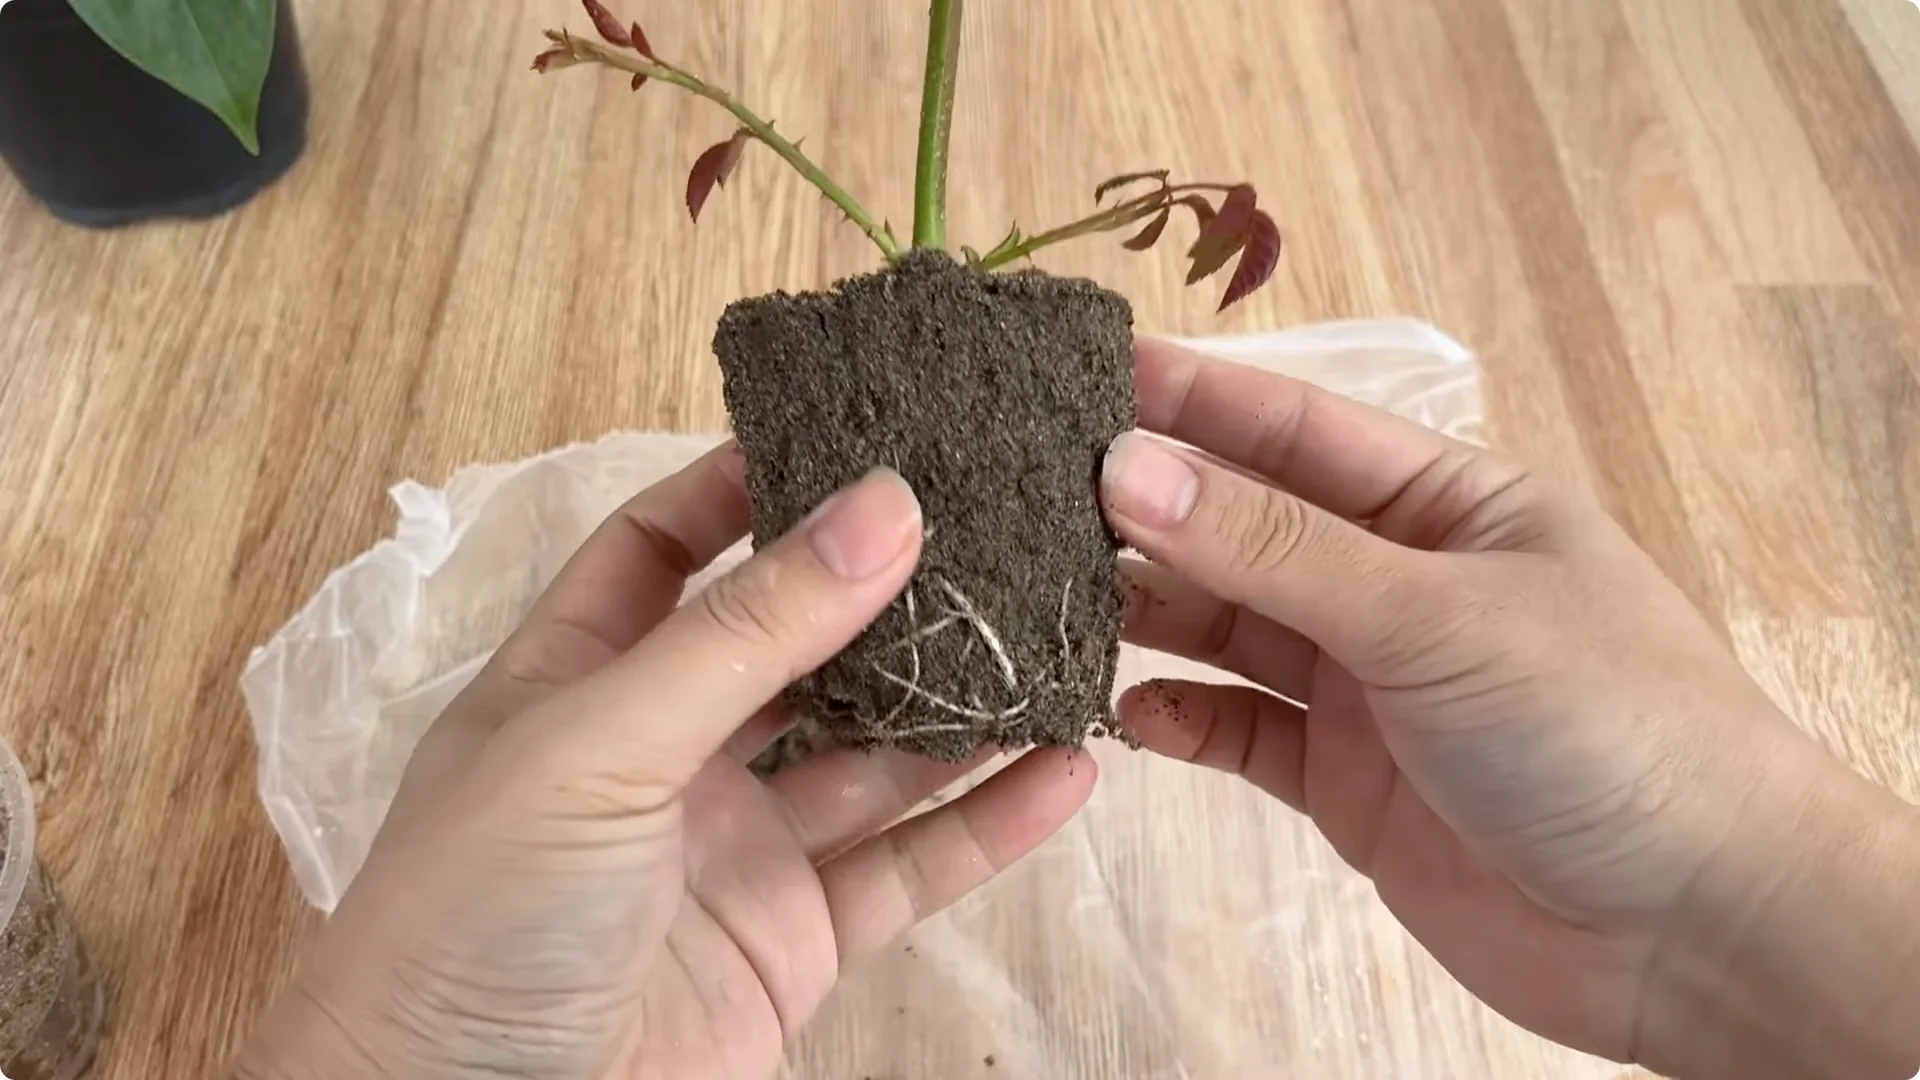
After about 10 days, look for positive signs. New, vibrant green, plump, and healthy shoots will appear on the stem. At the base, new, white, succulent roots gradually form and anchor in the sand, showing the cutting has adapted and is ready for a new growth phase.
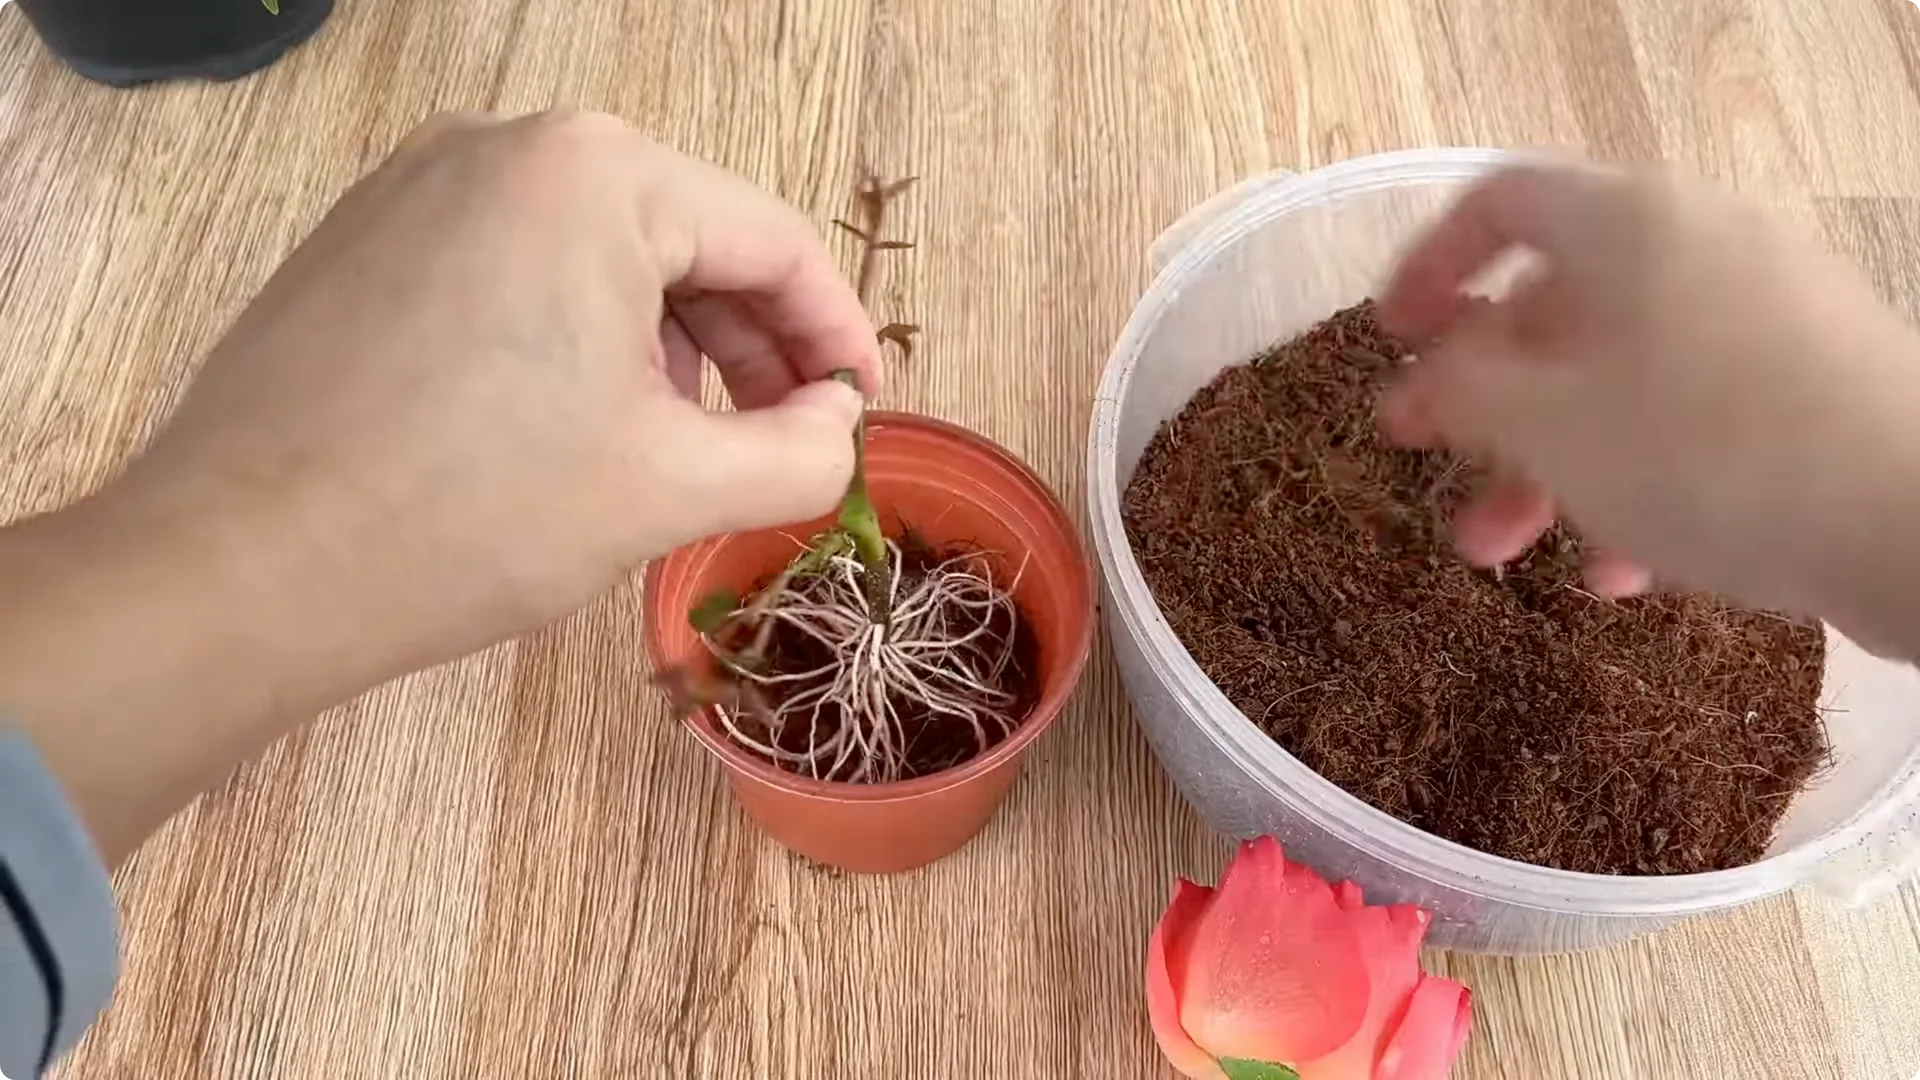
6. Rose Propagation by Cuttings: Transplanting
Once the root system is stable, replant the cutting in a well-draining pot. Use coconut fiber as a growing medium so the roots continue to grow vigorously and stay well aerated. For a nutrient boost after potting, some growers add an egg-based feed as shown in One Egg Transform Rose Roots Blooms.
7. Rose Propagation by Cuttings: Why This Natural Blend Works
The method using aloe vera, garlic, and oatmeal yields noticeable results and helps you feel the harmony between nature and your caring hands. Each ingredient plays a unique role and complements the others to create an ideal environment for new life to begin. When young shoots emerge and healthy white roots form, it reflects technique and also patience, meticulousness, and love for the plant.
From simple cuttings planted today, your garden becomes more vibrant tomorrow. Each blossom carries the quiet yet enduring joy of the grower who poured heart and soul into every small step. For strengthening shoots and blooms as plants mature, see the gentle tonic in One Cup Transform Rose Plant Growth Blooms.
Final Thoughts
Choose the right cutting, prep it carefully, and let aloe vera pre-soak reduce shock. Feed and protect with the aloe-garlic-oatmeal solution, root in clean river sand, and maintain a stable, humid environment. Transplant once roots are strong, and keep nurturing for vigorous growth and abundant blooms.