Hello everyone! May you always maintain your enthusiasm and patience as you nurture your little rose cuttings in your garden!
Today, we will continue exploring a completely natural method of rooting cuttings, which offers surprising results in stimulating root growth, preventing fungal diseases, and nourishing rose cuttings from the very first days. For a related approach, see this surprising method.
Clove and Potato Rose Propagation Steps
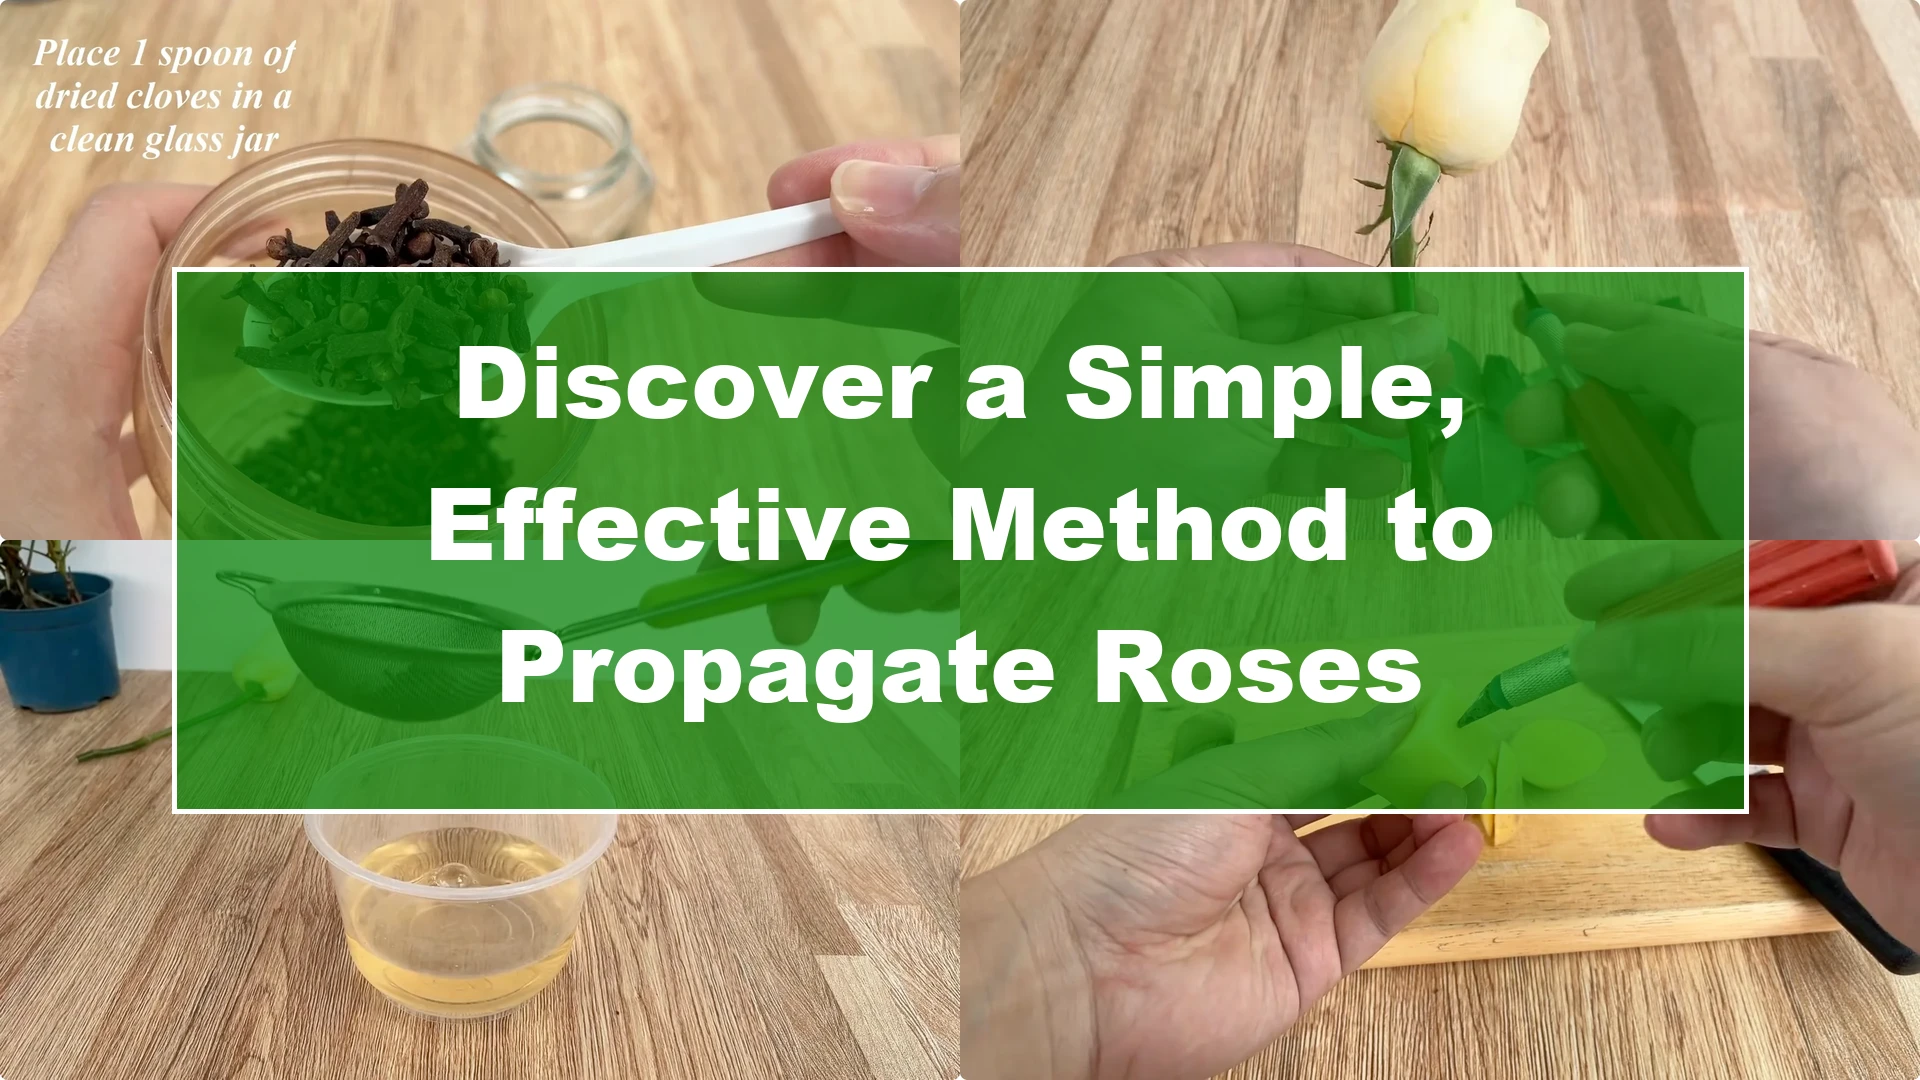
1. Prepare the clove solution
First, start by preparing the clove solution. Take a spoonful of dried clove buds and put them in a clean glass jar, then pour about 500 ml of boiling water into the jar.
Seal the lid tightly and let it sit until the water cools completely. During this process, the natural active ingredients in the cloves will gradually release into the water, creating a solution with excellent antibacterial and antifungal properties, helping to protect the rose cuttings from harmful agents during this sensitive rooting stage.
If you want a speed-focused approach, see the faster method.
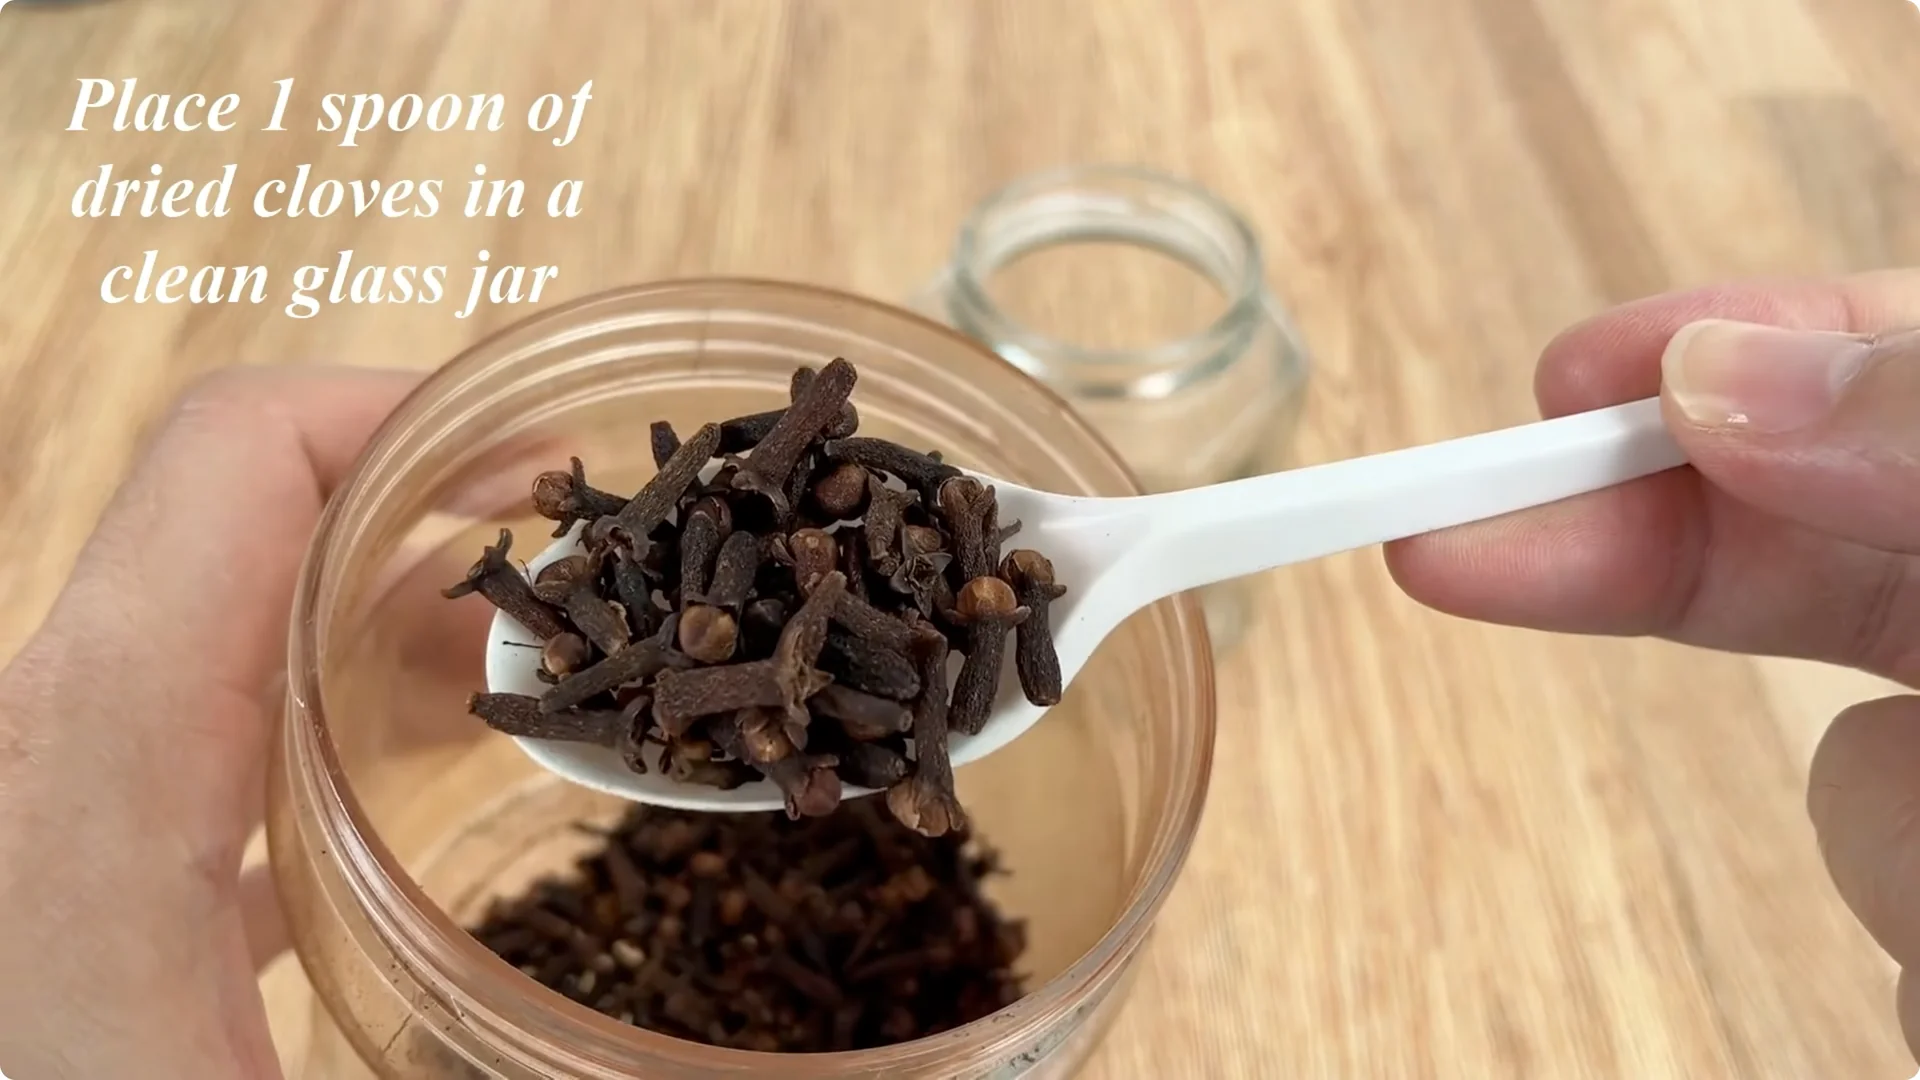
2. Prepare the rose cuttings
While waiting for the clove solution to cool, prepare the rose cuttings. Choose a healthy rose branch of moderate age, with a sturdy stem but still full of vitality.
Use scissors or a sharp knife to remove all leaves and thorns, and also remove any old, withered, or damaged petals. Cleaning the branch in this way will help reduce water loss, decrease the risk of disease, and allow the branch to concentrate its energy on forming new roots.
Then, trim the rose branch, leaving only about 20 cm in length, ensuring that healthy dormant buds are still present.
3. Soak in the clove solution

Once the clove water has completely cooled, filter out all the residue, keeping only the clear solution. Soak the rose branch in this clove solution for about 30 minutes.
This time is sufficient for the solution to penetrate the surface of the stem and cuts, providing gentle disinfection and creating a favorable environment for callus formation – an important prerequisite for the development of new roots later.
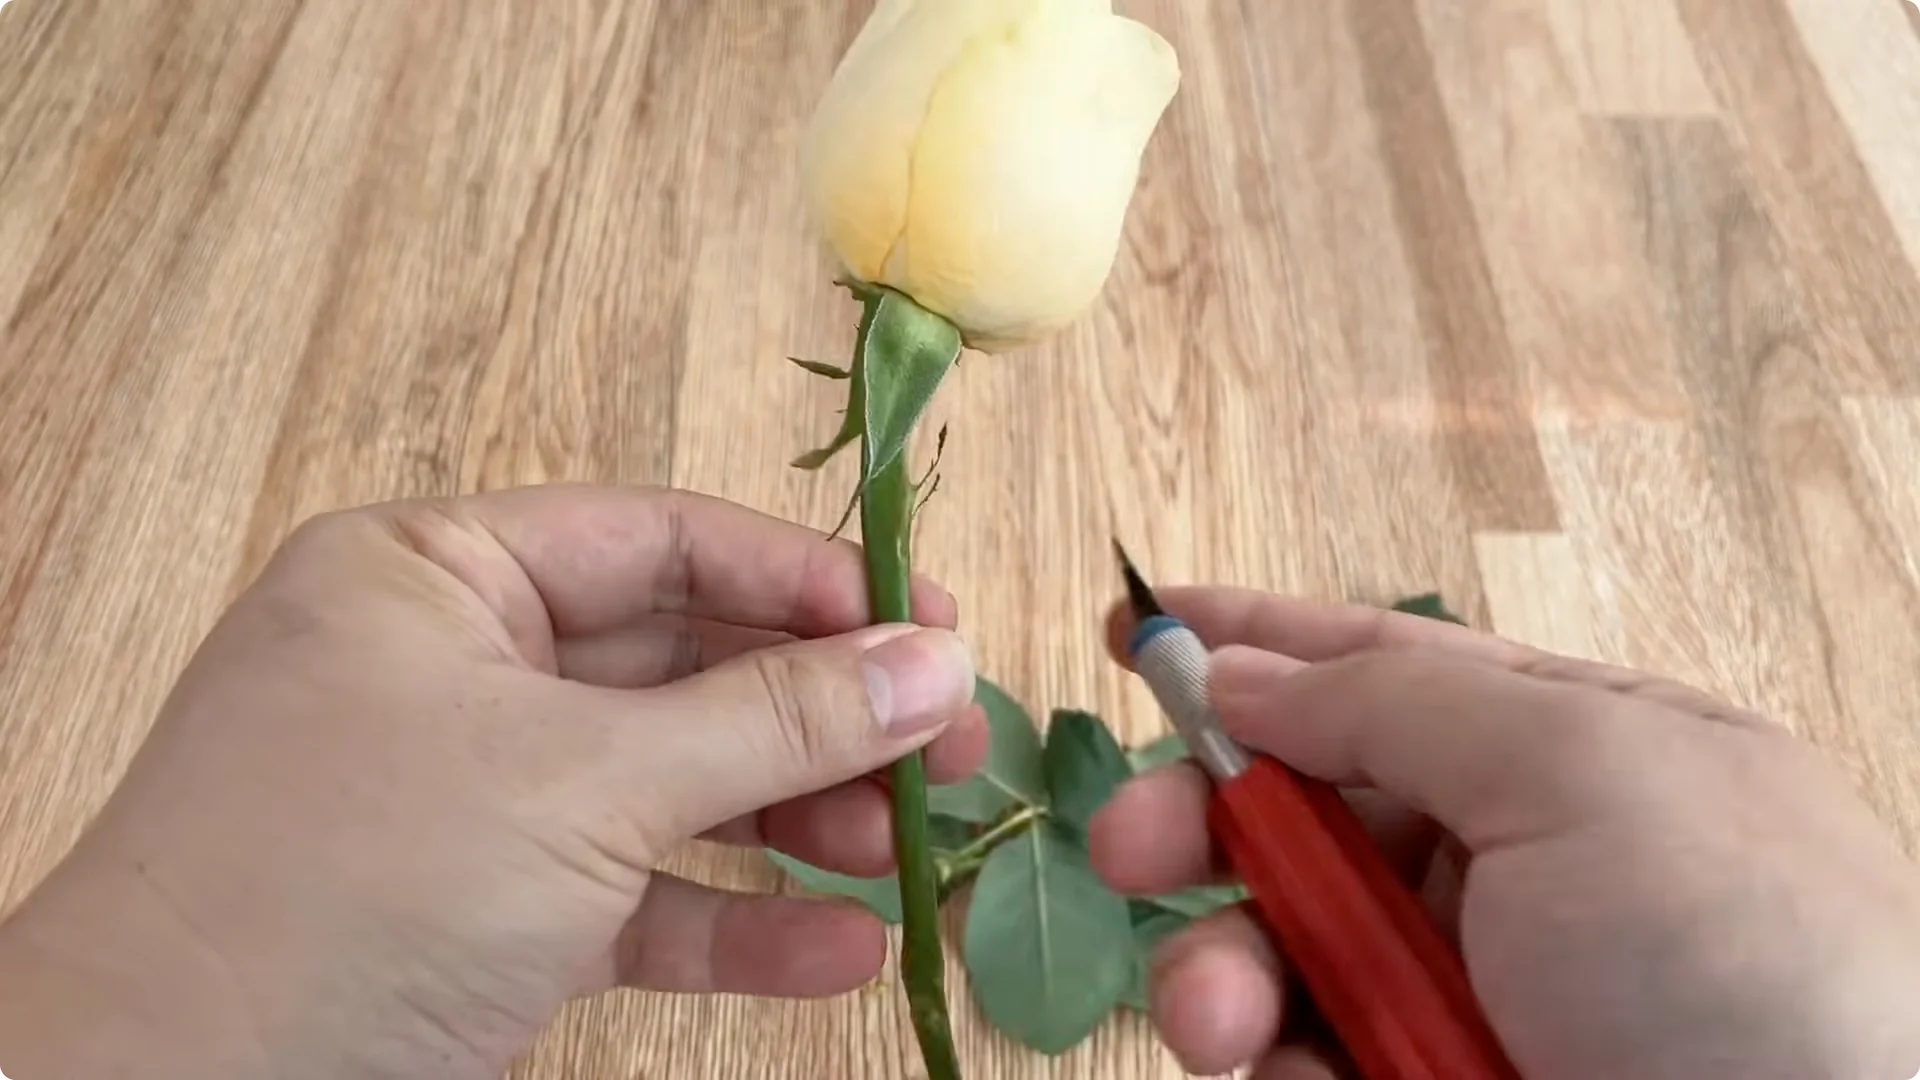
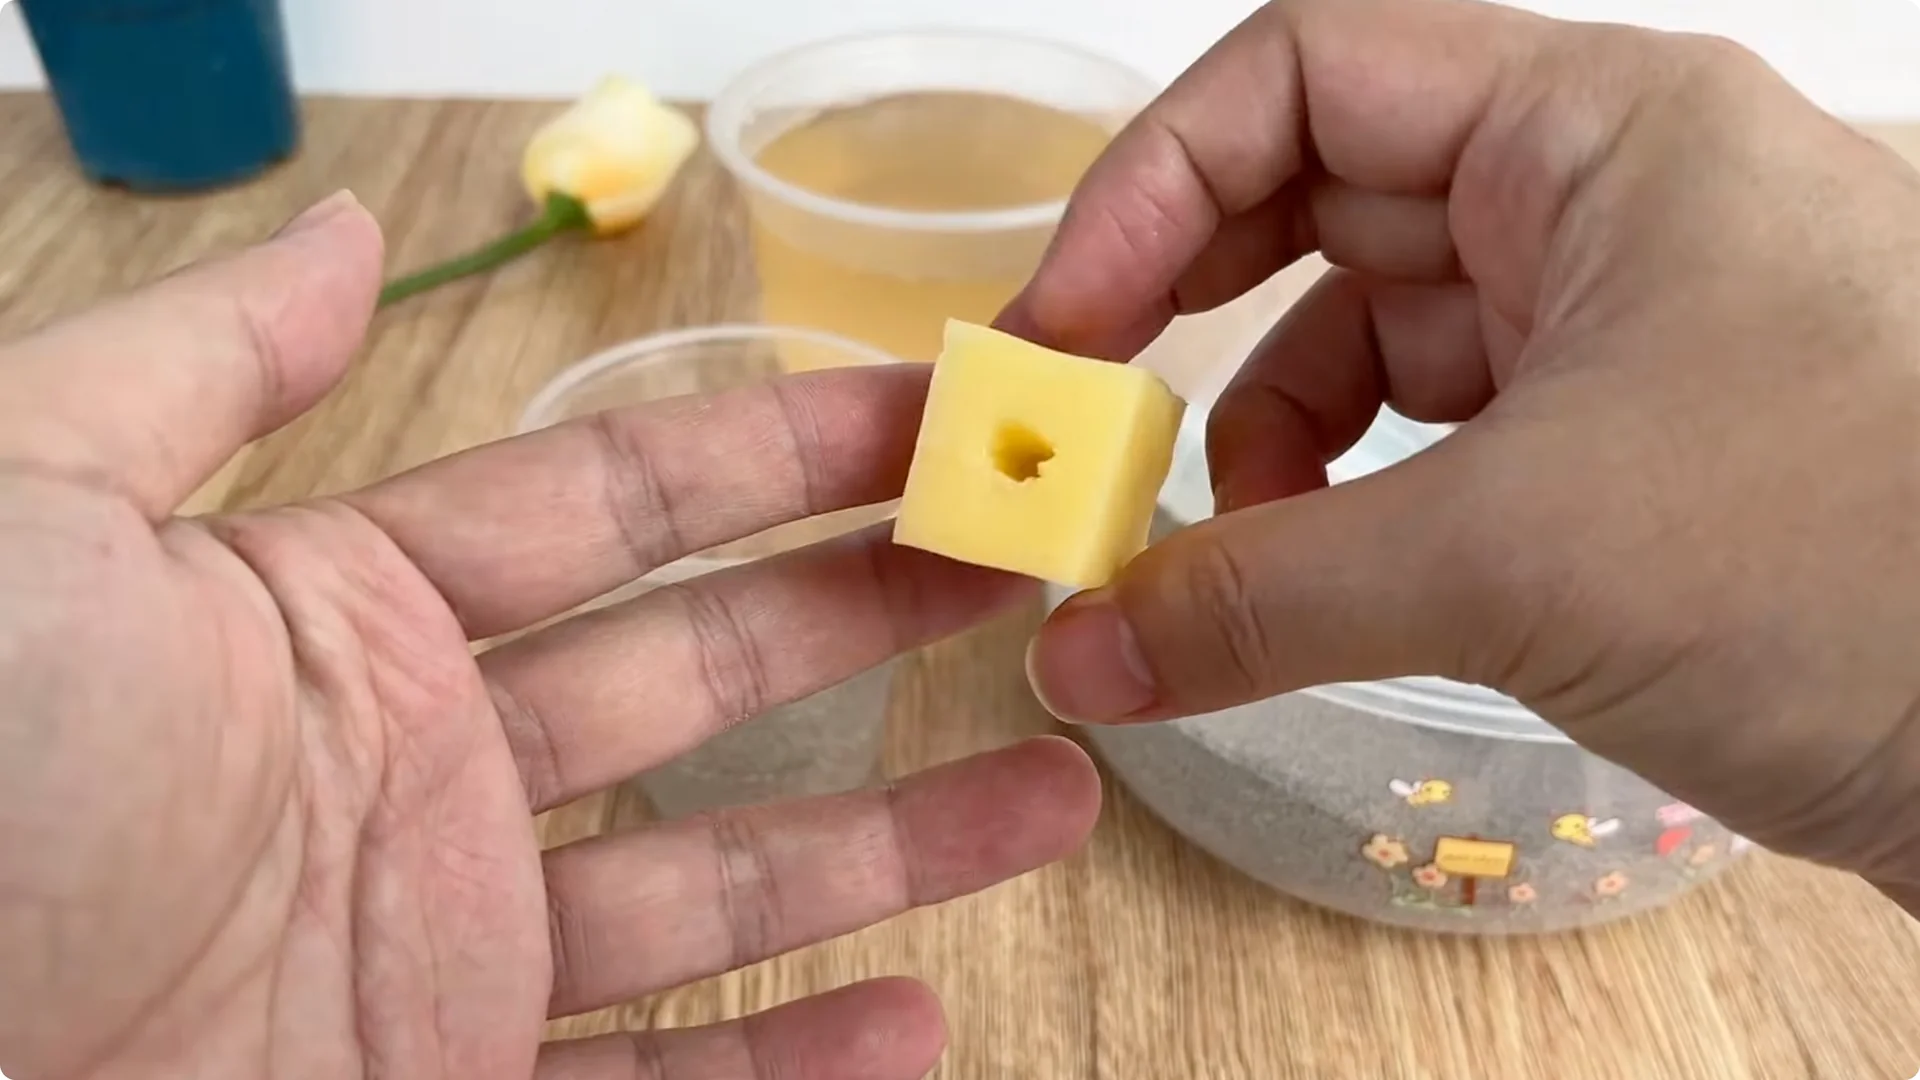
4. Prepare the potato nutrient
Next, prepare the potatoes. Take a fresh potato, wash it, and cut it in half.
From this half, cut out a piece of potato about 3×3 cm in size, then use a small knife to make a hole in the center of the potato piece and set it aside. This piece of potato will act as a living nutrient source, providing starch and stable moisture to the base of the rose stem.
Cut the remaining potato into small pieces and put it in a clean plastic cup. Add 500 ml of warm water, stir well, and let it sit for about 30 minutes to allow the nutrients in the potato to dissolve into the water.
5. Combine the solutions
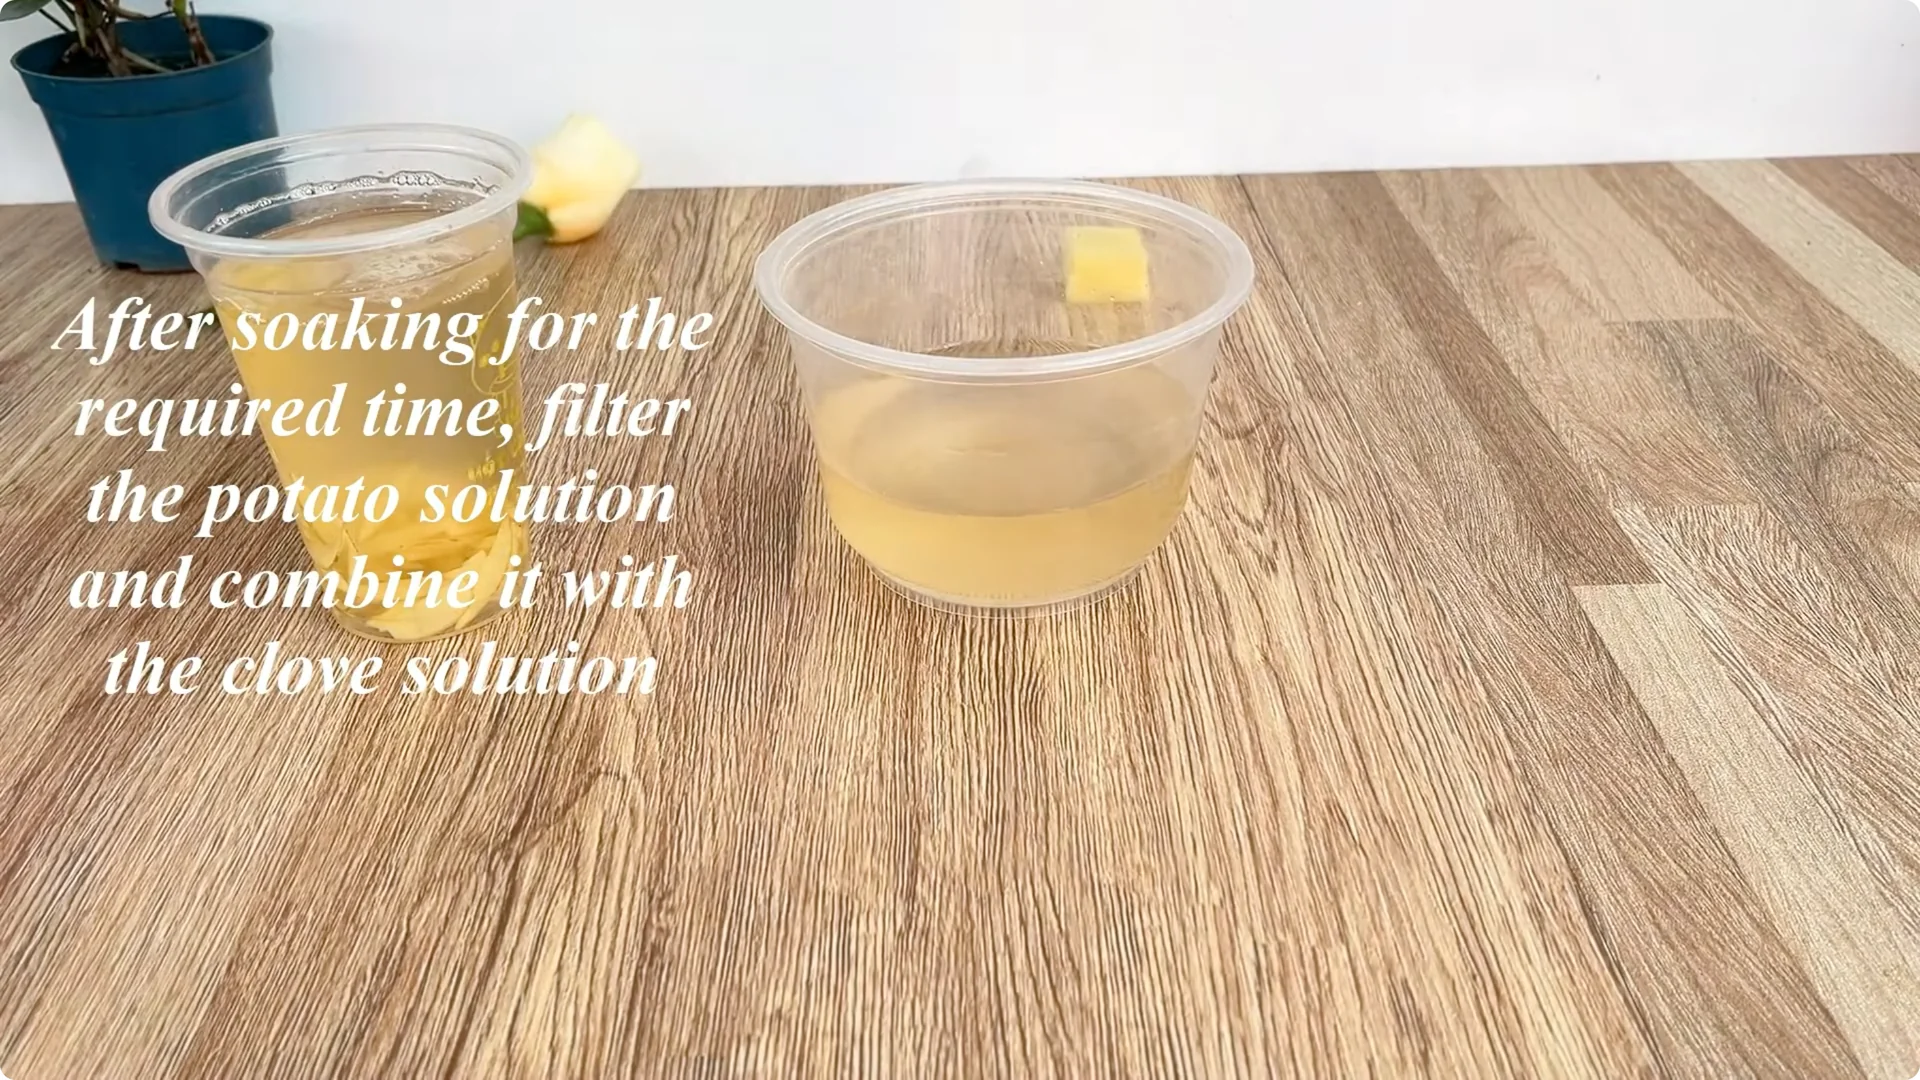
After both solutions have soaked for the required time, filter the potato solution, completely removing the pulp. Mix this potato solution with the clove solution prepared earlier, stirring well to create a nutrient-rich mixture that is both antibacterial and helps nourish young roots naturally.
6. Plant in sand with the potato
Prepare another clean plastic cup and fill it about one-third full with treated river sand. Gently insert the base of the rose cutting into the small hole already drilled in the potato slice.
Place both the potato slice and the rose cutting into the cup of sand. Continue adding sand until the cup is full, then gently press around the cutting to secure it and prevent shaking that could damage the delicate tissue.
Slowly pour the potato-clove solution into the cup of sand, ensuring the sand is evenly moist but not waterlogged. River sand helps with drainage, preventing waterlogging and creating a well-ventilated environment for root development.
7. Create a humid microclimate
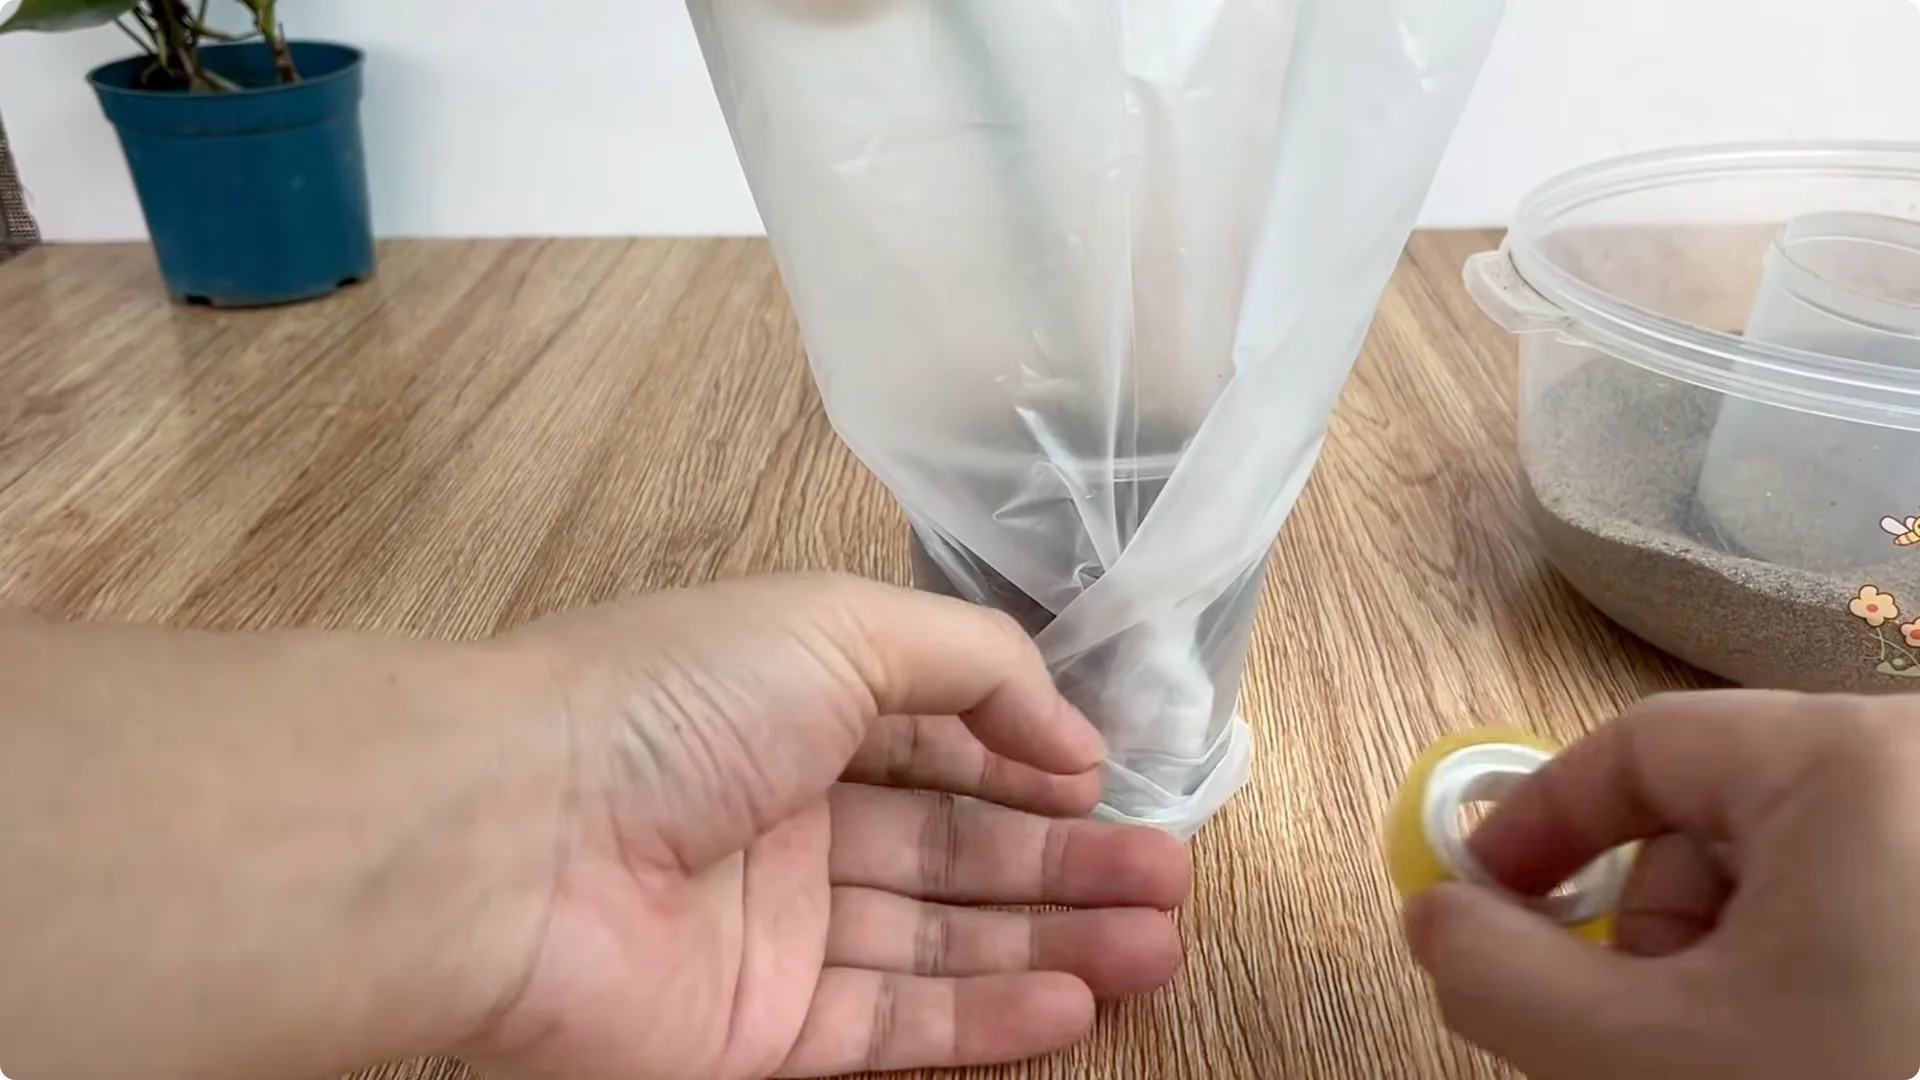
Cover the entire cup and rose cutting with a clear plastic bag or plastic cup. This covering will help retain moisture, stabilize the temperature, and create a favorable microclimate for the cutting to develop.
Place the cup in a cool, airy place, away from strong winds and direct sunlight.
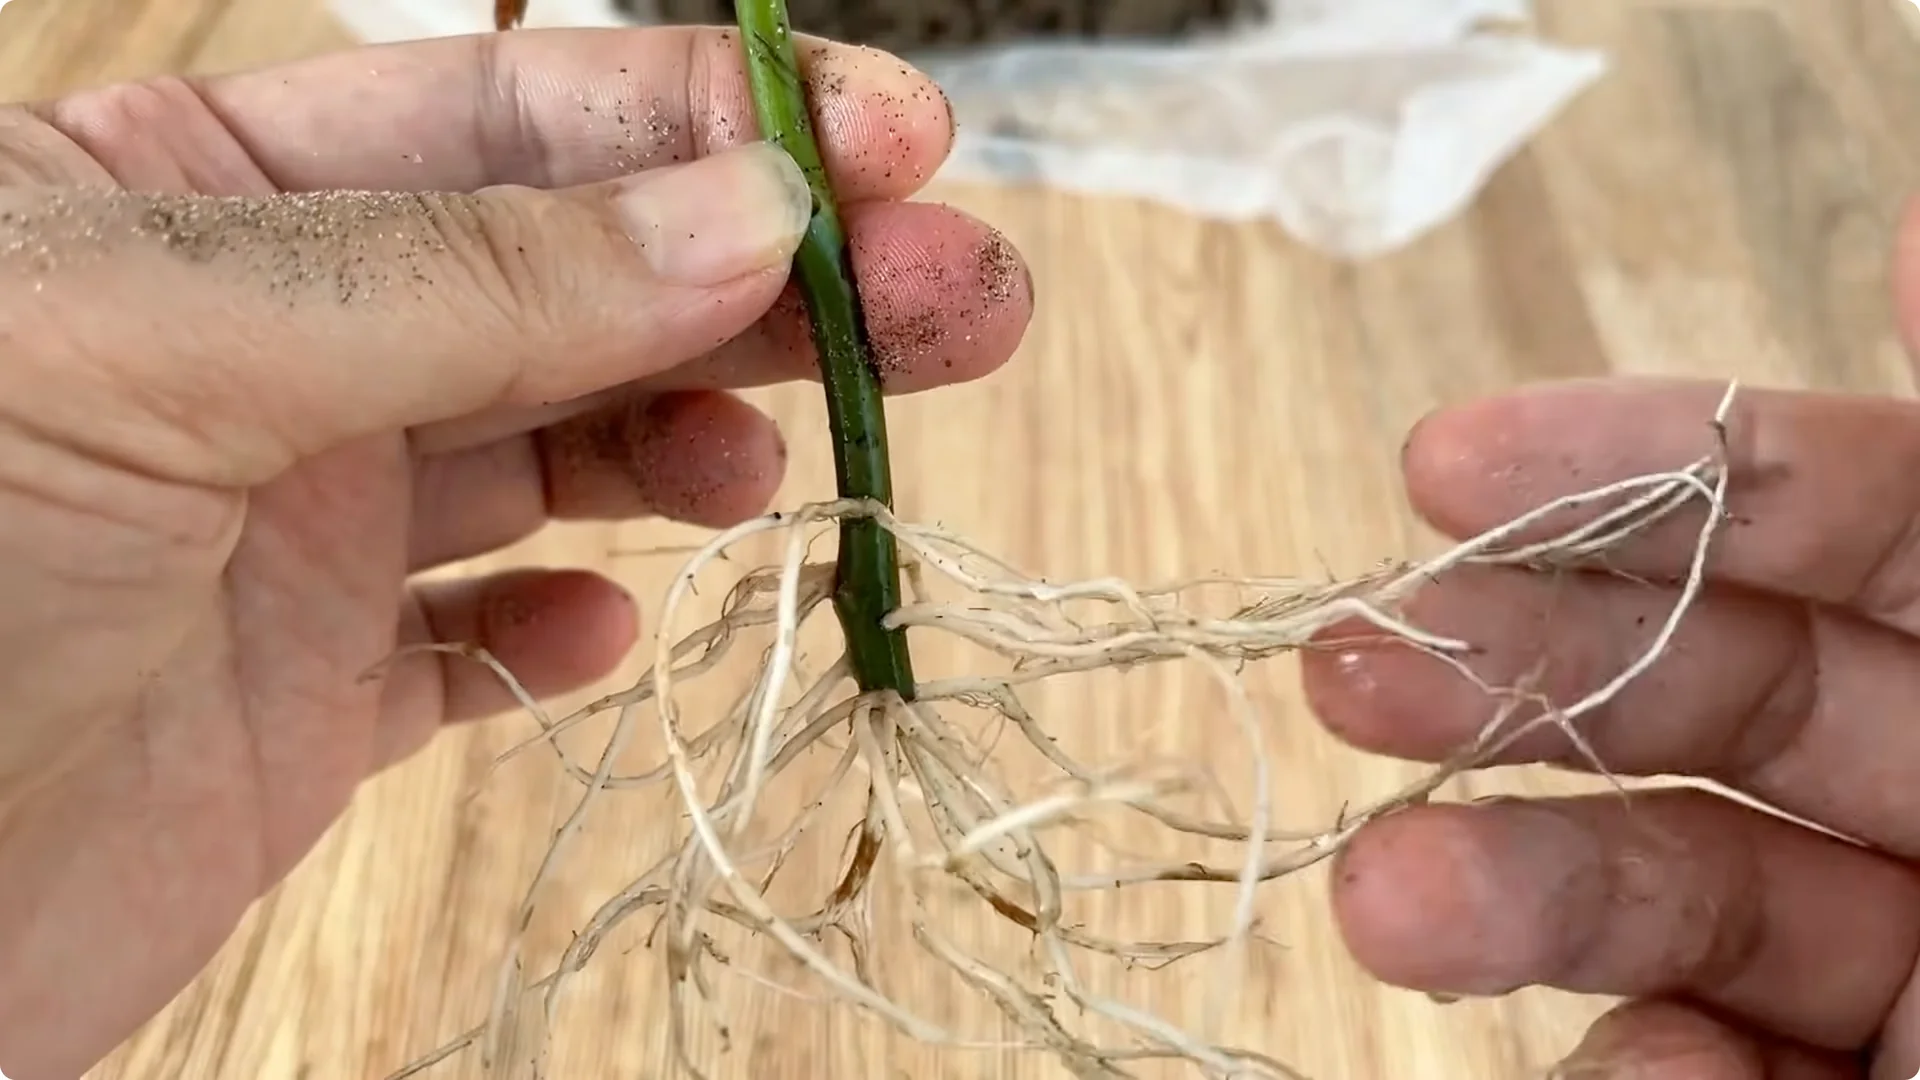
8. Watch for progress
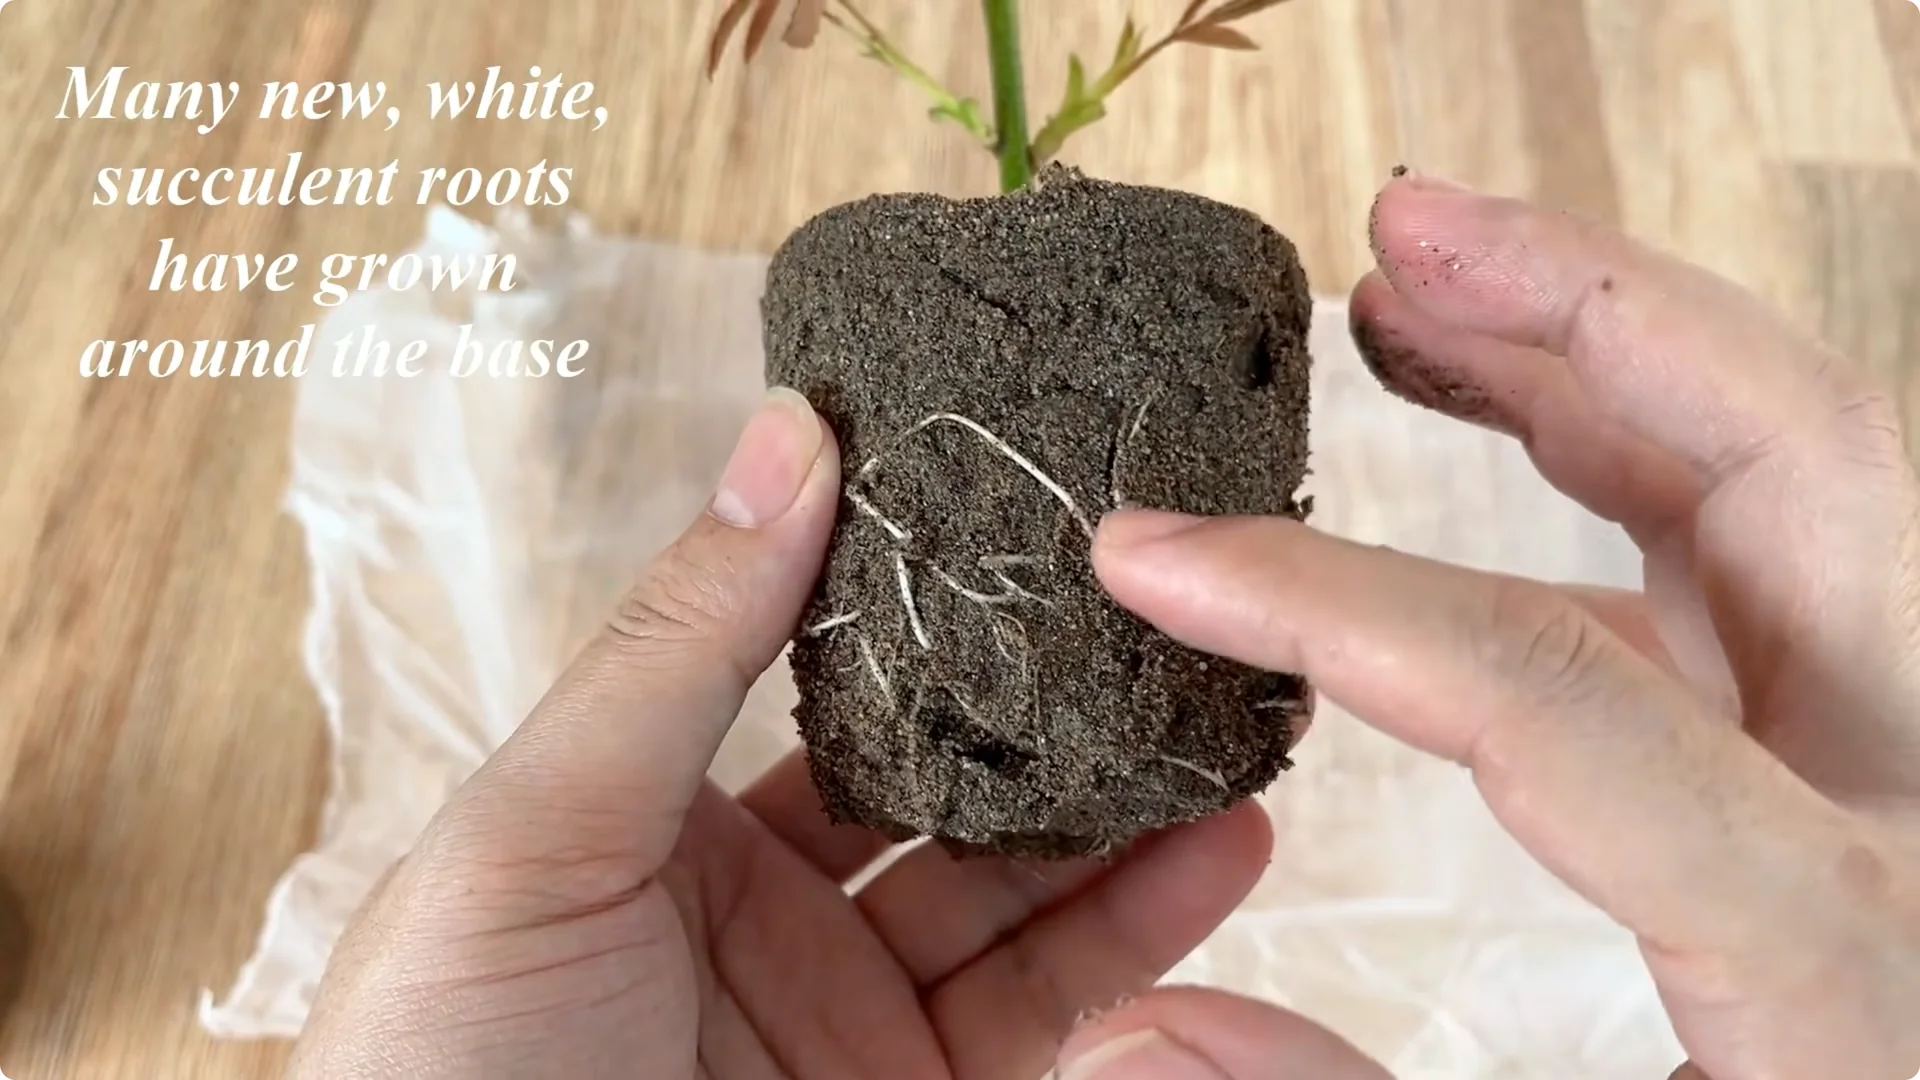
After about 10 days of patiently waiting and observing, encouraging signs will gradually appear. On the branch, fresh green shoots gradually emerge, indicating that the rose cutting has adapted well and the propagation process is progressing successfully.
At the base of the branch, many new, milky white roots begin to sprout, plump, healthy, and firmly anchored in the sand.
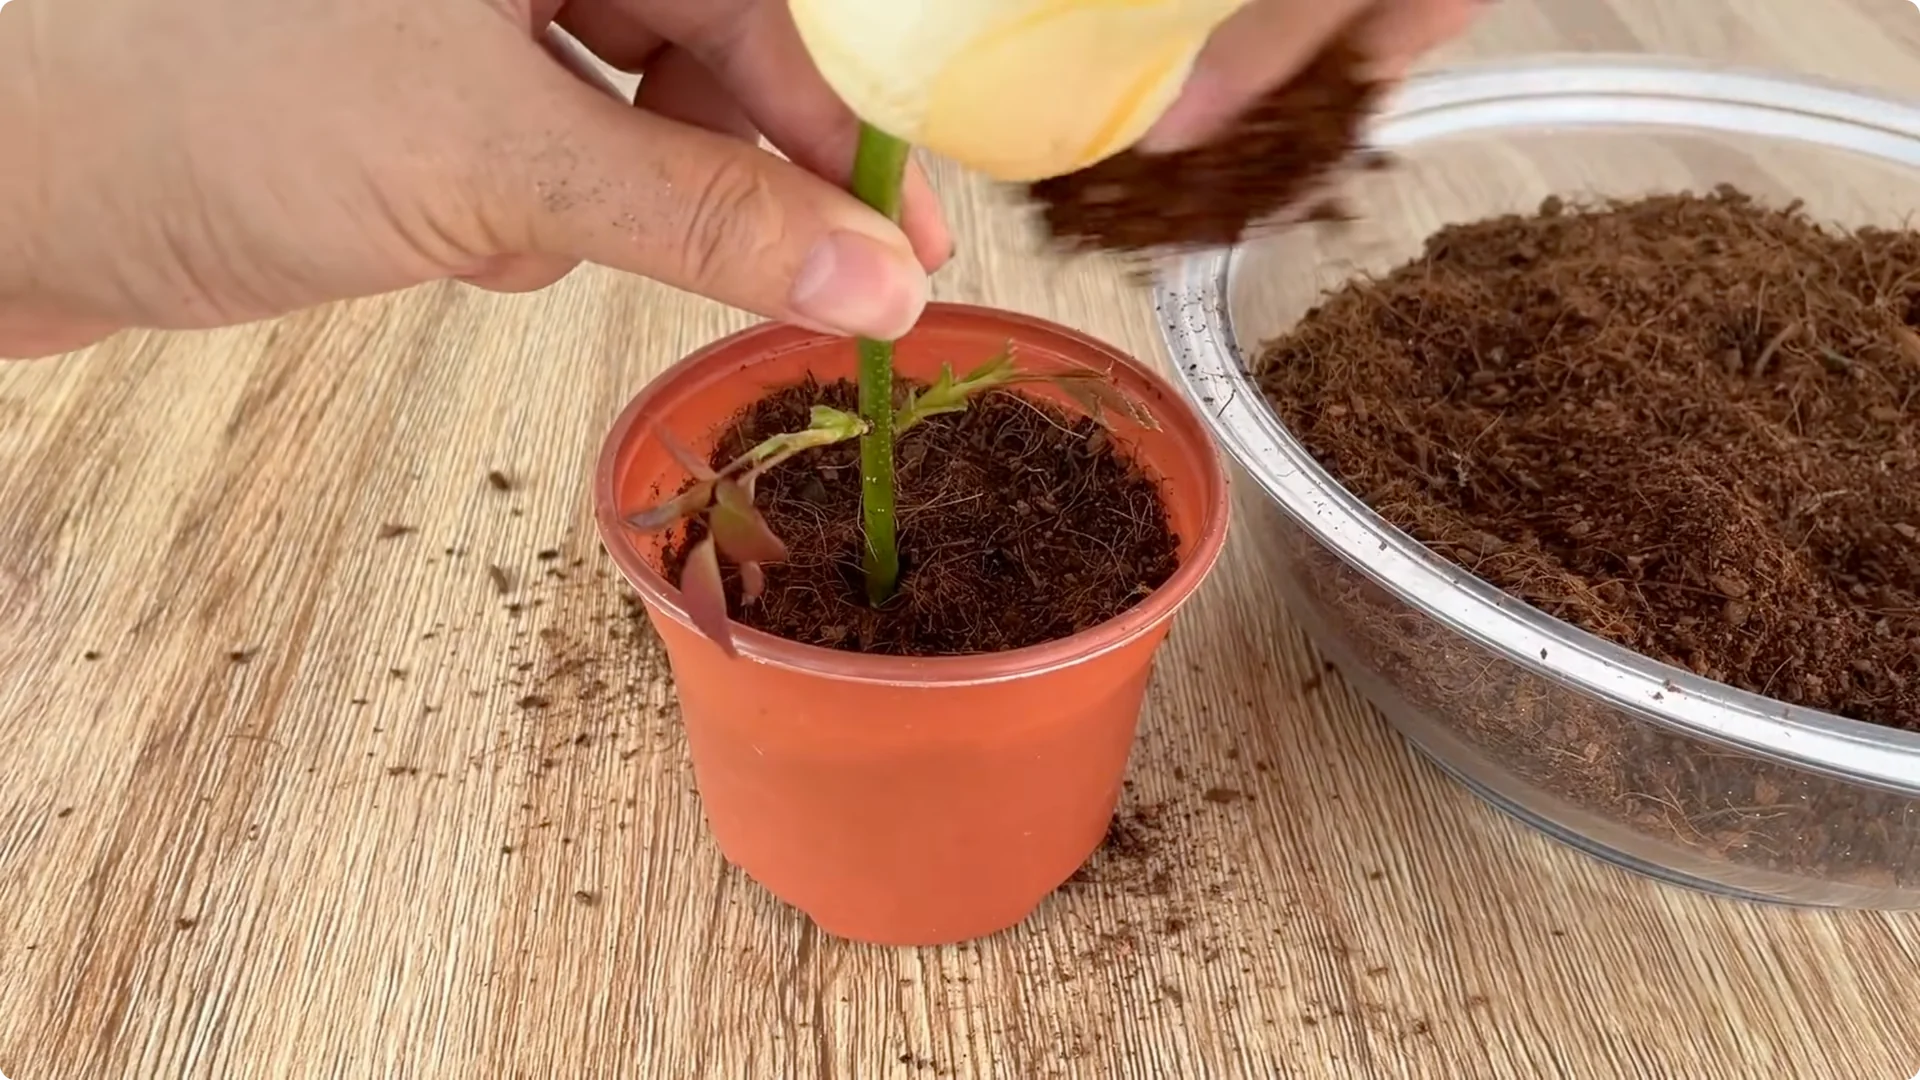
9. Transplant and continue care
Once the root system is well-established, gently transfer the rose cutting to a well-draining pot. Use coconut fiber as a growing medium to continue nurturing the plant long-term.
Philosophy of Clove and Potato Rose Propagation
The method of propagating roses from cuttings using cloves and potatoes is not only creative but also clearly demonstrates a philosophy of growing plants in harmony with nature. Without the need for chemical rooting hormones, you can use readily available materials to create a safe and healthy environment for rose cuttings to take root and grow.
More importantly, this process teaches us patience and meticulousness from selecting the cuttings and preparing the solution to silently observing the small changes at the base of the cutting day by day. These moments create a unique joy for the gardener, witnessing life sprouting from the simplest things.
That is also the motivation for us to continue exploring, experimenting, and spreading sustainable, nature-friendly rose cultivation methods in our own small gardens. For another approach, see another method.
Final Thoughts
Clove and potato rose propagation brings gentle disinfection, steady moisture, and early nutrition to tender cuttings. Keep the sand airy, the environment humid, and your observations patient. With care and consistency, new shoots and strong roots will reward your effort.