A very gentle yet highly effective method of propagating rose cuttings uses simple ingredients that protect and nourish young roots. This method is especially suitable for those who enjoy safe, low-risk gardening, helping rose cuttings root quickly, develop strong shoots, and minimizing root rot in the early stages. With patience, meticulousness, and a little understanding of nature, you can create healthy new rose plants from your favorite cutting.
1. Preparing the Cinnamon Solution for Rooting Rose Cuttings
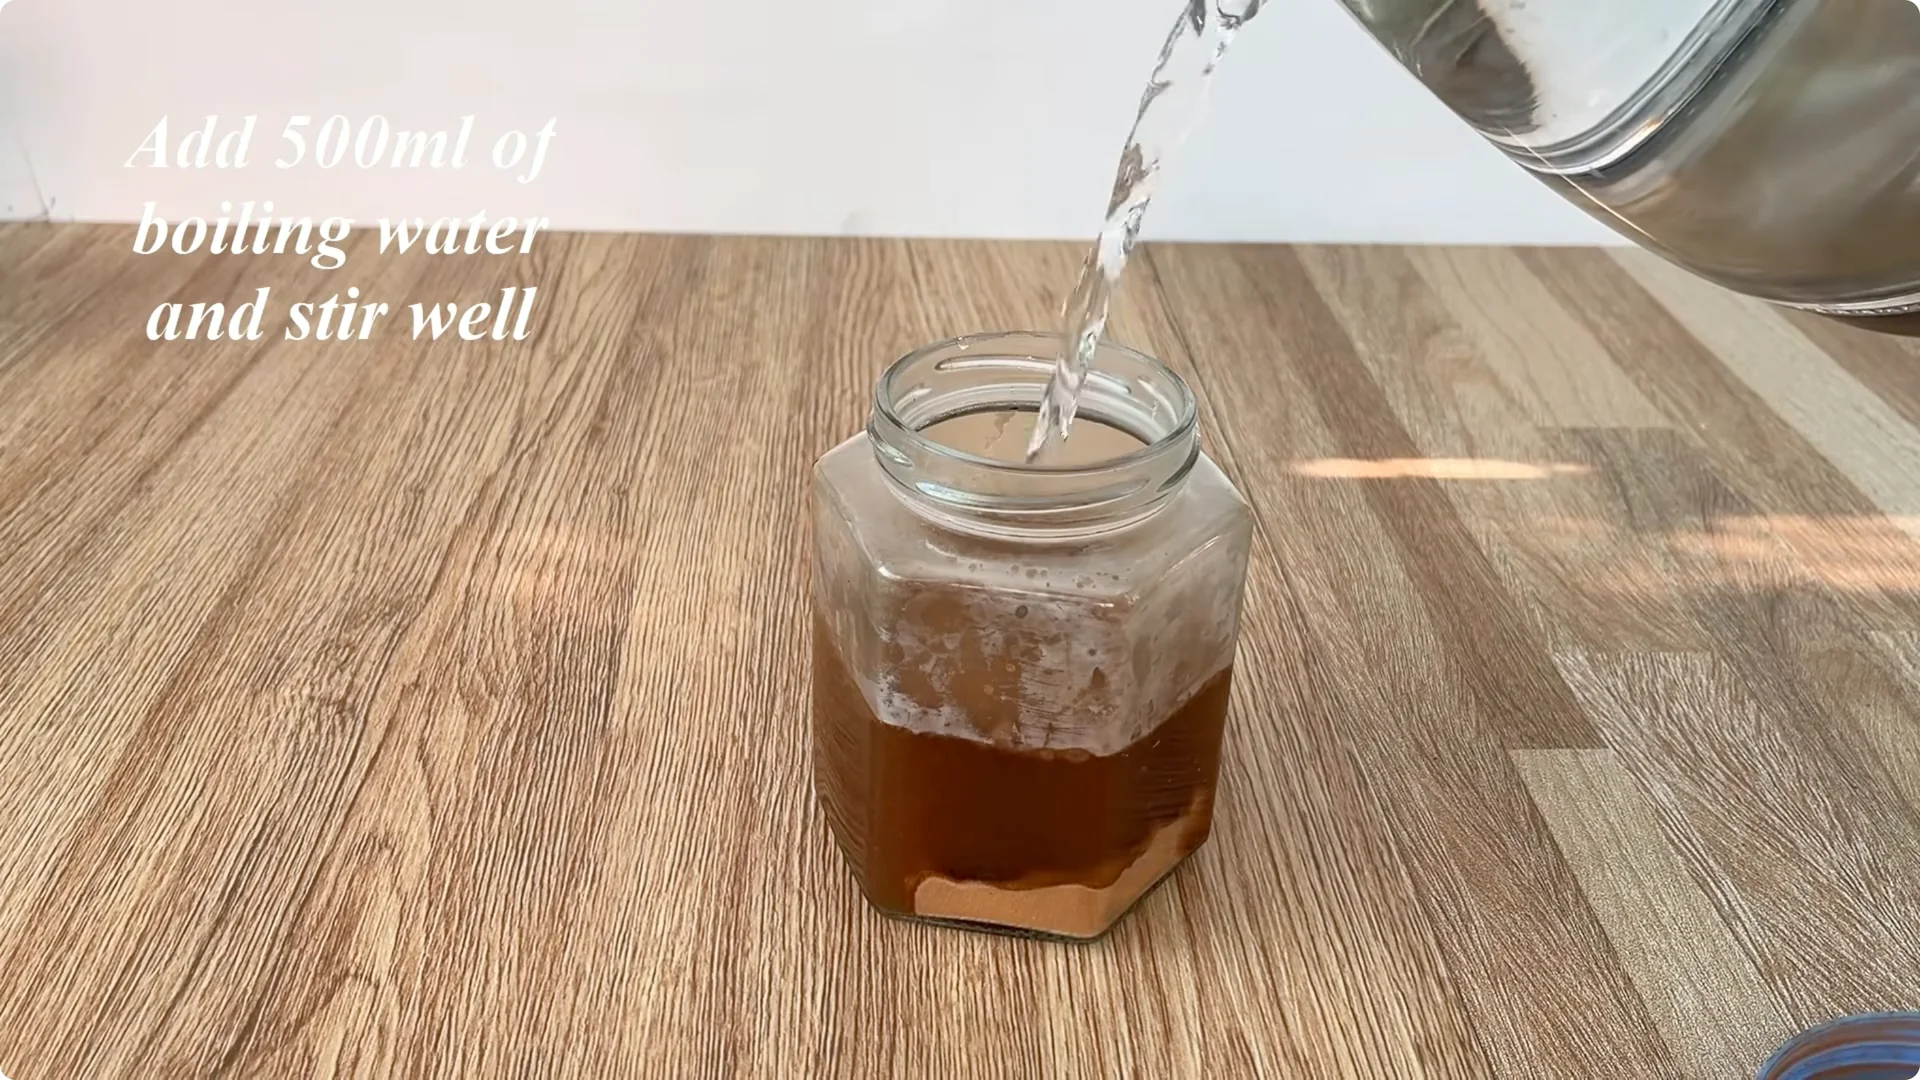
Take 1 teaspoon of pure cinnamon powder and put it into a clean glass jar. Add about 500 ml of boiling water and stir well to dissolve the cinnamon powder and release its essence. Cinnamon is warming and rich in natural antibacterial and antifungal compounds, helping to kill harmful microorganisms often found at the cut ends of cuttings.
After stirring, seal the jar tightly and let the solution cool completely. This cooling process makes the solution safe for the plant tissue and helps stabilize the active ingredients in the cinnamon. Once cooled, filter out the residue and keep only the clear cinnamon liquid.
2. Selecting and Preparing the Rose Stem for Rooting Rose Cuttings
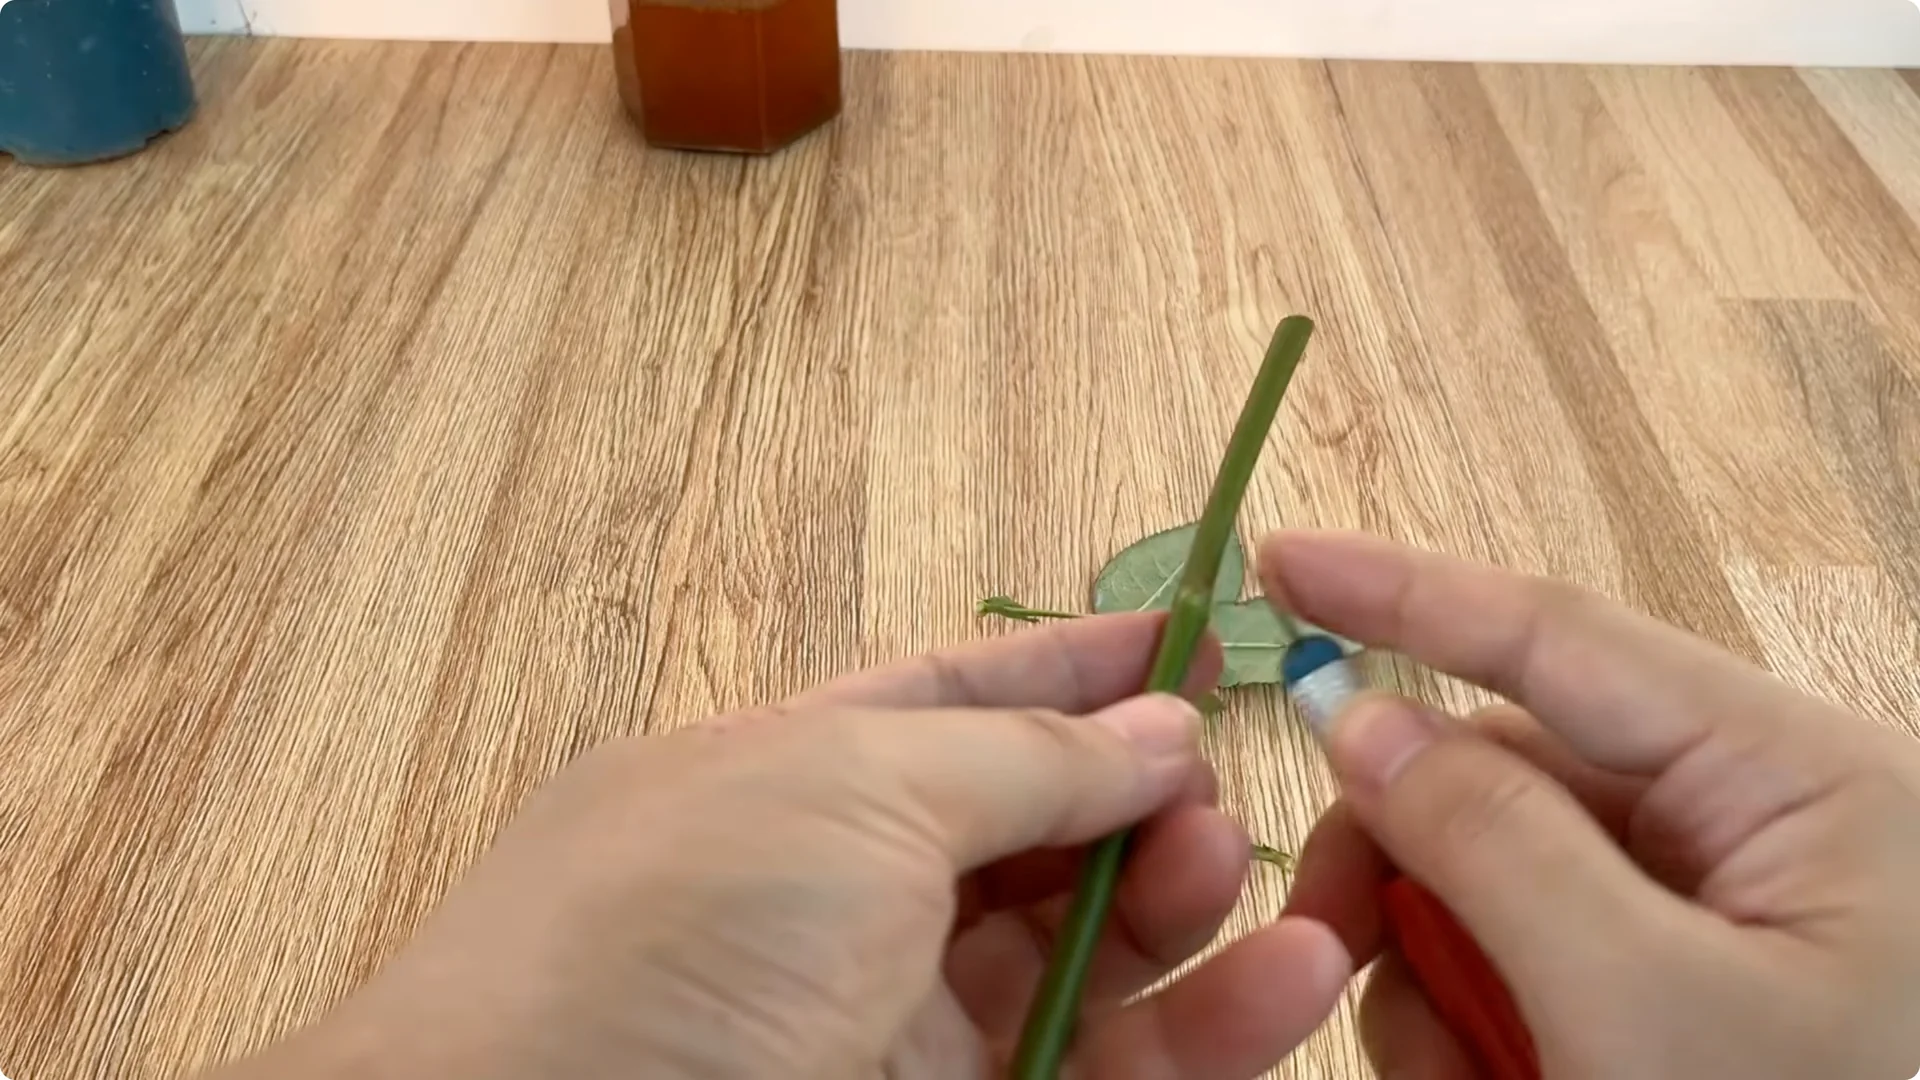
Choose a healthy rose stem, free from pests, diseases, black fungus, or damage, ideally one that is of moderate age. Stems that are too young tend to wilt easily, while those that are too old are slow to root. After selecting a suitable stem, remove all leaves and thorns to reduce water loss and prevent injury to your hands.
Trim the stem, leaving it about 15 cm long. This length allows the stem to concentrate nutrients on forming new roots instead of nourishing the trunk and leaves.
3. Disinfecting and Priming the Cutting with Cinnamon
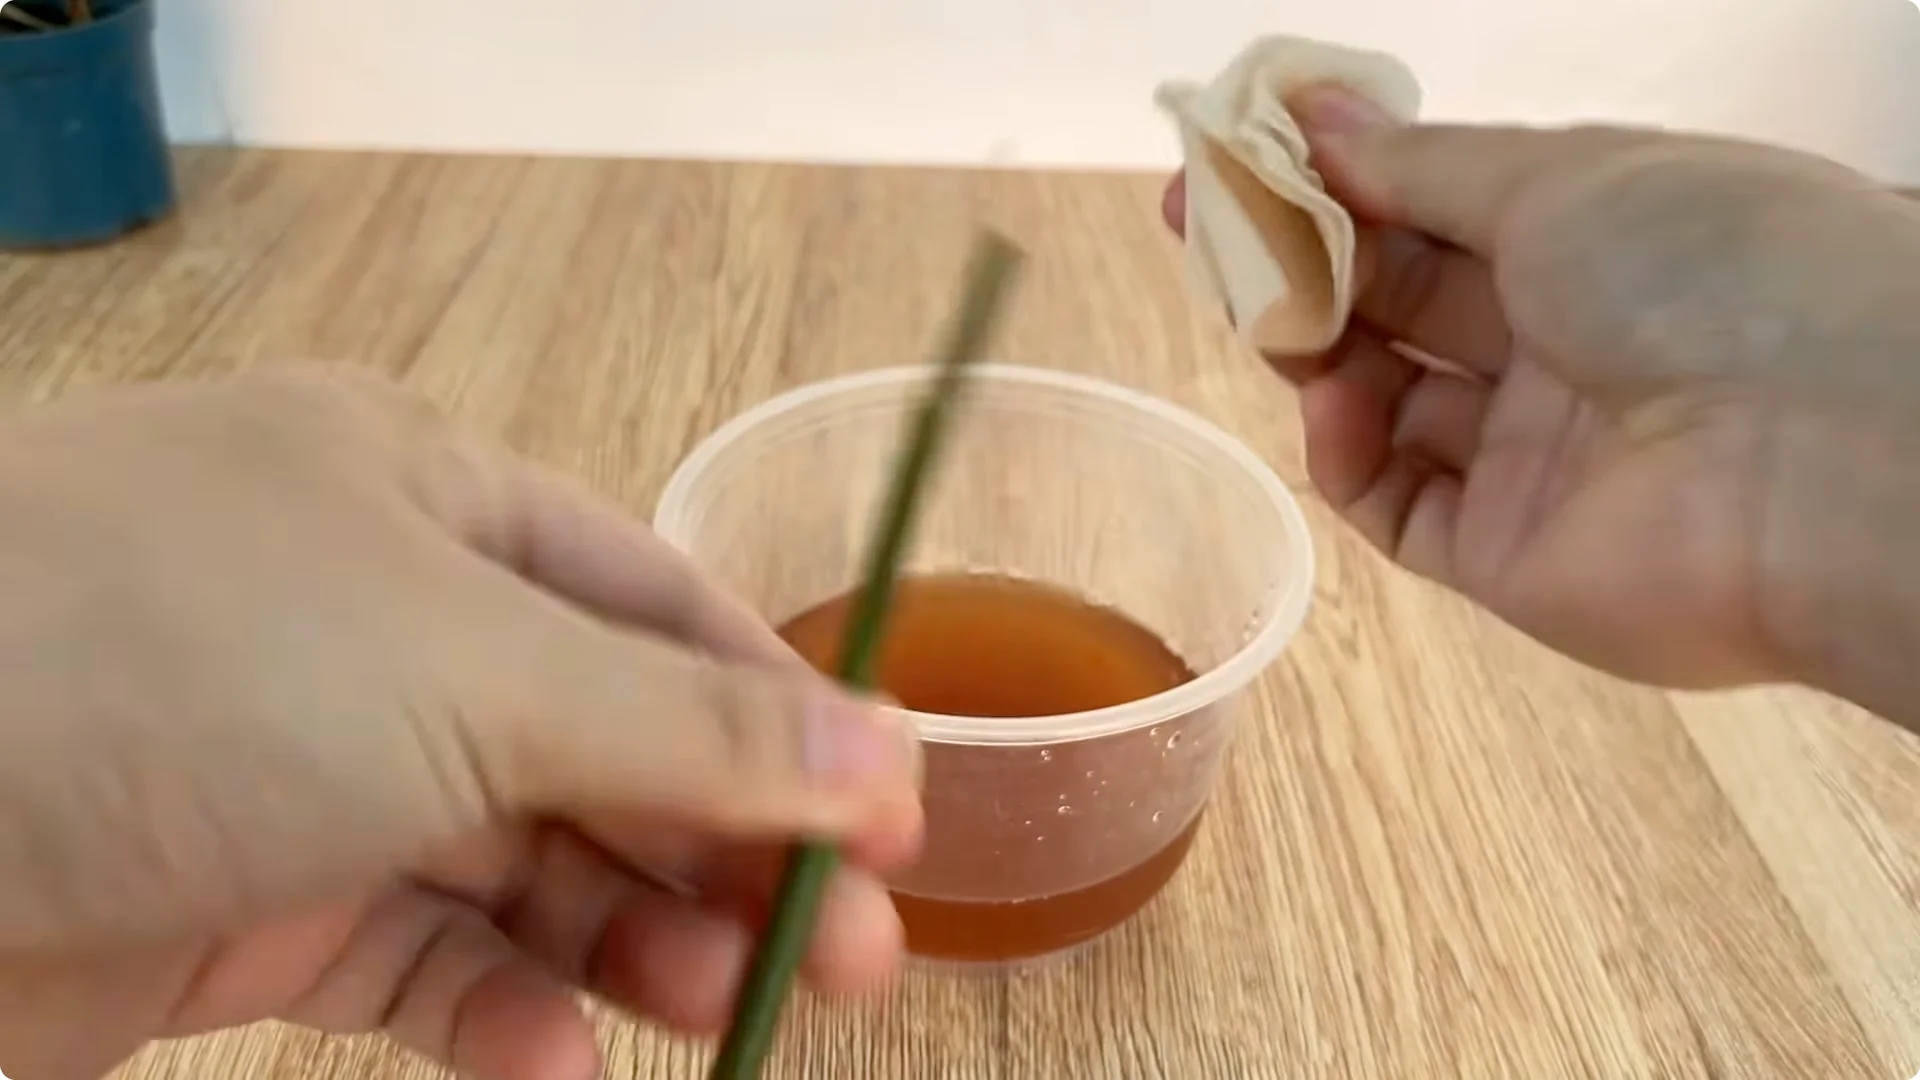
Dip a soft, clean cloth into the clear cinnamon solution and gently wipe the entire rose stem, paying special attention to the base and cut. This step disinfects the surface of the stem, reducing the risk of fungal and bacterial infection.
Gently immerse the rose stem directly in the cinnamon solution for about 30 minutes. During this time, the active ingredients from the cinnamon penetrate deep into the root tissue, stimulating the branch’s self-defense capabilities and preparing favorable conditions for root growth.
4. Making the Potato Solution for Rooting Rose Cuttings

Take a piece of potato weighing about 30 grams, wash it thoroughly to remove soil and impurities, then chop it into small pieces and put it in a clean plastic cup. Potatoes contain a lot of starch, vitamins, and easily soluble minerals. When soaked in water, they create an energy-rich solution that helps nourish young roots in their early stages of formation.
Add about 500 ml of warm water to the cup, stir well, and let it sit for about 30 minutes.
5. Combining Cinnamon and Potato Solutions for Rooting Rose Cuttings
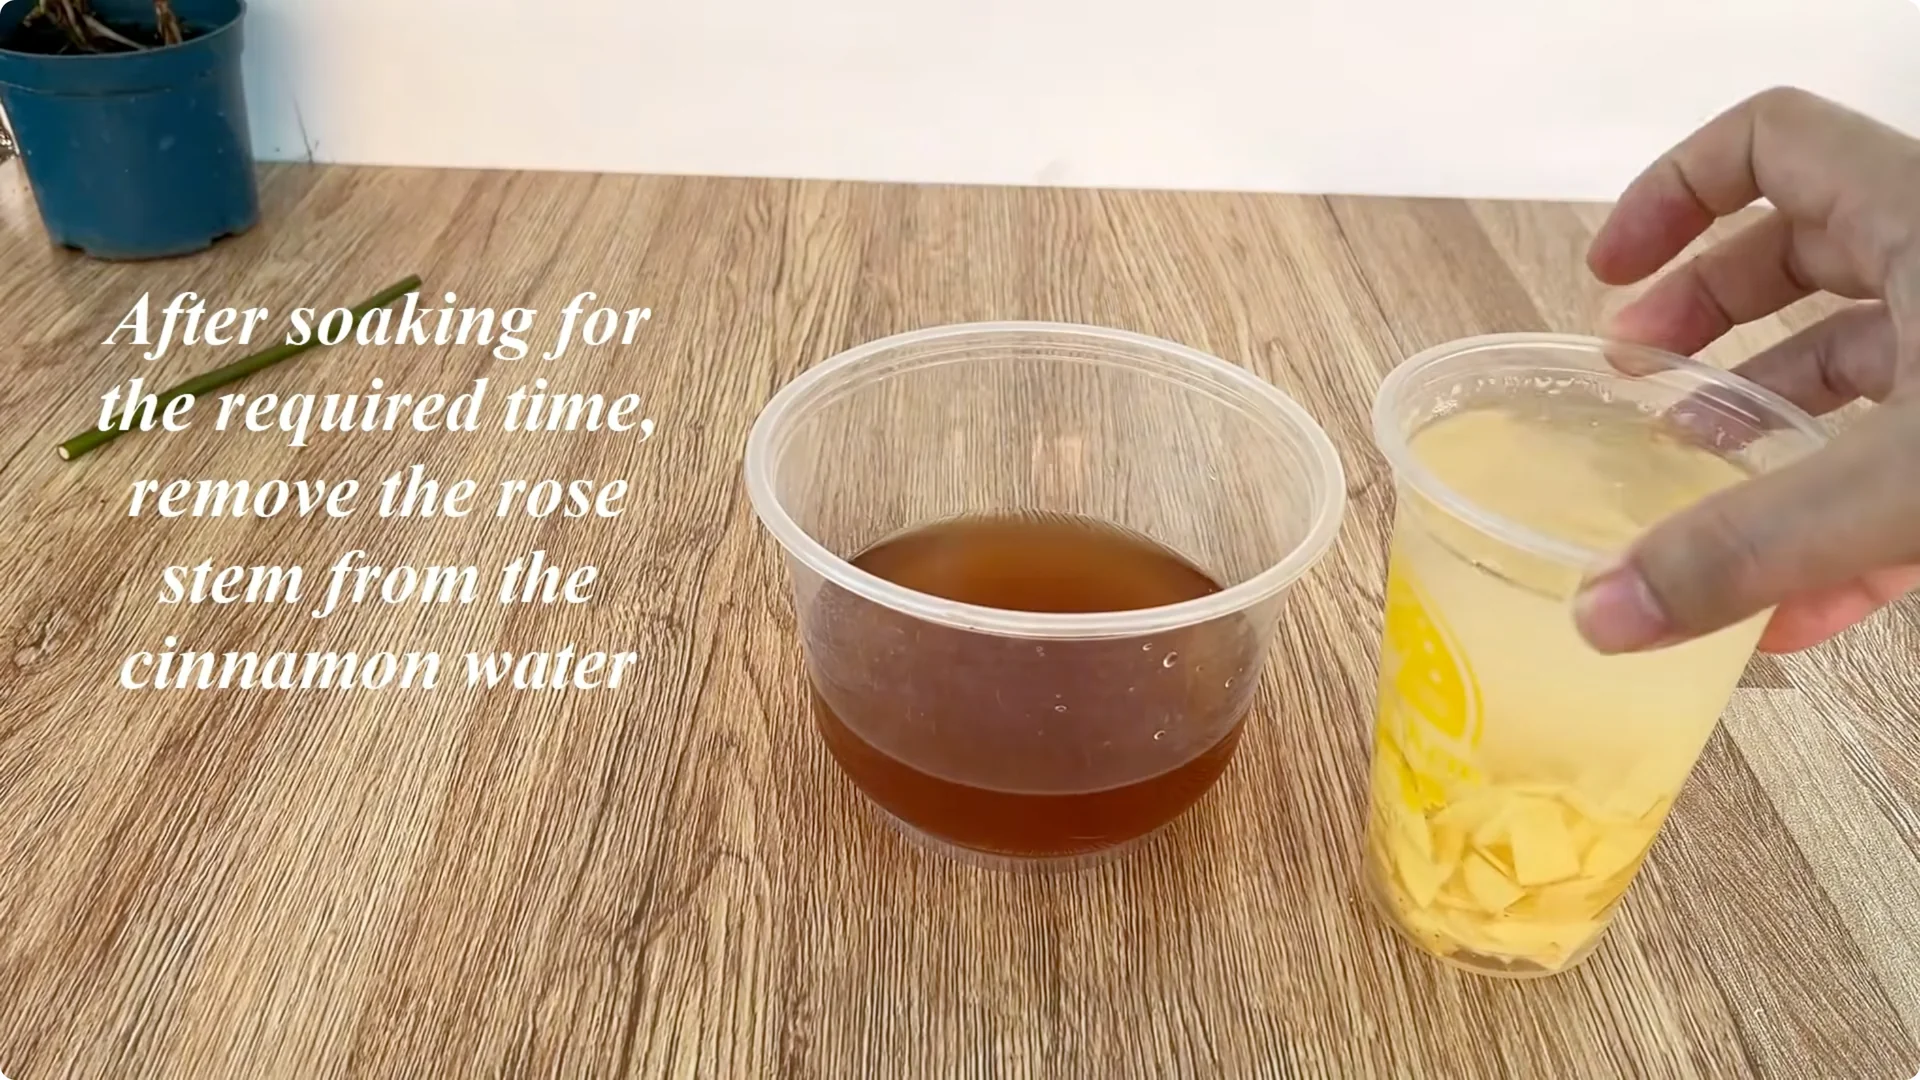
After the soaking time is complete, remove the rose branch from the cinnamon solution and let it drain gently. Filter out the potato pulp, collect the clear potato solution, and mix it with the cinnamon solution prepared earlier. This combination offers both the powerful antibacterial properties of cinnamon and the gentle nourishment from potatoes, making it ideal for rose cuttings during the rooting stage.
6. Preparing the Growing Medium for Rooting Rose Cuttings
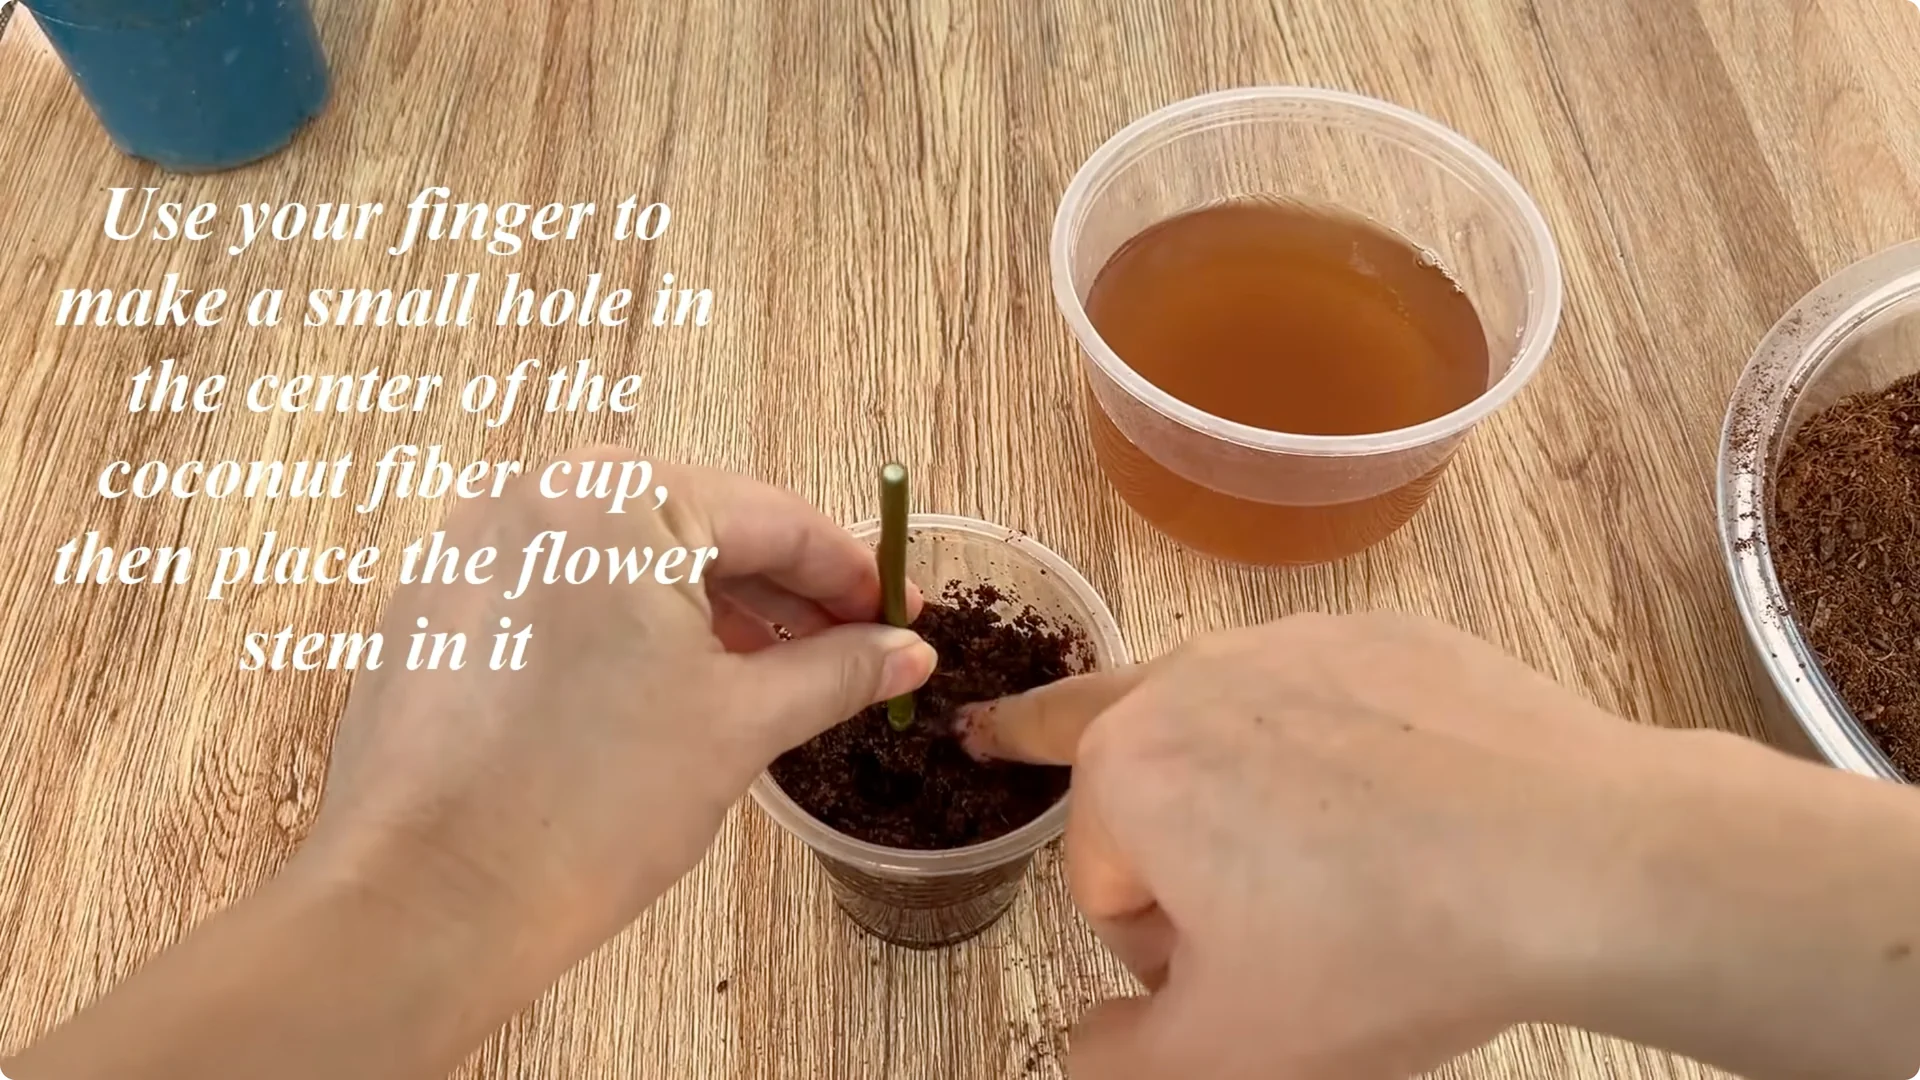
Prepare a clean plastic cup and fill it with treated coconut fiber. The coconut fiber needs to be cleaned of tannins and pathogens before use to ensure the safety of the young roots.
Pour the cinnamon-potato solution into the coconut fiber cup enough to achieve the appropriate moisture level – not too dry, but not waterlogged either. Use your finger to create a small hole in the center of the coconut fiber cup, then gently place the rose cutting into the hole, pressing lightly around it to secure the cutting.
7. Creating a Stable Humid Environment for Rooting Rose Cuttings
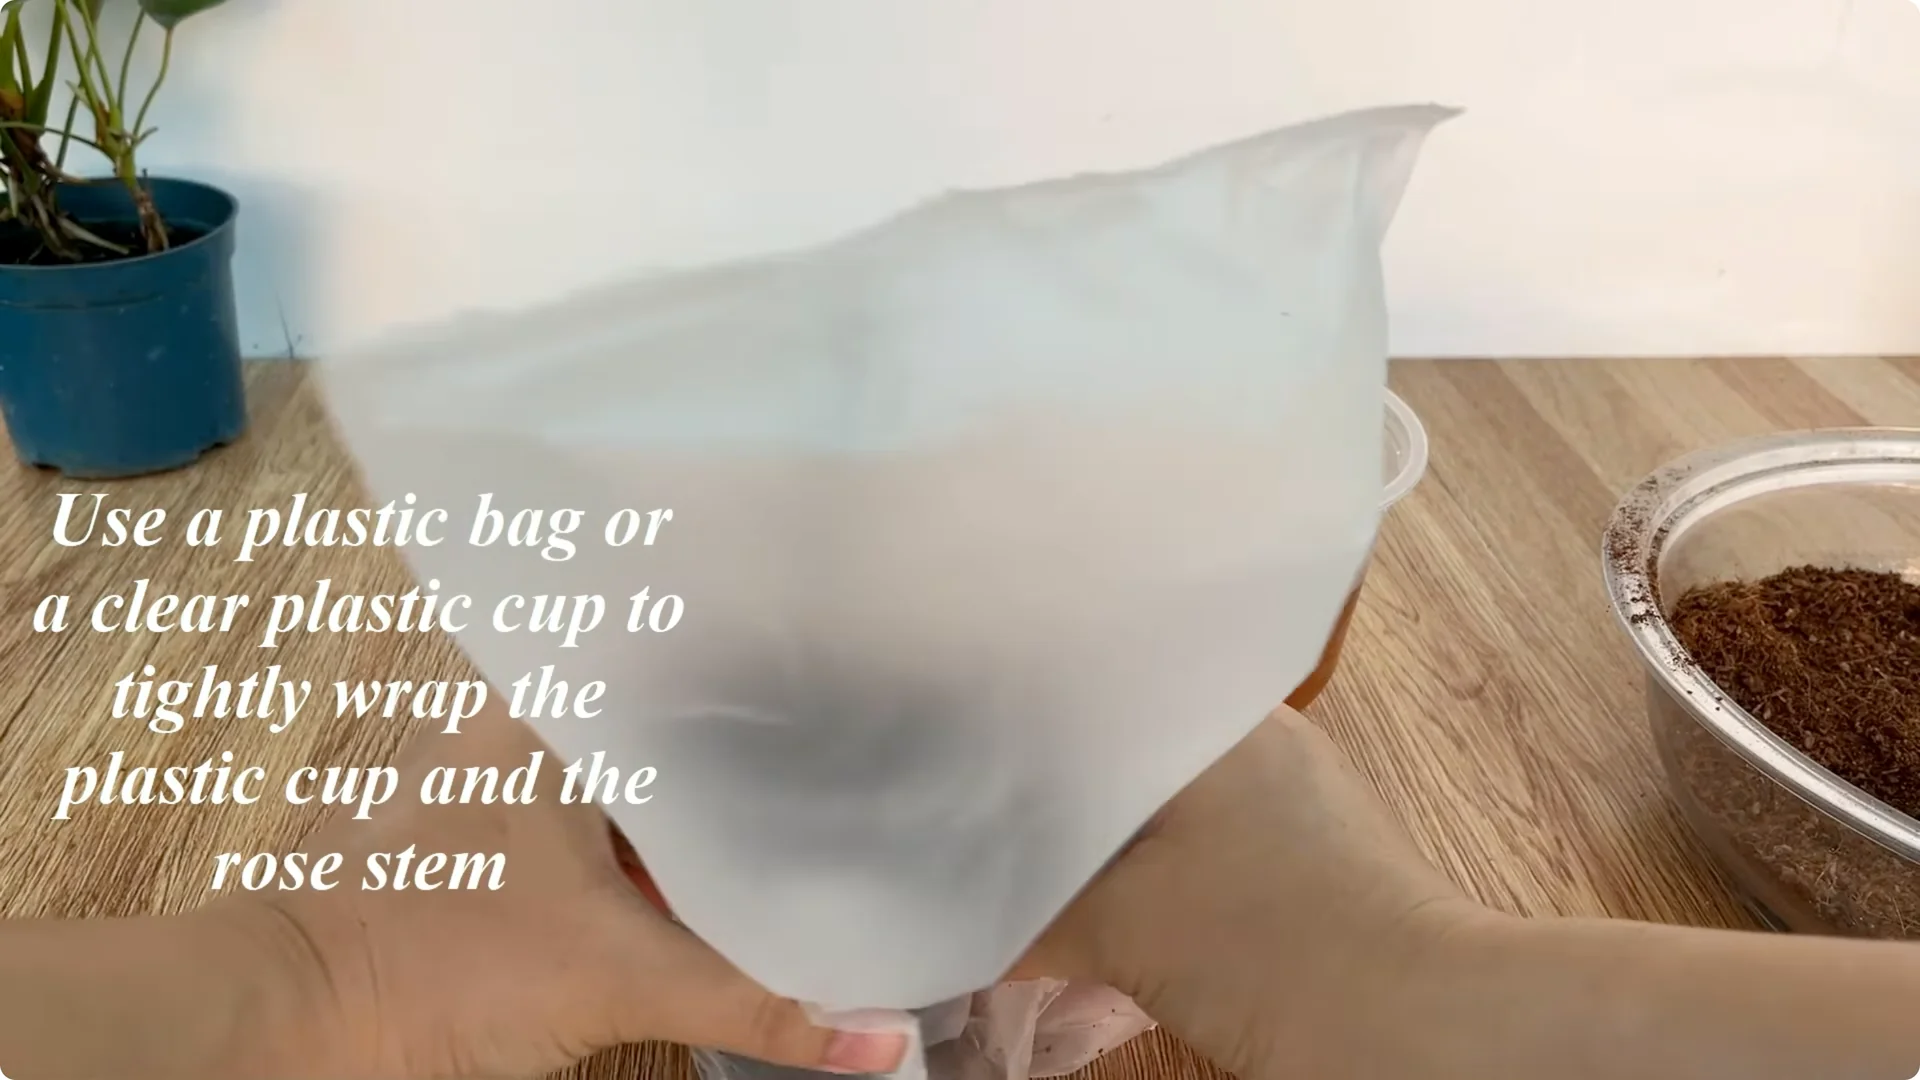
Cover the cup and the rose cutting with a plastic bag or clear plastic container to create a stable humid environment. Place the cup in a cool, airy place, avoiding strong winds and direct sunlight. Only soft, diffused light is needed for the cutting to survive and grow.
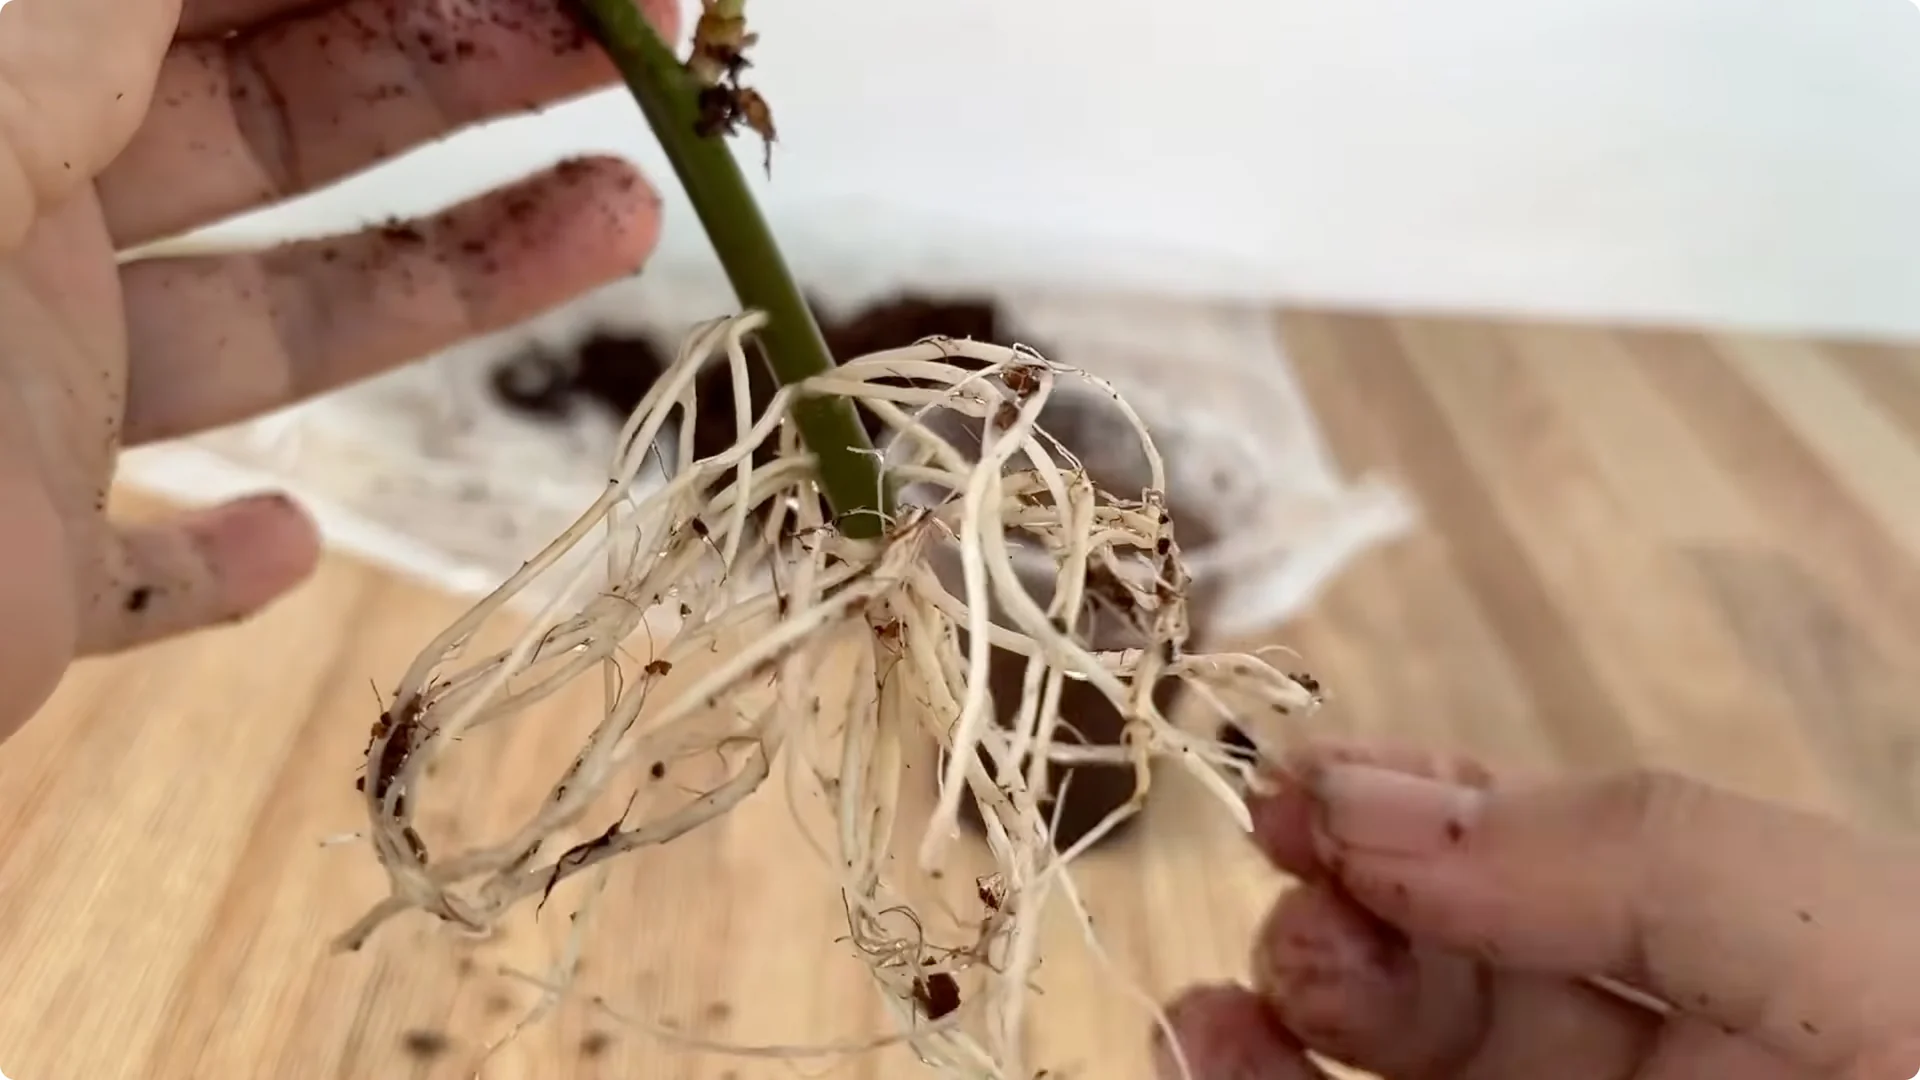
8. Care Timeline and Signs of Success in Rooting Rose Cuttings
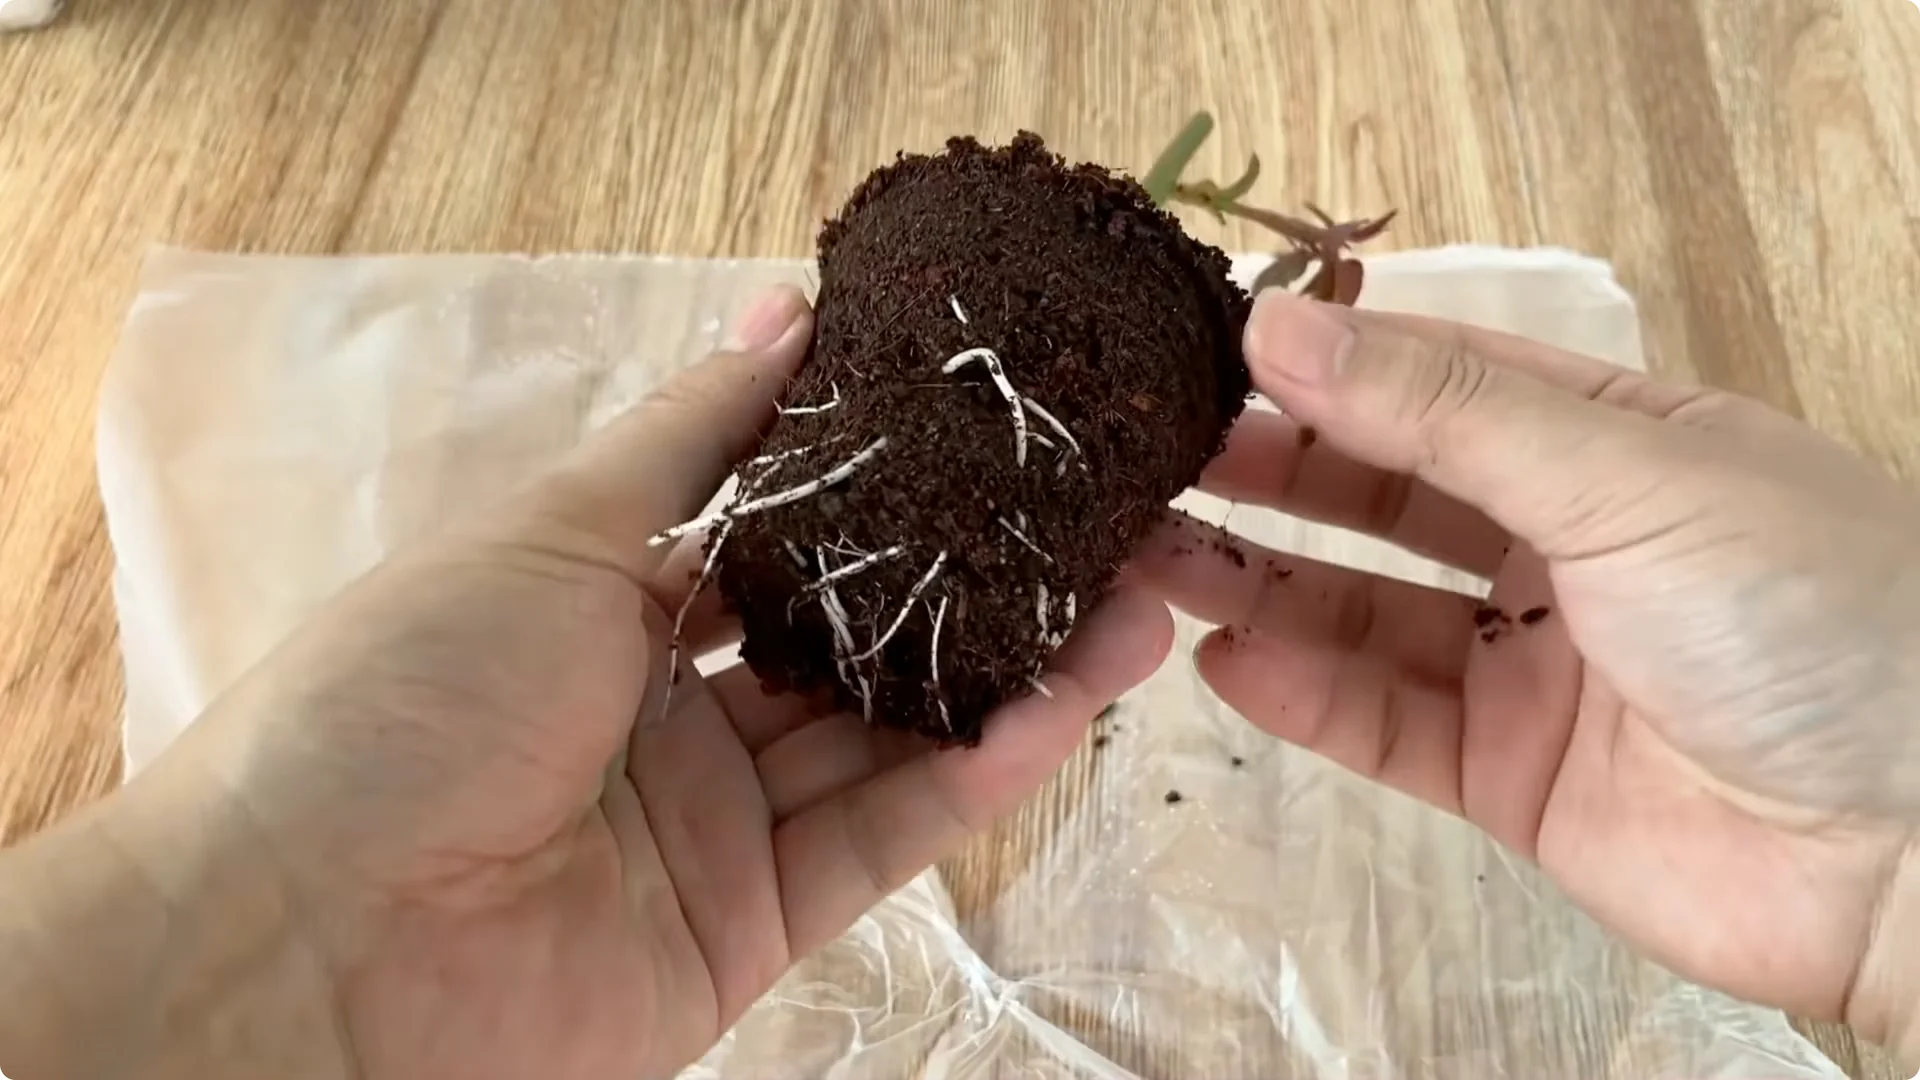
After about 10 days of proper care, you will notice a significant change. The rose cutting will begin to sprout fresh, plump green shoots, showing strong vitality. Observing the base, many new, white, plump roots will have formed and spread evenly in the coconut fiber substrate.
9. Transplanting Rooted Rose Cuttings
This is the ideal time to transfer the rose cutting to a larger pot. Choose a pot with good drainage and use clean river sand as the initial substrate to allow the young roots to continue developing steadily.
Final Thoughts on Rooting Rose Cuttings
The method of propagating rose cuttings using cinnamon powder and potatoes shows that sometimes the most effective solutions come from very familiar ingredients. No need for complicated methods or harsh chemicals; with patience, meticulousness, and a little understanding of nature, you can create healthy new rose plants. Every sprouting bud and every developing white root is a testament to the harmonious connection between humans and plants, nurturing joy, tranquility, and a lasting love for the nature around us.